
How to Prevent Wound Infection With Proven Practical Steps
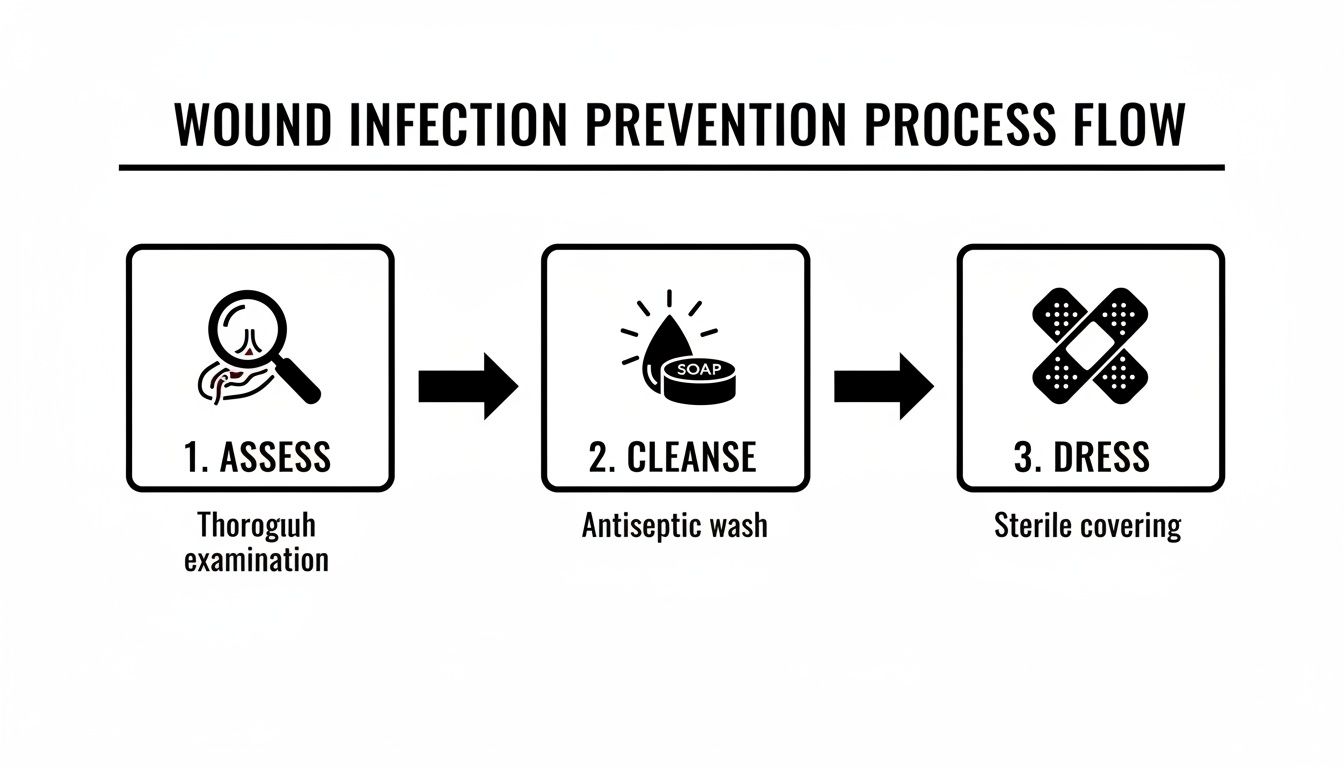
Preventing a wound from going sideways isn’t about magic—it’s about having a simple, reliable routine. Start by sizing up the injury, follow with a solid cleanse, pick the right dressing, keep everything spotless, and then watch closely. Stick to these five pillars and you’ll shut out bacteria before they throw a party.
Quick Prevention Guide For Wound Infection
Whether you’re at home or in a clinic, these actions will keep infection at bay. The real trick is weaving them into your workflow so they become second nature.
-
Pinpoint What You’re Dealing With
Assess the wound’s depth, level of contamination and the patient’s overall risk profile. -
Flush Out Debris and Bugs
Use sterile saline or an antiseptic rinse to knock down the bacterial load right away. -
Seal Smart With Dressings
Opt for moisture-managing and antimicrobial materials that match the wound’s needs. -
Keep Your Hands—and Instruments—Pristine
Hand hygiene and equipment sterilization aren’t optional; they’re lifelines. -
Observe Changes Daily
Watch for unusual pain, redness or drainage and be ready to act fast.
Tip: Begin with your cleanest tools first to avoid dragging contaminants into the fresh wound.
Summary Of Key Prevention Steps
Here’s a snapshot of what to do—and when—to keep infection rates low:
| Prevention Step | Description | Timing |
|---|---|---|
| Assess | Classify wound type and risk | Immediately on wound discovery |
| Cleanse | Irrigate and apply antiseptic | After assessment |
| Dress | Choose moisture control dressing | Within 2 hours |
| Hygiene | Handwash and sterilize equipment | Before and after each change |
| Monitor | Check for redness or discharge | Daily through healing |
Refer back to this chart whenever you need a quick refresher on timing and actions.
Field-Tested Home Care Example
A weekend gardener nicked her forearm on a thorn. She irrigated the scrape with saline, wrapped it in an antimicrobial dressing, then jotted down observations in a notebook. Within days, she caught subtle warmth around the edges and switched to a secondary dressing before deeper issues emerged.
Clinic Workflow Integration
At our partner clinic, nurses follow a tight sequence: assess and photograph the wound, irrigate thoroughly, apply the dressing and log every detail in the EHR. This photo-guided routine doubled early detection of evolving infections—and cut SSI rates from 28.4% to 12.1% in recent trials. Learn more in this research summary.
Home Care Kit Essentials
• Sterile saline or pre-filled irrigation syringes
• Chlorhexidine pads or equivalent antiseptic wipes
• Assorted gauze and moisture-balancing dressings
• Disposable gloves and hand sanitizer
• Notebook for daily wound observations
Red Flags For Escalation
• Red streaks spreading beyond the margin
• Pain that won’t budge with OTC relief
• Swollen lymph nodes or fever over 100.4°F
• Thick, foul-smelling discharge
Criteria For Prophylactic Antibiotics
Reserve antibiotics for wounds with high infection potential:
• Deep punctures extending to fascia or muscle
• Visible foreign debris or necrotic tissue
• Systemic signs like fever or tachycardia
Applying these five pillars consistently will slash infection risks and streamline follow-ups. Share this guide with caregivers and your clinical team—and reach out to Specialty Wound Care for expert support whenever you need it.
Assess Wounds And Risk Factors
You can’t prevent an infection if you don’t start with a solid wound assessment. That means looking past the obvious cut or scrape and thinking about how it happened, what’s lurking inside, and who’s on the receiving end.
Begin by identifying the wound type and the context of injury. A cleanup after a gardening mishap plays out differently than a kitchen knife slip or postoperative incision.
- Abrasion: Superficial scrape often peppered with dirt or gravel from friction.
- Laceration: Deep tear with uneven edges, sometimes involving muscle or fat.
- Puncture: Tiny entry point that can harbor bacteria deep in the tissue.
Next, gauge wound dimensions, depth, and any visible debris to estimate potential bacterial load. If your patient is malnourished or on immunosuppressants, even a few flakes of dirt become a red flag.
Don’t forget host factors. Conditions like diabetes, advanced age, peripheral vascular disease, or immune suppression can double—or even triple—your infection risk if you’re not vigilant.
Risk Factor Comparison
Consider two patients in routine practice: a 45-year-old gardener with a light forearm scrape versus an 80-year-old diabetic who just had surgery. The gardener’s abrasion will likely mend in days with little oversight. The diabetic incisional wound? That one demands closer eyes and tighter timelines.
| Patient Profile | Risk Elements | Follow-up Interval |
|---|---|---|
| Active Adult Abrasion | Clean edges, no major comorbidities | Every 48 hours |
| Elderly Diabetic Incision | Deep puncture, high blood sugar | Daily or clinic visit |
Use this quick-reference matrix to tailor your reassessment schedule. Sync reminders to both wound features and patient vulnerabilities.
“Regular check-ins can cut infection rates by more than 50% in some trials.”
Checklist For Escalation
Building a personal workflow helps you catch trouble before it spirals. Drop these red-flag cues into your digital notes or paper chart so escalation becomes second nature:
- Pain that worsens despite over-the-counter relief
- Redness spreading beyond 2 cm from the wound edge
- Noticeable warmth or swelling that feels off
- Foul smell or discolored discharge
- Systemic signs such as fever over 100.4°F
Practical Assessment Tip
I learned this the hard way after a thorn prick led to a small hand wound. A simple smartphone alarm labeled “Wound Check” kept me honest.
- Snap a photo each time you review and compare sizes.
- Jot down any new symptoms—heat, swelling, streaks—in a notebook.
- If typing slows you down, record quick voice memos.
With a reliable assessment habit in place, you’re ready to move on to cleaning and debridement—your next line of defense against infection.
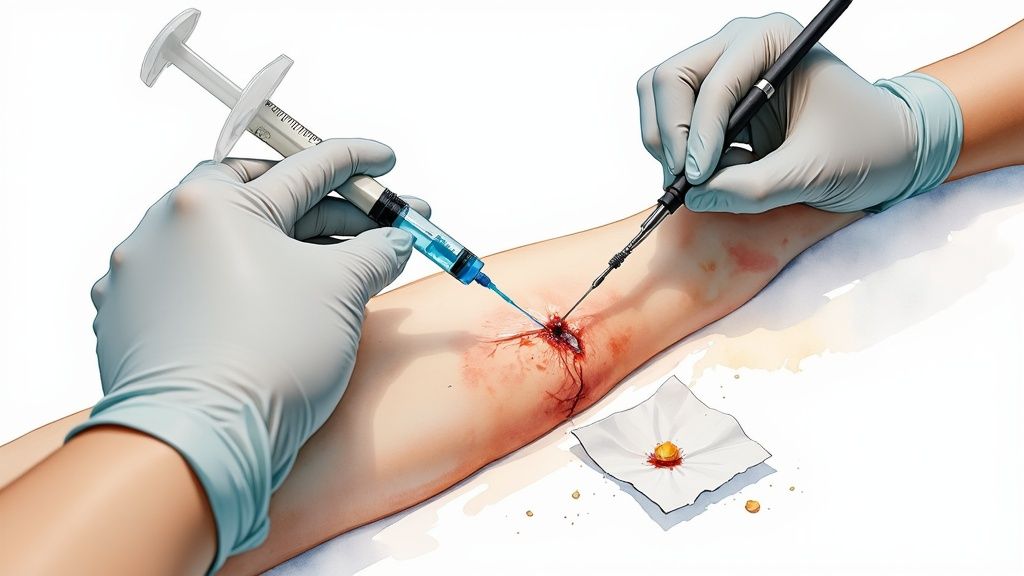
Clean And Prepare The Wound Bed
A clean wound bed isn’t just a cliché—it’s the cornerstone of infection prevention. Flushing with sterile saline under the right pressure washes away bacteria and debris without harming delicate tissue. When you set up your irrigation station, think of it as laying the groundwork for every step that follows.
For deeper or more complex wounds, I often weigh patient comfort against antimicrobial strength. A gentle rinse with chlorhexidine—or povidone-iodine if tolerated better—balances microbial control and cell viability. That small choice can tip the scales toward faster healing.
Controlled Irrigation Technique
I learned early on that pressure matters almost as much as the solution itself. Aim for 8–15 psi to blast away contaminants but preserve healthy edges. In home care or clinics with scant supplies, a simple syringe-and-catheter setup does the trick.
- Grab a 35 mL syringe plus an 18-gauge catheter
- Hover the tip about 1 cm from the wound—avoid poking fragile tissue
- Moderate the push so fluid lifts debris rather than bruising margins
“Targeted flushing cut a diabetic foot ulcer’s bacterial count by 60% in one trial,” notes a wound specialist I spoke with.
Sequential Debridement Example
One of my colleagues shared a patient story that highlights gradual progress. Over seven days, a diabetic foot ulcer went through three tailored debridement sessions:
| Session | Technique | Outcome Improvement |
|---|---|---|
| Day 1 | Sharp debridement | Cleared 50% of slough |
| Day 4 | Autolytic debridement | Reduced exudate by 30% |
| Day 7 | Mechanical debridement | Margins showed healthy tissue |
That staged approach shaved 2 weeks off the expected healing timeline compared to a one-and-done clinic model.
Pain Reduction Tips
Keeping patients comfortable pays dividends in compliance. Over the years, I’ve picked up a few simple tricks:
- Apply topical anesthetic about 5 minutes before irrigation
- Warm saline to body temperature—no one likes a cold shock
- Lead a quick guided-breathing exercise to distract and calm
When you mix these bedside hacks together, even anxious patients relax and cooperate more readily.
Adapting To Low Resource Environments
Not every setting has a sterile kit at the ready. I once taught home-care nurses to boil and cool water to body temperature, then run it through a gravity drip from a mason jar. A disinfected steel basin and a clean syringe become perfectly serviceable tools. Remember: boiling or wiping with alcohol cuts contamination risk, so you can improvise without cutting corners on safety.
Key Takeaways
- Proper irrigation reduces bacterial burden by up to 60%
- Staged debridement can accelerate healing by 2 weeks
- Simple analgesia tricks boost patient cooperation
With the wound bed prepped and bacteria suppressed, you’re ready to select a dressing that locks in moisture and keeps pathogens at bay.
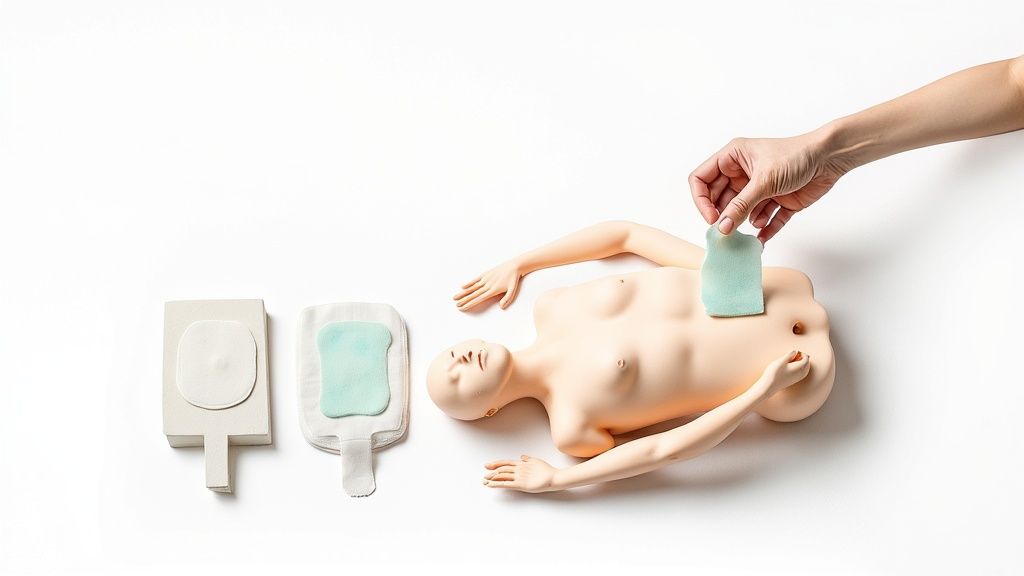
Choose And Manage Wound Dressings
Selecting the right dressing goes far beyond simply covering a wound. It’s about striking the perfect balance of moisture, preventing contamination, and creating an environment that helps tissues regenerate. In my experience, foam dressings excel at wicking away exudate, while hydrocolloids adapt to varying fluid levels.
Every wound tells its own story, so you need materials that match the challenge. A simple gauze pad can handle a minor clean cut but does nothing to manage moisture. On the other hand, antimicrobial dressings infused with silver or iodine actively reduce bacterial load and give that extra line of defense.
Here’s a quick rundown to guide your choice:
- Foam Dressings cushion fragile skin and absorb heavy drainage
- Hydrocolloids lock in moisture but require intact periwound skin
- Silver-Impregnated Pads deliver targeted antimicrobial action at high-risk sites
- Iodine Dressings offer broad-spectrum coverage without significant cytotoxicity
Knowing when to move from gauze to a more advanced product can shave days off healing time—and cut down infection risk. I reserve gauze for light exudate or patients with very delicate skin that reacts to adhesives.
An abdominal surgical incision behaves very differently than a stubborn venous ulcer. For postoperative wounds, I often reach for a foam dressing with an adhesive border; it contains drainage well and stretches the interval between changes.
Real World Dressing Scenarios
I coach patients to swap these dressings every two to three days. Chronic venous ulcers, however, usually demand daily attention—hydrocolloids or antimicrobial pads work best here.
| Wound Type | Dressing Recommendation | Change Frequency |
|---|---|---|
| Surgical Abdominal Incision | Foam with Adhesive Border | 48–72 Hours unless the pad soaks through |
| Chronic Venous Ulcer | Hydrocolloid or Antimicrobial Pad | Daily, inspecting for periwound maceration |
- Secure edges with gentle adhesive strips to prevent leaks
- Rotate fixation points to minimize friction over bony prominences
When it’s time to remove a dressing, loosen the edges and peel parallel to the skin. A splash of water or a dedicated adhesive remover wipe can save patients from unnecessary discomfort.
Tips To Avoid Adhesive Trauma
Always spot-test any remover on a small patch of skin to rule out allergies. I once had a patient with extremely fragile dermis who avoided repeated tears thanks to a single adhesive wipe.
Pro Tip Rotate dressing edges towards the center before peeling away.
Market data underline the value of prevention: global surgical wound care expenditure hit $148.65 billion in 2022, driven by the urgency to curb infections that lengthen hospital stays and boost readmission rates. You can explore the full research on PubMed.
Check out our guide on advanced treatment options by Primus Specialty Wound Care to explore next steps: Advanced Treatment Options by Primus Specialty Wound Care.
Proper storage of unopened dressings keeps them sterile and ready at a moment’s notice. I recommend labeling each pack with the date opened and type to streamline busy clinic workflows. A shared checklist ensures every team member selects the ideal dressing for each wound presentation.
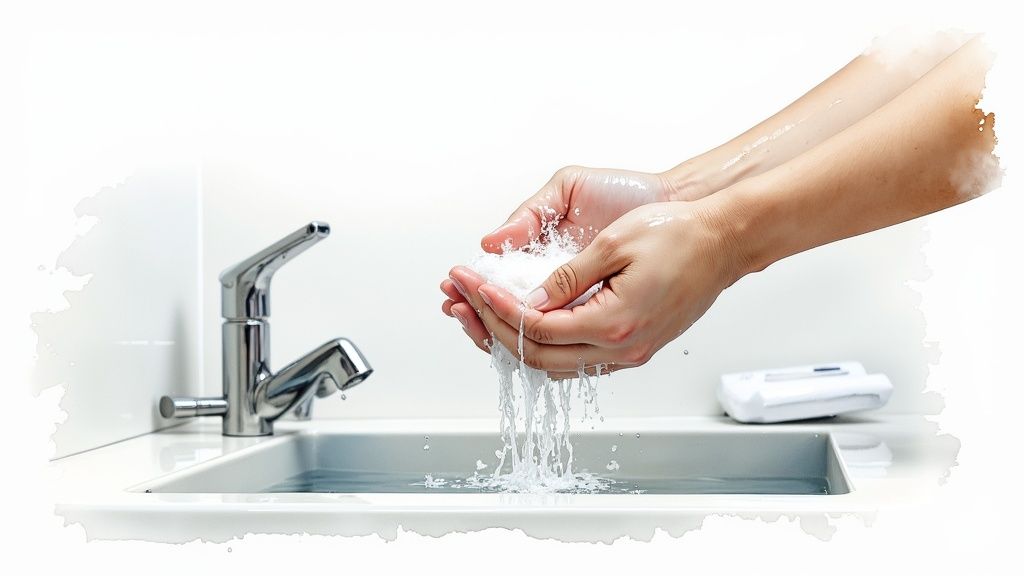
Maintain Hygiene For Safe Healing
Proper wound care means more than applying ointment. It’s about crafting a clean zone where germs are kept at bay and healing can kick in.
Hands are the first defense. The World Health Organization’s handwashing sequence can slash pathogens by over 90% when you follow every step.
- Rinse hands under warm, running water for at least 20 seconds, making sure you scrub palms, backs, and between fingers.
- Pat dry with a fresh paper towel, then use that same towel to switch off the faucet.
- Slip on new sterile gloves right before changing dressings to block any cross-contamination.
Setup A Sterile Field
Stopping microbes starts with your toolkit. Whether you’re at home or in a clinic, clean instruments make all the difference. Steam autoclaves or high-level disinfectants handle most equipment, depending on available resources.
At home, simply wipe down a tray with a hospital-grade disinfectant spray and let it air-dry. In professional settings, routine audits keep workspaces spotless, and supplies live in sealed containers until use.
Education paired with solid hygiene routines cuts healthcare-associated infections dramatically. In fact, roughly 1 in 10 hospitalized patients pick up an HAI, highlighting why infection prevention and control programs matter Learn more about these findings.
- Build a digital checklist into your electronic health record to log every cleaning cycle.
- Stash a brightly colored caddy with disinfectants and fresh gloves for quick access.
- Label instrument trays with color-coded tags showing the latest sterilization date.
Implement Environmental Cleaning
Mopping floors and wiping counters might seem mundane, but these tasks stop pathogens from bouncing back. Zero in on doorknobs, light switches, and drawer handles—spots that everyone touches.
Combine regular surface disinfection with antimicrobial stewardship to keep resistant bugs in check. Swapping disinfectant products each month prevents any single organism from gaining ground.
“Regular environmental audits paired with staff coaching halved infection rates in one hospital ward,” an IPC specialist shares from firsthand experience.
Make surface checks a talking point during daily huddles so cleaning never falls off the radar. Small, consistent actions plug holes in your workflow and keep infection risks low.
- Use EPA-registered wipes on all exam tables and counters to achieve 99.9% pathogen kill rates.
- Spray quick-drying alcohol solutions between appointments for ongoing protection.
- Photograph or digitally log each cleaning session with a timestamp for full accountability.
I set up weekly debriefs where teams discuss what’s working and where they can improve. That sense of ownership and open feedback loop often matters more than chasing perfection.
Consistency beats occasional deep cleans every time.
Recognize Infection Signs And Seek Help
Even the cleanest dressings can’t guarantee infection won’t sneak in around a break in the skin. Spotting trouble early makes all the difference between a simple home remedy and a trip to the hospital.
Look out for swelling, a foul smell or odd-colored discharge—they’re your body’s alarm bells.
- Spreading redness beyond the wound edge
- Pain that intensifies despite OTC painkillers
- Heat around the wound or swelling that won’t subside
- Green, yellow or brown discharge with a bad odor
Dive deeper into how labs catch sneaky bugs in our Advanced Pathogen Detection guide.
When To Order Diagnostics
Red streaks or fever? Time to call in the lab team. Wound cultures zero in on the exact bacteria, while blood work—CBC and CRP—checks if the infection has gone rogue.
- Request a wound culture for deep, stubborn wounds
- Order blood tests when reading tops 100.4°F or if heart rate spikes
- Consider ultrasound or MRI when you suspect an unseen abscess
“Timely diagnostics can halve the risk of systemic infection,” says a seasoned wound care specialist.
Escalation Triggers
Not every cut needs antibiotics, but some do. If you’re cutting down to fascia or there’s dead tissue, start prophylaxis and loop in a specialist.
- Deep punctures or surgical site breakdown
- Systemic signs like chills, rapid heartbeat or low blood pressure
- Red streaks racing toward lymph nodes
In one clinic, ankle cellulitis got flagged, cultured under ultrasound and treated within 24 hours—hospitalization avoided.
Tip: Document your escalation criteria in the chart so any team member knows exactly when to step in.
Case Study
A 60-year-old diabetic gardener noticed the redness climbing her shin two days after a shrub scratch. A high CRP and positive culture led to oral antibiotics plus an ultrasound check, stopping the spread in 48 hours.
When To Use Imaging
Ultrasound is your go-to for fluid pockets; MRI maps out deeper tissue involvement. The images guide both your incision plan and antibiotic choice.
Always attach imaging links right in the patient record for quick reference.
Key Takeaways
- Stay alert for red flags like spreading redness and foul discharge
- Combine cultures, labs and imaging for a rock-solid diagnosis
- Base antibiotic prophylaxis on clear risk factors
- Define and record referral triggers so no one hesitates
Catching infections early and backing up your clinical hunch with diagnostics is your last line of defense against complications.
Frequently Asked Questions
We’ve boiled down the trickiest knots in everyday wound care into these FAQs. In the video above, you’ll find clear, hands-on demos covering irrigation techniques, dressing swaps, and critical risk checks.
- Deciding between saline, chlorhexidine, or povidone-iodine
- Timing dressing changes for brand-new cuts versus stubborn ulcers
- Spotting the right moment for antibiotics—and when to hold off
- Home routines that genuinely speed up recovery
Choosing The Right Cleanser
Not every wound cleanser is cut from the same cloth. Saline shines as a gentle, no-rinse option—perfect for fragile or freshly injured tissue.
When you need extra antimicrobial firepower, chlorhexidine steps in with broad germ-killing action and minimal irritation.
Saline suits vulnerable tissues while chlorhexidine steers wide of most gram-negatives.
- Saline: Neutral pH, gentle on cells
- Chlorhexidine: Broad-spectrum, low cytotoxicity
- Povidone-Iodine: Potent coverage; avoid prolonged contact
Scheduling Dressing Changes
A dressing change isn’t just a chore—it’s your chance to reassess the wound. For a fresh cut, plan a swap every 48–72 Hours. That window lets you catch bleeding or excess exudate early.
Chronic ulcers demand daily check-ins. Even a quick look can identify moisture buildup or subtle signs of infection before they escalate.
| Wound Type | Change Interval |
|---|---|
| Acute Cut | 48–72 Hours |
| Chronic Ulcer | Daily Review |
Judging Antibiotic Need
Antibiotics can be lifesavers—or overkill. Topical antibiotics work wonders on low-risk, superficial wounds, keeping systemic resistance at bay.
When a wound dives deep or shows high contamination risk, systemic therapy earns its place. Always circle back to culture results within 24–48 Hours to fine-tune your coverage.
- Reserve systemic use for deep or high-risk infections
- Narrow therapy based on culture and sensitivity
- Skip prophylaxis in clean, minor wounds to protect the microbiome
Optimizing Home Habits
Healing extends far beyond the clinic. Good nutrition, steady hydration, and a clean environment give tissues the support they need.
A few practical tweaks make a big difference:
- Eat lean protein and leafy greens for collagen support
- Drink 2 Liters of water daily to boost perfusion
- Store dressings in a clean, dust-free container
- Keep pets away from open wounds to curb contamination
You might be interested in exploring more FAQs at Specialty Wound Care FAQ Index
These insights reflect hands-on strategies to stay one step ahead of wound infections and keep healing on track.
For targeted wound-management solutions, partner with Specialty Wound Care