A Guide on How to Prevent Surgical Site Infections

Primus Healthcare | December 27th, 2025


Preventing a surgical site infection isn’t a single action, but a coordinated effort that spans the entire surgical journey—before, during, and after your procedure. It's a partnership between you and your care team. Success hinges on optimizing your health beforehand, ensuring absolute sterility in the operating room, and staying vigilant with wound care during recovery.

Honestly, the most effective strategy is simply to follow your care team's guidance at every single step.

Why We Have to Talk About Surgical Site Infections

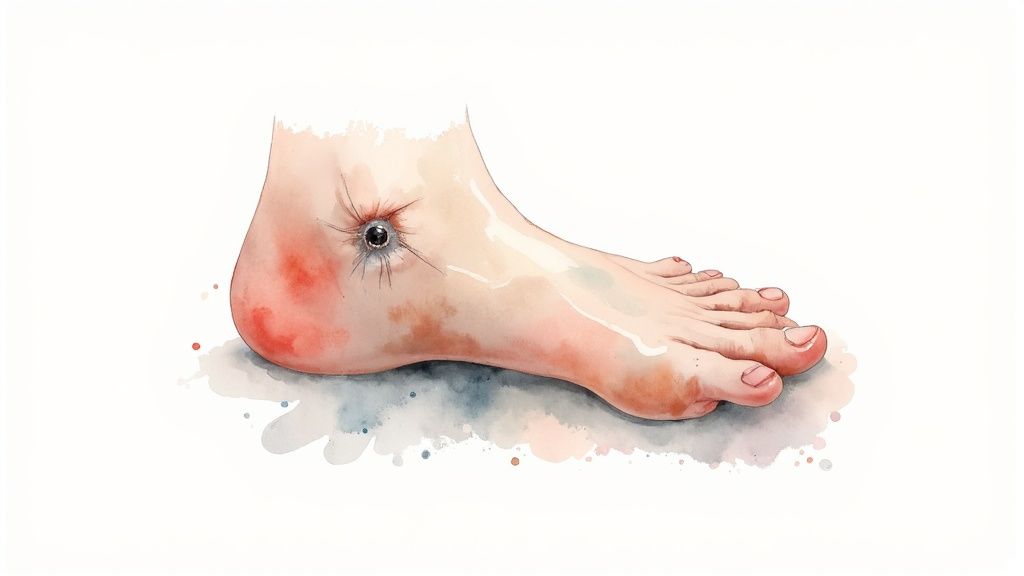
A surgical site infection (SSI) is so much more than a clinical term. For a patient, it’s a major setback on the road to recovery. It’s what happens when germs find their way into a surgical incision, triggering complications that can be as minor as a little redness or as severe as a life-threatening condition.

When an infection takes hold, it almost always means a longer, more painful recovery. It means more trips to the doctor, more antibiotics, and sometimes, another operation to fix the problem. The emotional and financial toll on patients and their families is immense.

Just How Big is the Problem?

Surgical site infections are a stubborn, global healthcare challenge. They are consistently one of the most common—and frustratingly, preventable—complications after surgery.

Globally, SSIs affect 2% to 4% of all patients who have an inpatient procedure. Here in the United States, that translates to over 400,000 extra hospital days every year, with a staggering price tag of around $900 million. Worldwide, the average incidence is about 2.5%, but that number can skyrocket to over 11% in regions with fewer resources. You can dig deeper into these SSI statistics and see the real impact on patient safety.

This isn’t just a numbers game; it’s about patient safety and the quality of care we deliver. To see how these principles fit into the bigger picture, it's helpful to understand the core strategies used to prevent healthcare-associated infections across all medical settings.

Here's the most important thing to remember: a huge number of these infections are completely avoidable. With proven, evidence-based strategies, healthcare teams and patients can work together to bring that risk way down and pave the way for a smoother, safer recovery.

A Roadmap for Prevention

This guide breaks down SSI prevention into three distinct phases. Think of it as a game plan where every stage has clear, actionable steps for both you and your clinical team.

  • The Pre-Operative Phase: This is all about getting your body ready for surgery. We'll cover how to optimize your health, what’s involved in proper skin prep, and why the timing of pre-surgical antibiotics is so critical.
  • The Intra-Operative Phase: Next, we'll go inside the operating room. We’ll look at the non-negotiables, from maintaining a sterile field to the surgical safety checklists that protect every patient.
  • The Post-Operative Phase: Finally, we’ll talk about your role after the procedure. This is where proper wound care, knowing the early warning signs of infection, and understanding when to call for help make all the difference.

Your Pre-Operative Playbook for Infection Defense

Preventing a surgical site infection doesn't start the moment you're wheeled into the OR. The real work begins days, and sometimes weeks, beforehand. Think of this pre-operative phase as setting the stage—getting your body in the best possible shape for a smooth, infection-free recovery.

It all starts with a frank conversation and a thorough risk assessment with your surgeon. This isn't just a box-ticking exercise; it's a critical look at your personal health factors that could put you at a higher risk. Being open about your medical history and lifestyle is absolutely essential here.

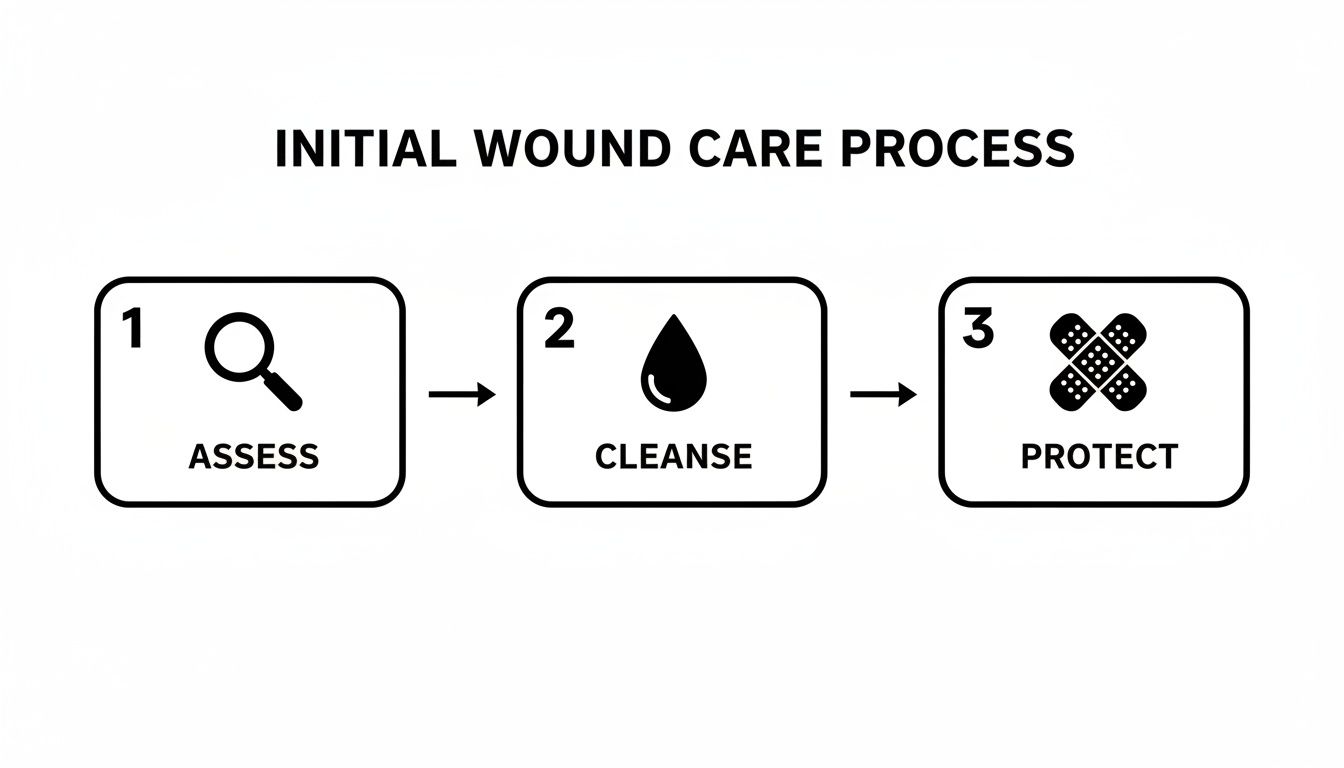
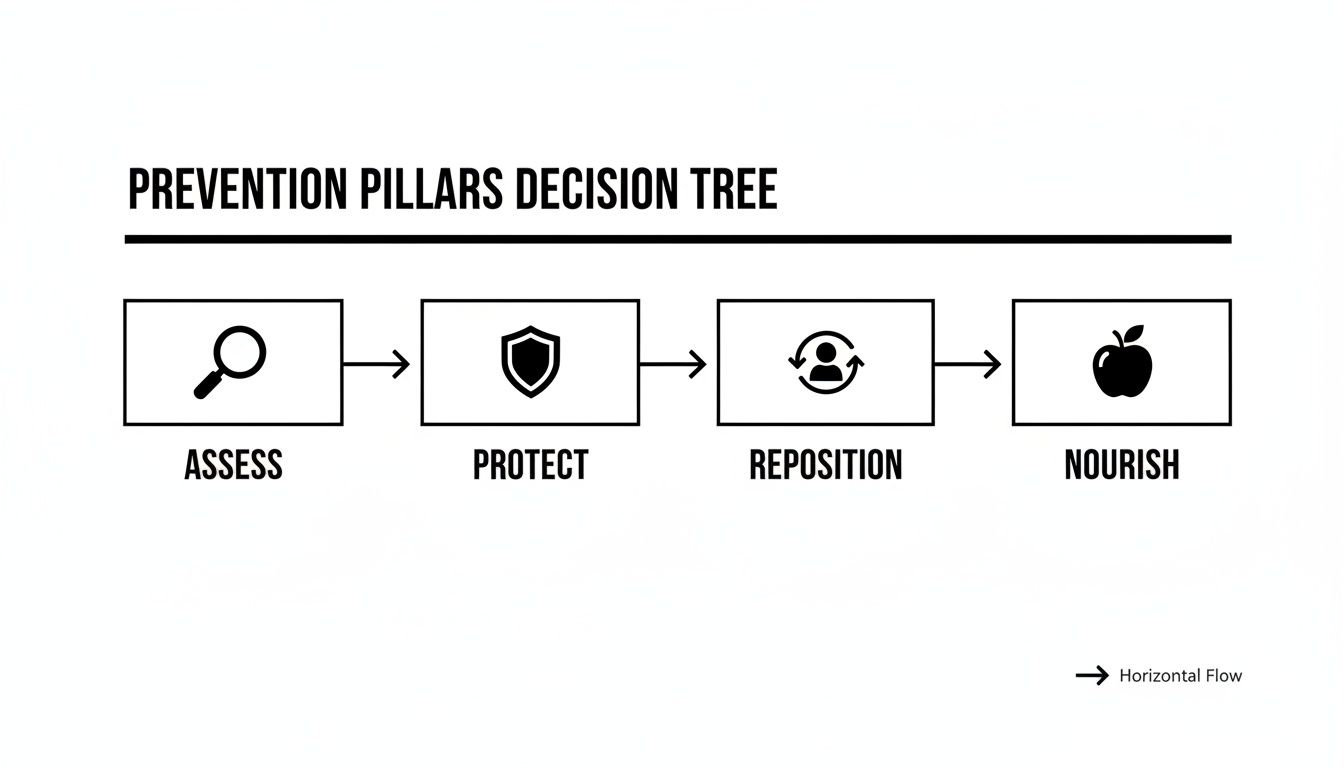
This flowchart breaks down the simple, three-phase approach to keeping infections at bay, showing what happens before, during, and after your procedure.

Flowchart detailing the infection prevention process, including steps before, during, and after medical procedures.

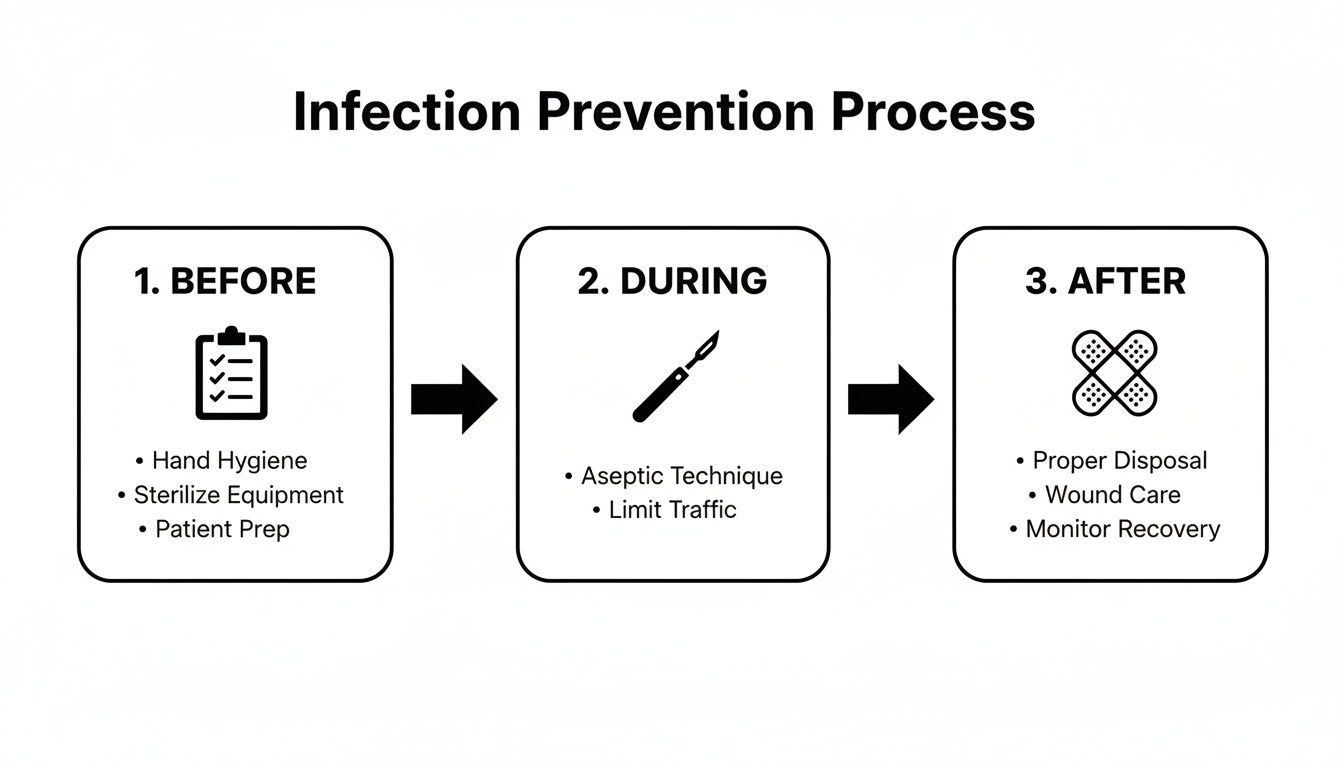
As you can see, infection control is a continuous loop, but optimizing your health before surgery is the foundation everything else is built on.

Getting Your Body Ready for Surgery

Once we know the risks, we can work on them. This is what we call "optimization"—taking proactive steps to manage any health issues that might interfere with your body's natural defenses.

For example, out-of-control blood sugar is a major red flag. High glucose levels can cripple your white blood cells, the very soldiers that fight off bacteria. If you're diabetic, your surgical team will want to see that your blood sugar is stable and well-managed leading up to the big day.

Smoking is another huge one. Nicotine clamps down on your blood vessels, which chokes off the supply of blood and oxygen to the surgical site. Oxygen is non-negotiable for healing tissue and for your immune cells to do their job. The good news? Quitting smoking even four to six weeks before surgery can make a massive difference in your outcome and slash your infection risk.

Skin Preparation and Hair Removal

Your skin is your body's first line of defense, but it's also covered in bacteria. The goal of skin prep is to reduce the number of these microbes at the incision site without causing any new problems.

Years ago, we used to shave the area. We know better now. Razors create tiny nicks and scrapes in the skin—basically, open invitations for bacteria to get in.

Today, the gold standard is simple: we only remove hair if it's absolutely necessary, and we use electric clippers. Clippers trim the hair right at the surface without breaking the skin. It’s a small change in practice that has had a huge impact on preventing surgical site infections.

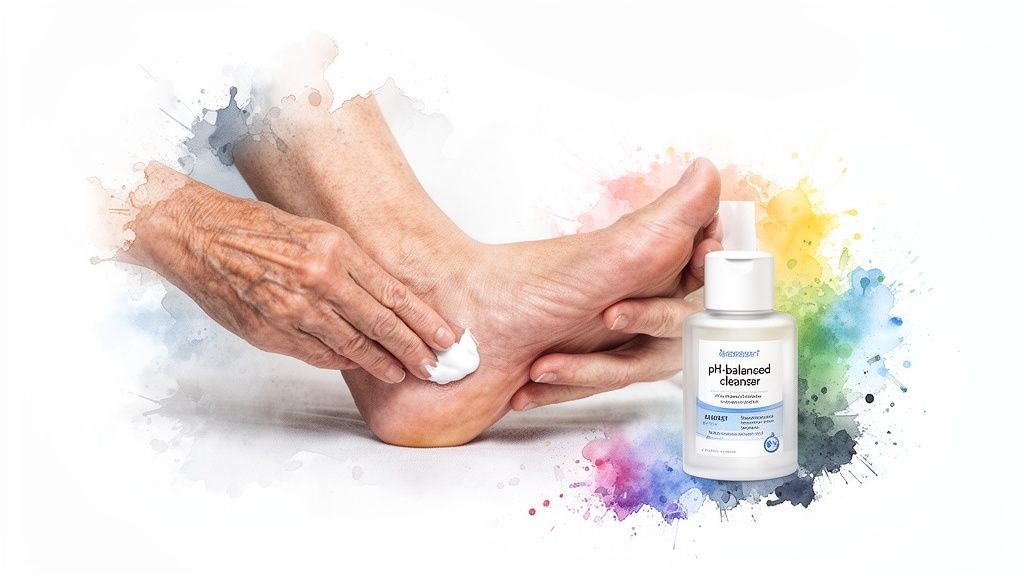
Your surgeon will likely also send you home with a special antiseptic wash, usually one containing chlorhexidine gluconate (CHG). You'll be instructed to shower with it the night before and the morning of your surgery. It’s a simple task that dramatically lowers the bacterial count on your skin. Follow the instructions to the letter.

  • Use the antiseptic soap exactly as directed, focusing on the surgical area.
  • Skip the lotions, deodorants, or powders after you wash. They can reduce the soap's effectiveness.
  • Sleep on fresh, clean sheets the night before surgery to keep your skin as clean as possible.

The Role of Prophylactic Antibiotics

Even with perfect preparation, some bacteria might still hang around. That's where prophylactic antibiotics come into play. We give you a dose of antibiotics right before your surgery starts to give your body a head start against any potential invaders.

Timing is everything. For the antibiotics to work, they have to be in your bloodstream when the surgeon makes the first incision. The standard is to administer the IV antibiotic within 60 minutes before that first cut.

The choice of drug isn't random, either. Your team selects an antibiotic that is known to be effective against the bacteria most likely to cause an infection for your specific type of surgery. It’s a targeted, preventative shield—not a treatment for an infection you already have. This proactive step is a cornerstone of modern surgical safety.

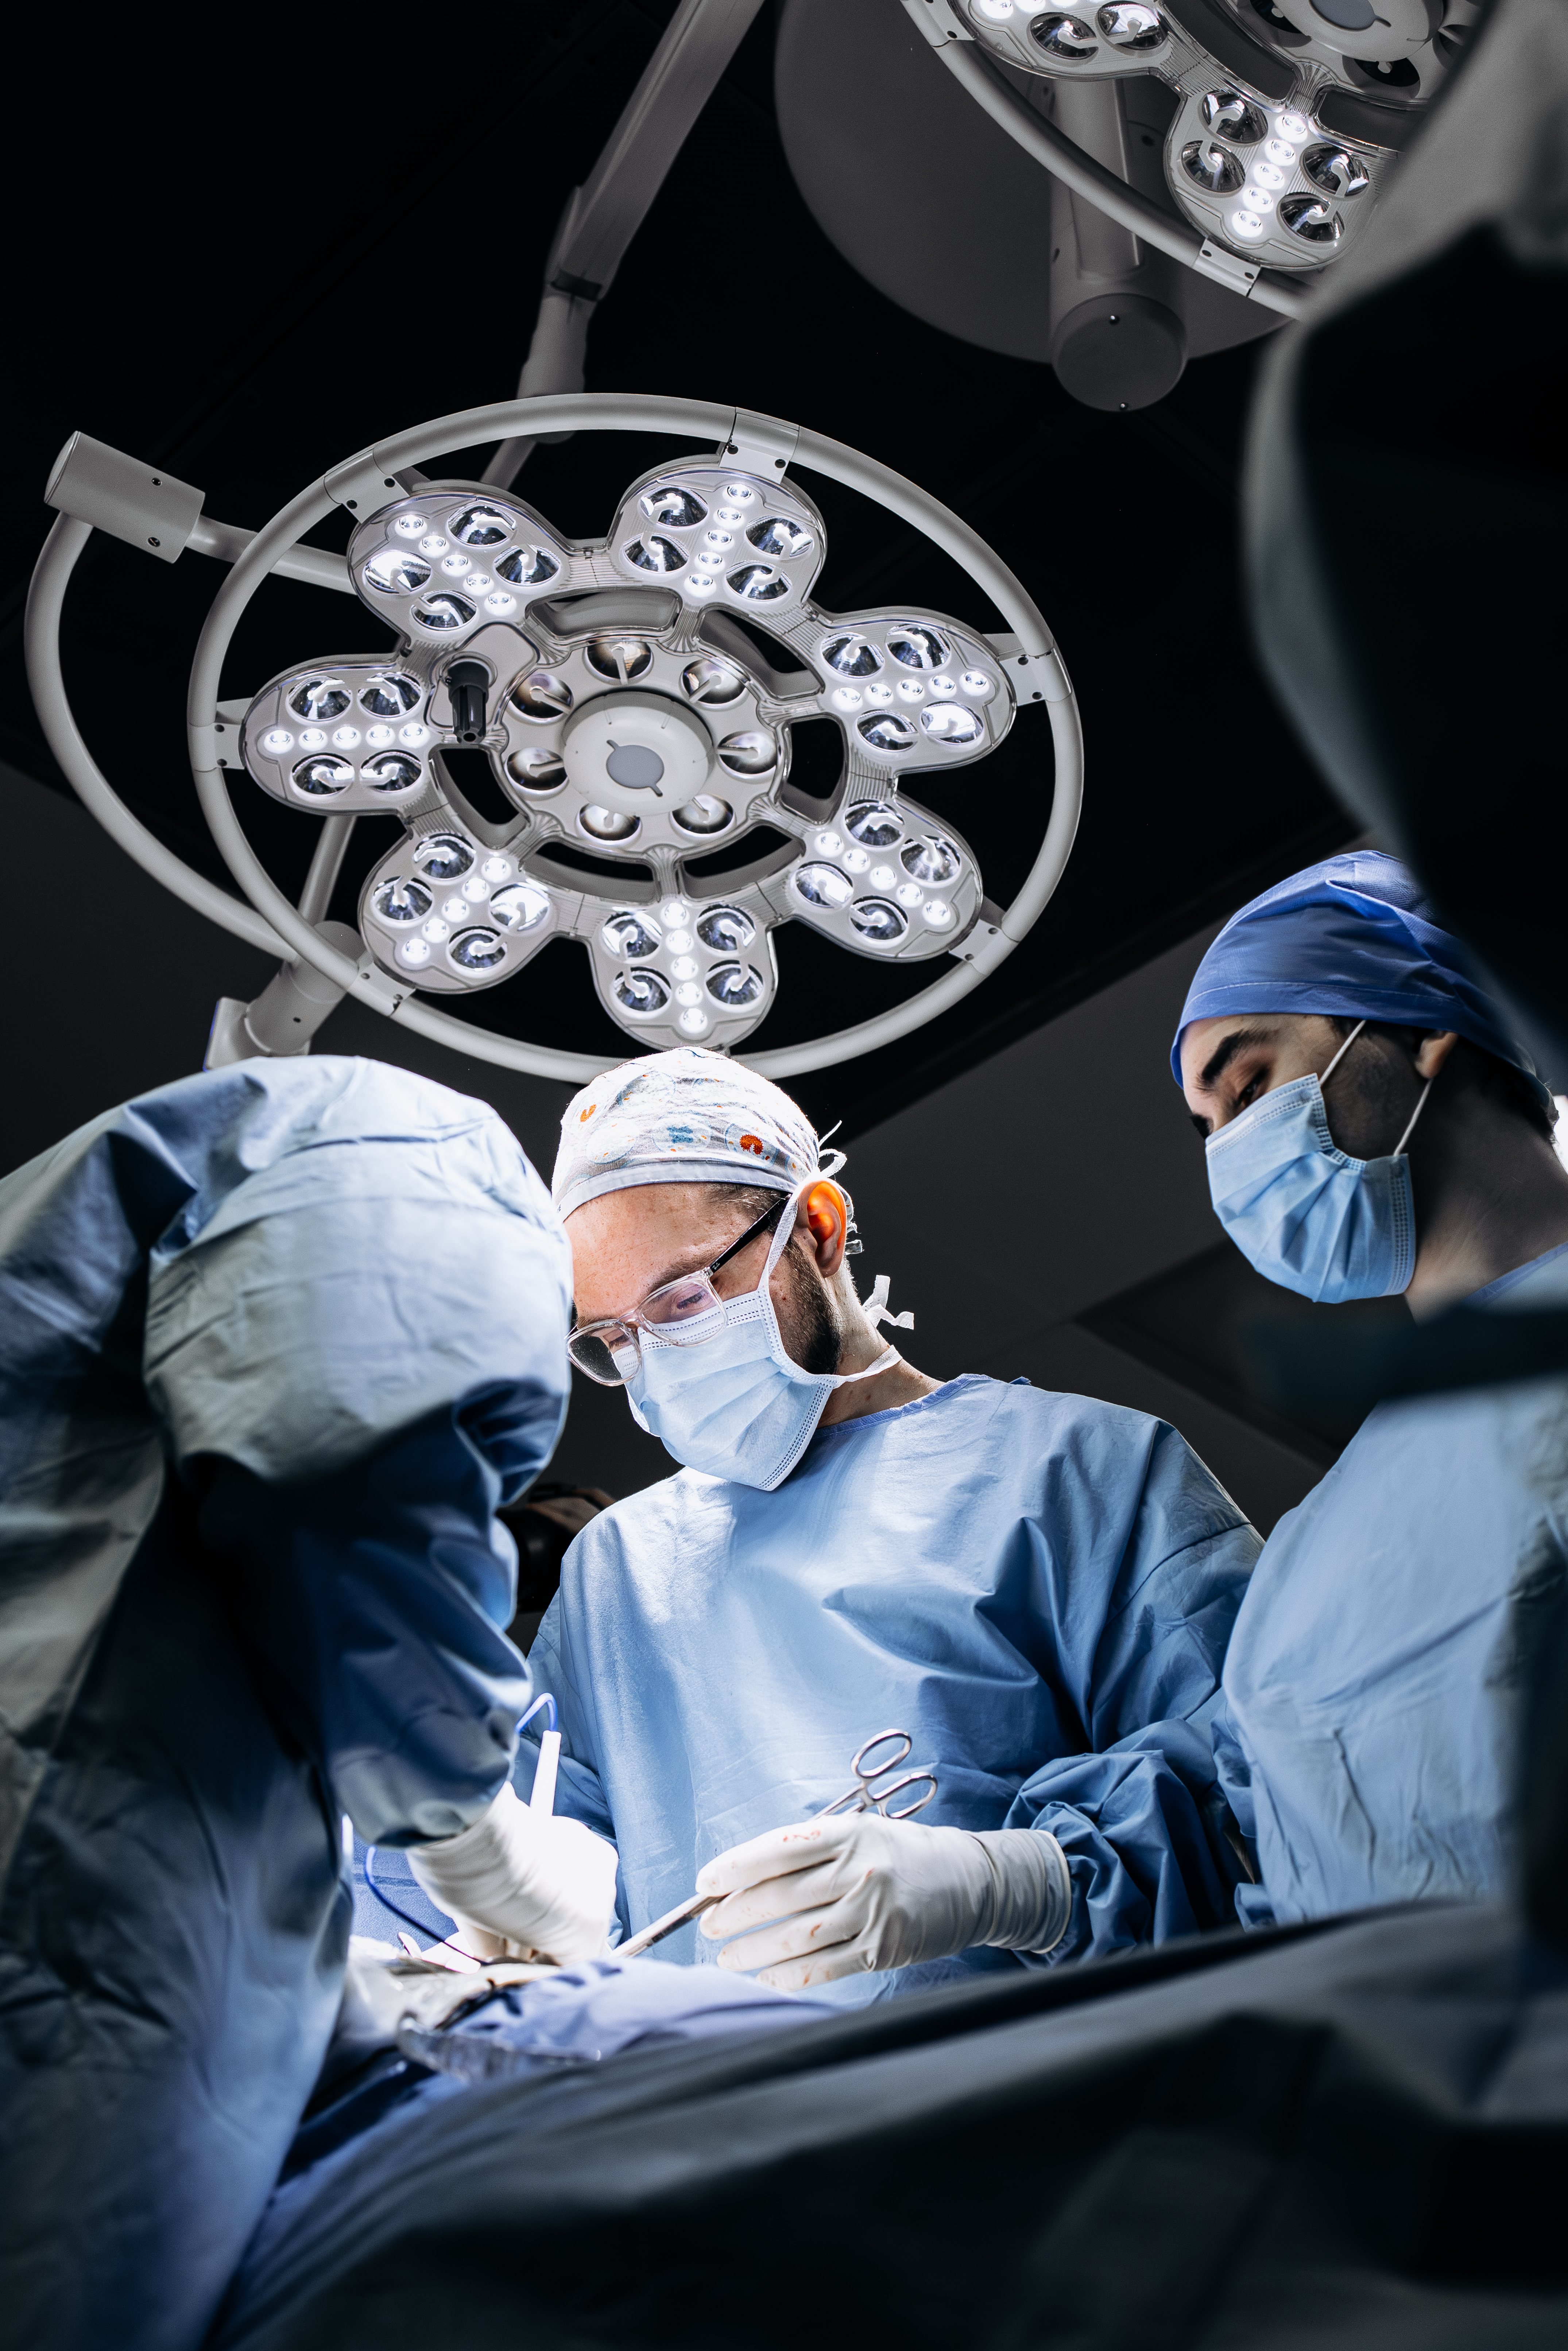
Inside The Operating Room: Proactive Measures During Surgery

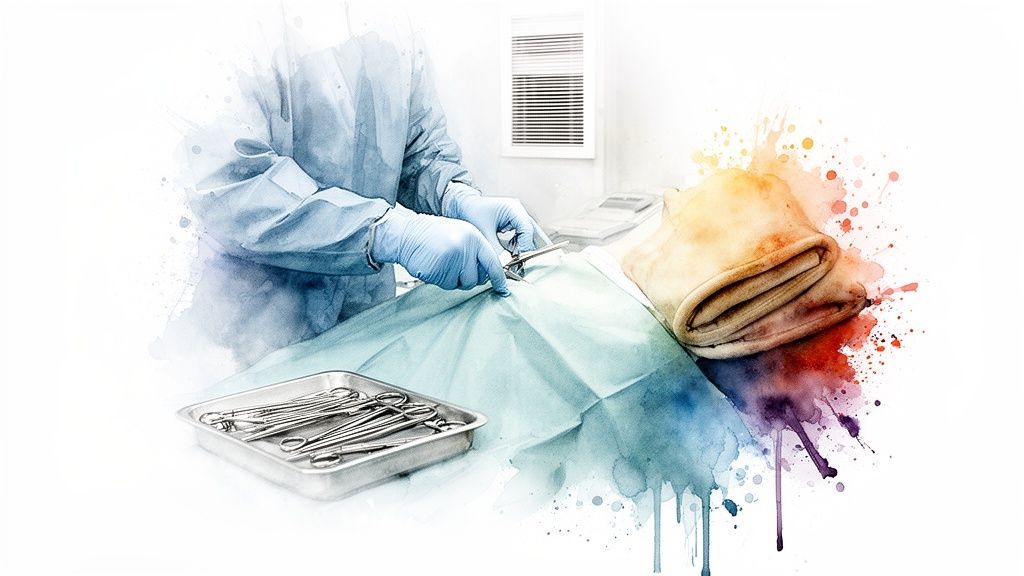
Once a patient enters the operating room, the responsibility for preventing infection shifts entirely to the surgical team. This is where a symphony of practiced, evidence-based protocols comes together in a highly controlled environment to ensure patient safety. While you won't be awake to see it, understanding what happens behind the scenes can offer tremendous peace of mind.

A surgeon in blue scrubs and gloves performs a procedure with instruments, surrounded by vibrant watercolor.

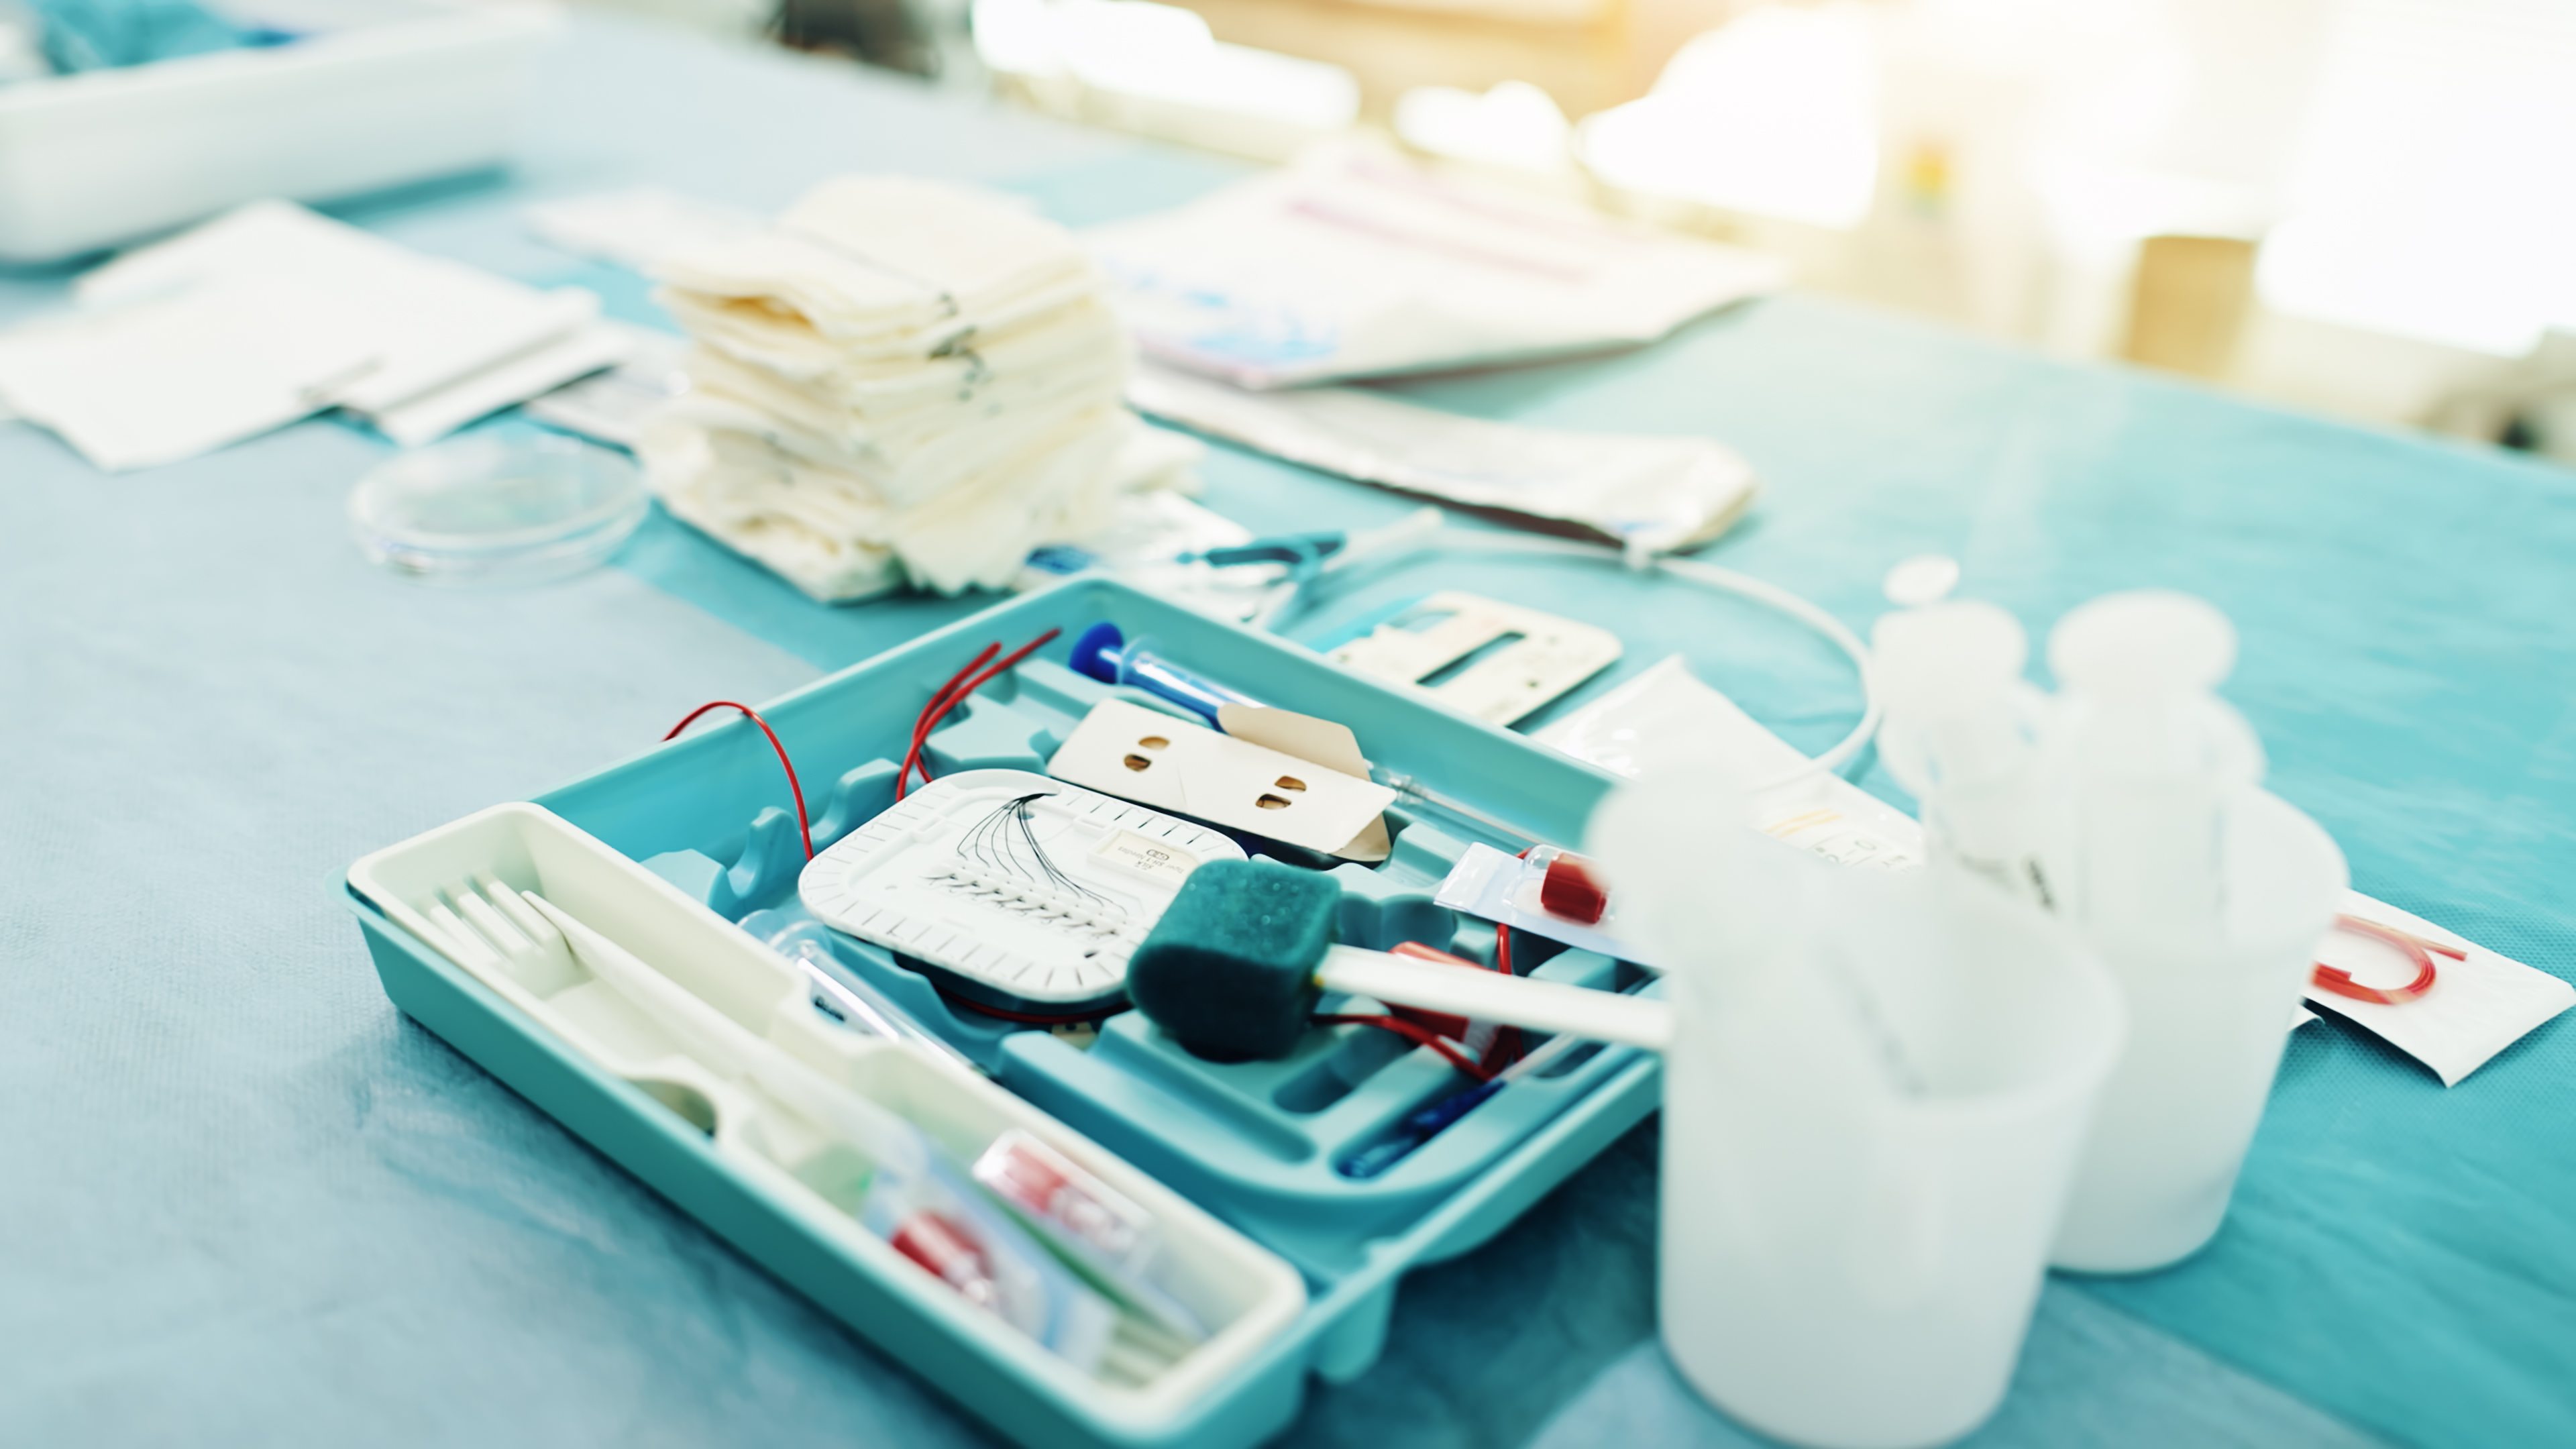
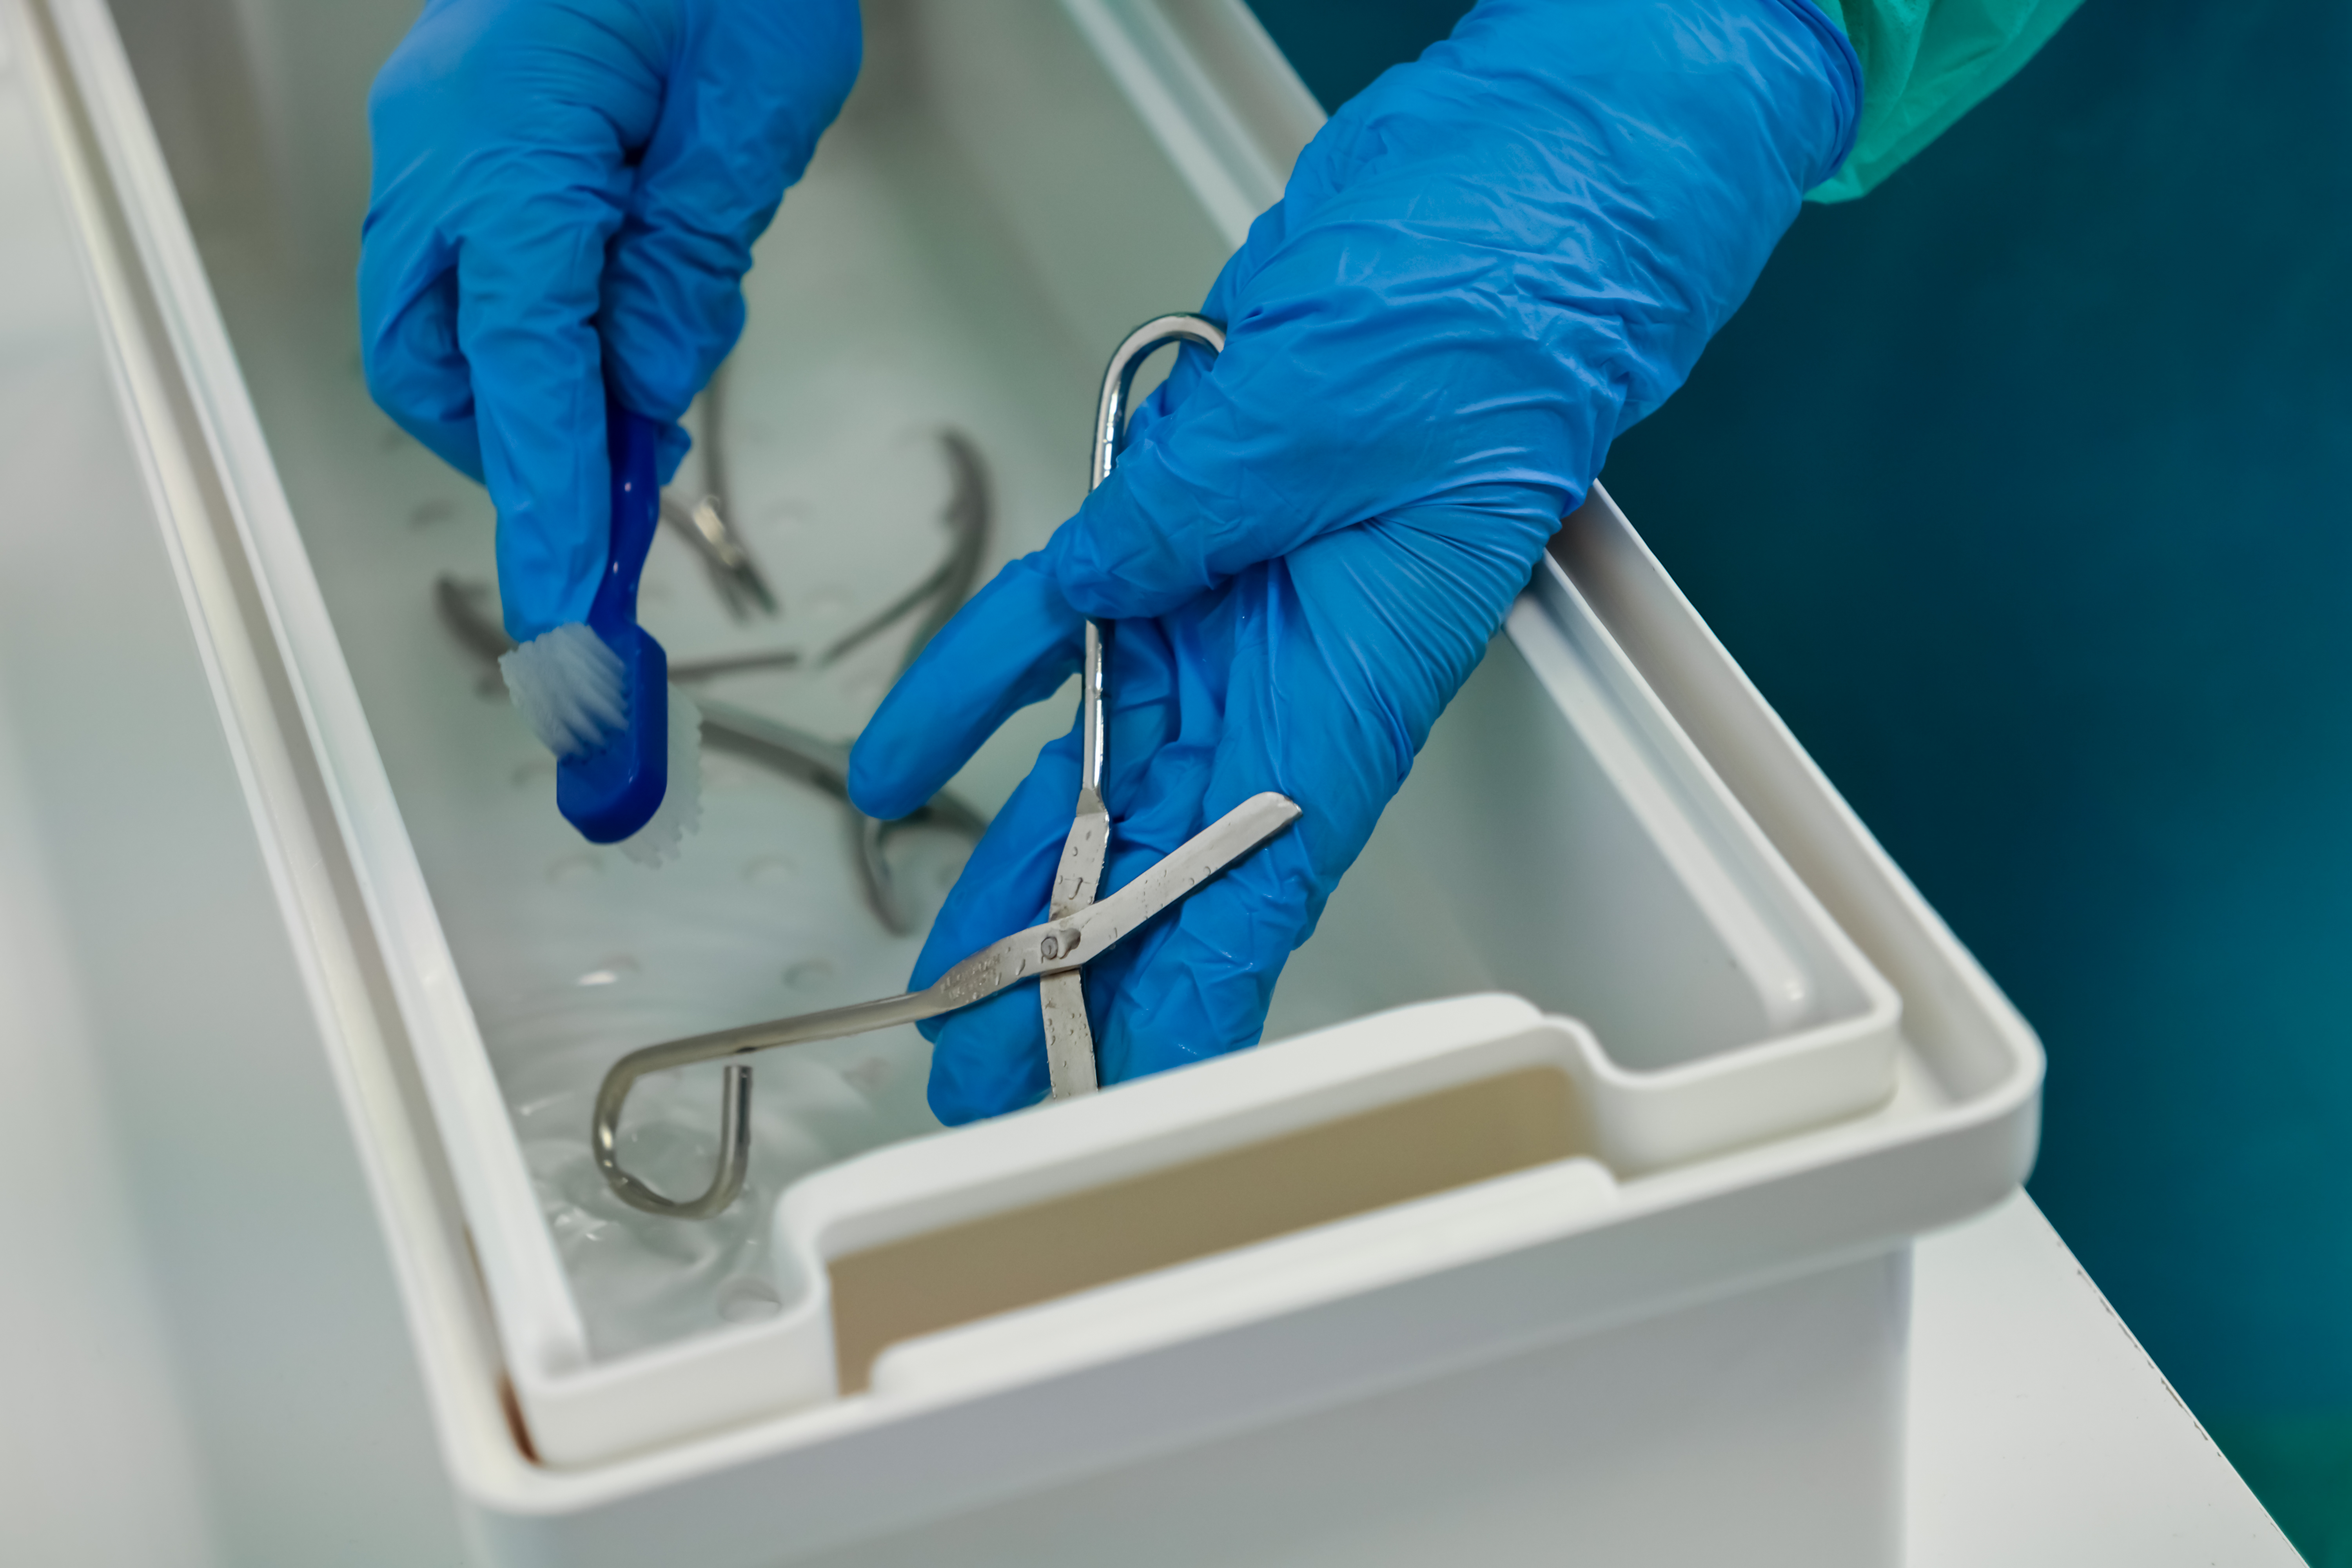
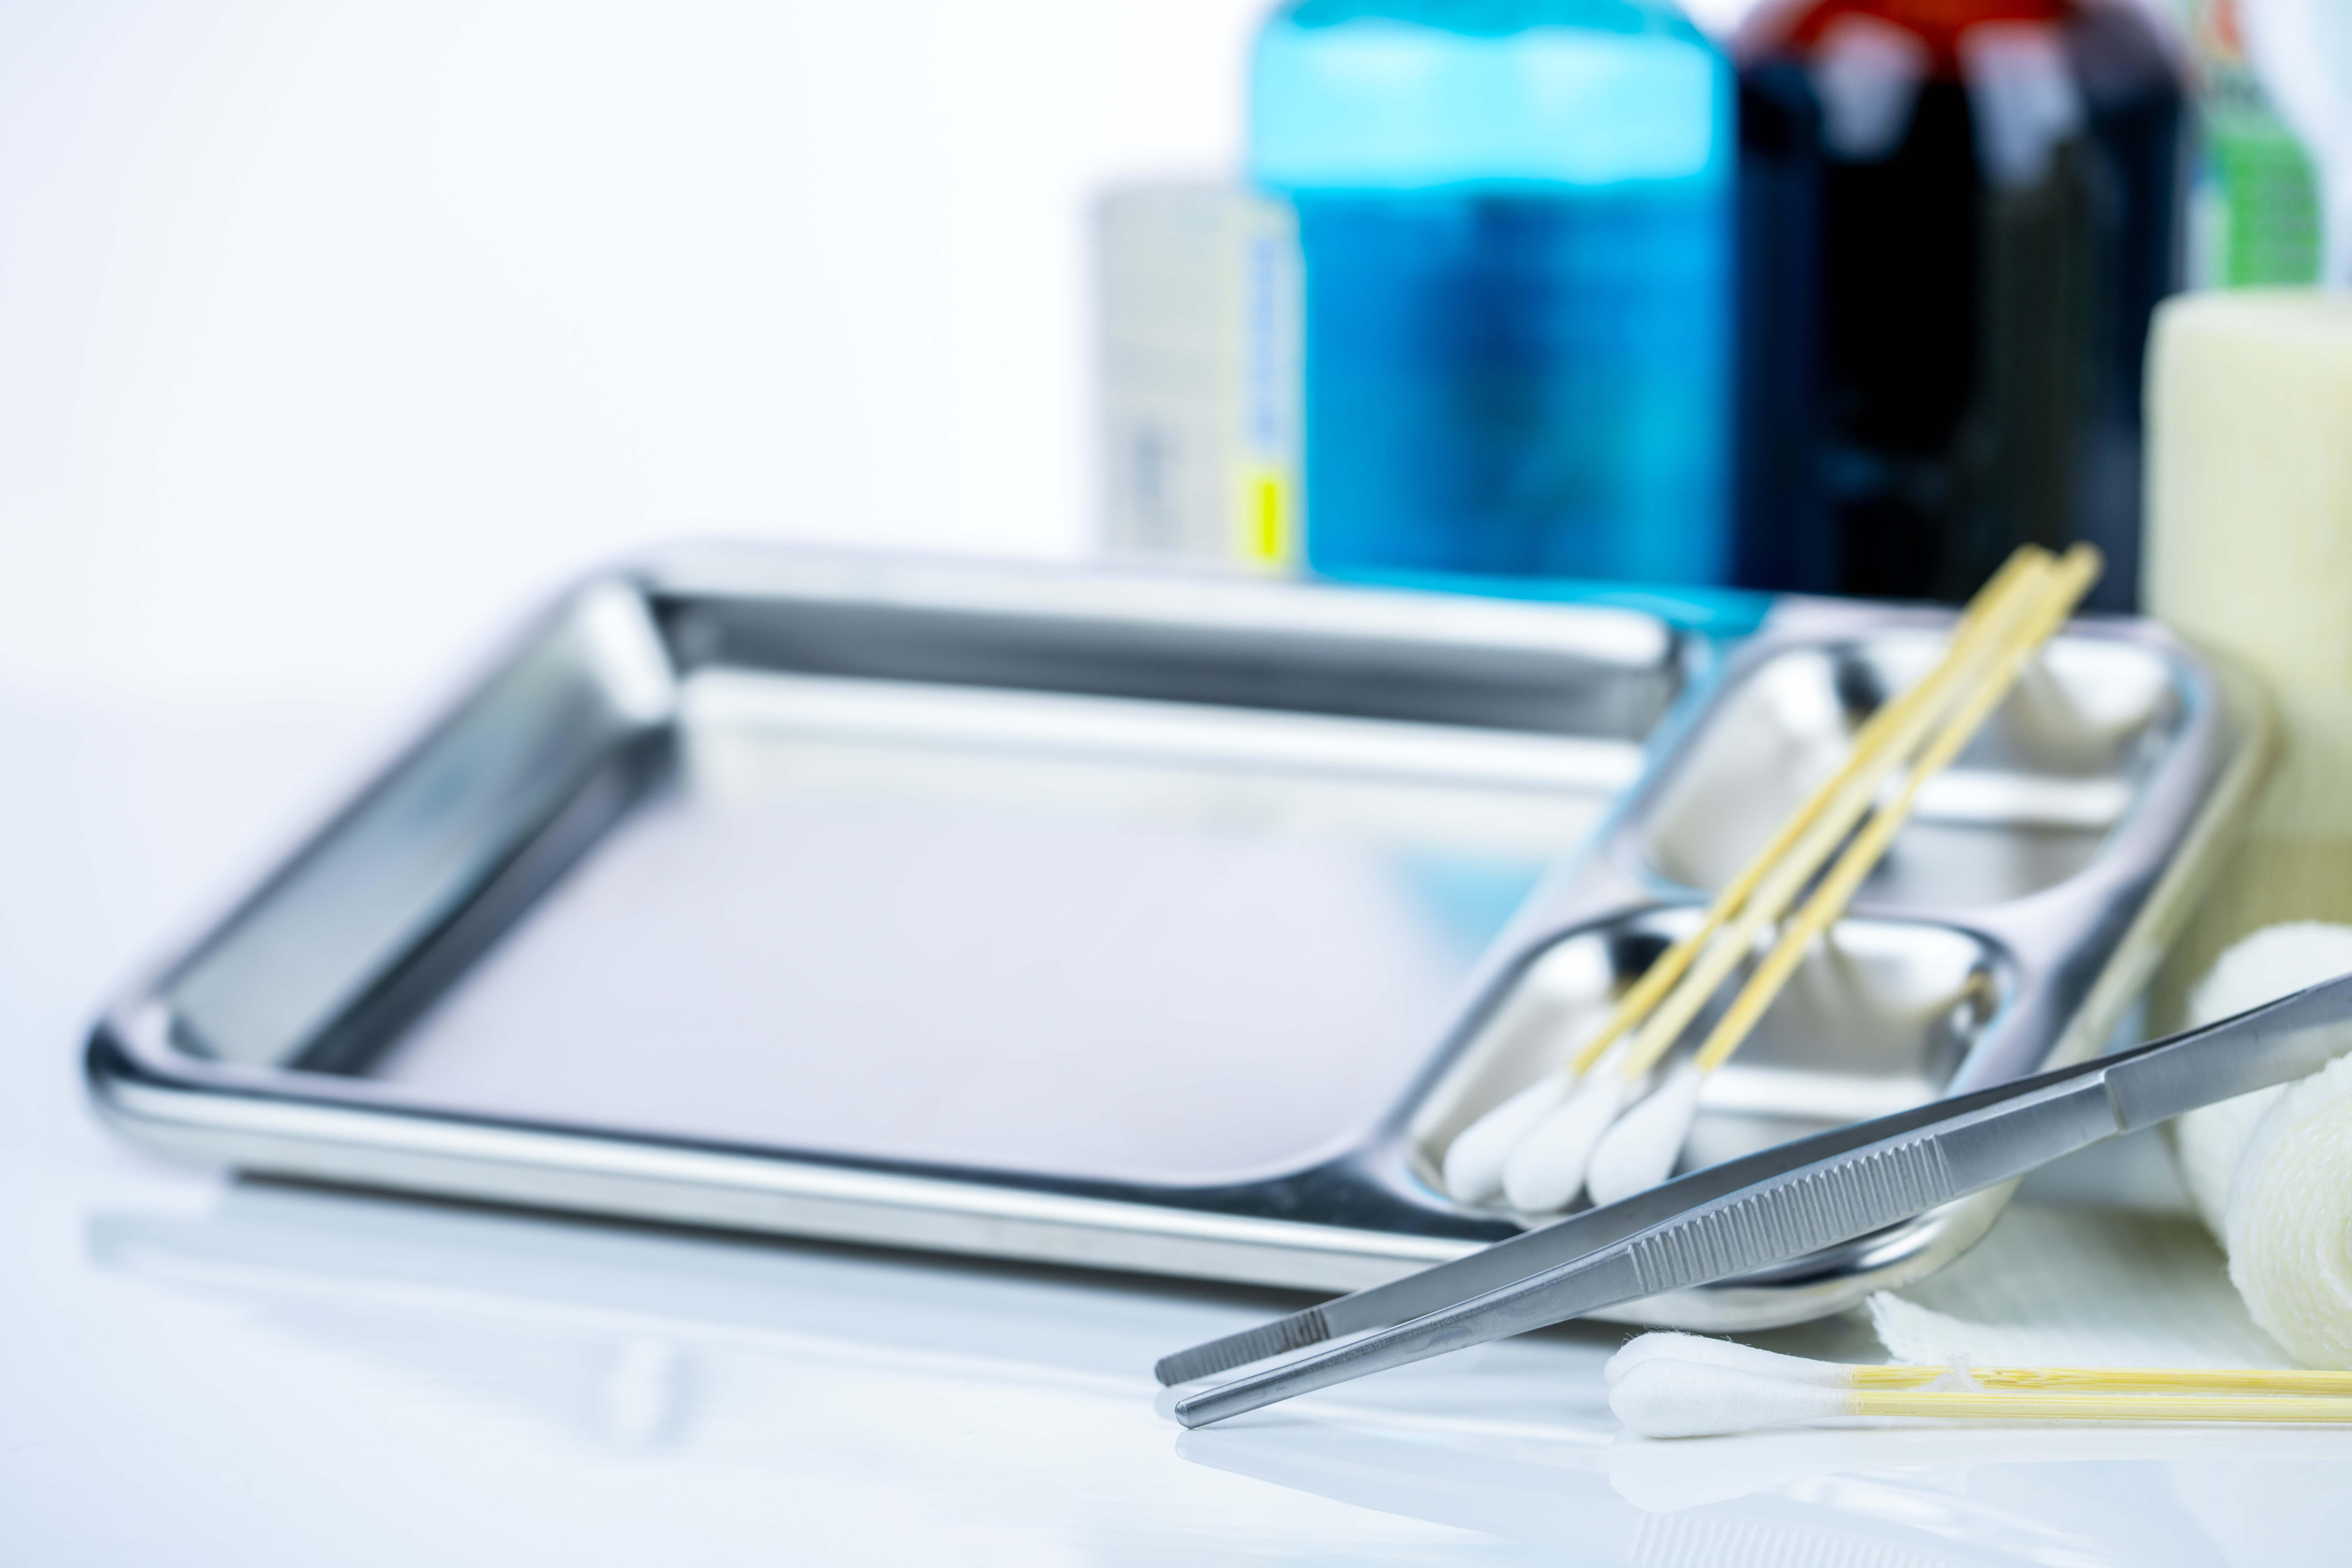
The absolute cornerstone of safety inside the OR is aseptic technique. This isn't just about wearing gloves; it's a rigorous, multi-layered approach to minimizing contamination at every turn. It all starts with meticulous hand hygiene, where surgeons and nurses perform a detailed surgical scrub. Just as critical are the essential medical device sterilization methods that guarantee every instrument used is completely free of microorganisms.

From there, the team establishes and strictly maintains a sterile field—a designated area around the patient where only sterile items are permitted. Every drape, tool, and gloved hand entering this zone must meet uncompromising standards. Any breach, no matter how small, demands immediate corrective action to protect the patient.

Beyond The Sterile Field: Controlling The Environment

Preventing surgical site infections also involves controlling the operating room environment itself. These factors are often invisible but play a powerful role in keeping patients safe.

Operating rooms are engineered with specialized ventilation systems that use positive-pressure airflow and high-efficiency particulate air (HEPA) filters. This setup constantly pushes clean, filtered air into the room while forcing potential airborne contaminants out, dramatically reducing the number of microbes in the air.

One of the most significant yet underappreciated strategies is maintaining the patient's core body temperature. When a patient gets cold during surgery (hypothermia), it can weaken their immune response and decrease blood flow to the surgical site. Simply keeping the patient warm—a practice called normothermia—has been shown to reduce SSI risk by as much as three-fold.

To provide a clearer picture, here’s a breakdown of the key interventions that happen while a patient is on the operating table.

Key Intra-Operative Prevention Strategies

This table summarizes the core evidence-based interventions performed during surgery to minimize the risk of surgical site infections.

Intervention Rationale and Impact
Antimicrobial Prophylaxis Administering antibiotics within 60 minutes before the first incision ensures peak drug concentration in the tissues, actively fighting bacteria.
Aseptic Skin Preparation Using an alcohol-based chlorhexidine solution has been proven more effective at killing skin flora than older agents like aqueous iodine.
Normothermia Maintenance Keeping the patient's core body temperature stable supports immune function and promotes healthy blood flow and oxygenation to the tissues.
Supplemental Oxygen Providing extra oxygen during and just after surgery can enhance the ability of immune cells to kill bacteria at the surgical site.
Gentle Tissue Handling Minimizing tissue trauma is crucial. Damaged tissue has a weaker defense against infection, so careful surgical technique is paramount.

These strategies are not just suggestions; they are standard-of-care protocols that form a powerful defense against infection.

Evidence-Based Interventions In Action

Modern surgical care is built on a foundation of proven strategies that actively reduce infection risk. These interventions are often guided by checklists and global health recommendations, ensuring every single patient benefits from the same high standard of care.

Beyond the major points, other practices contribute significantly:

  • Efficient Surgery: While never rushing, an experienced surgical team that minimizes the procedure's duration inherently reduces the time the surgical site is exposed to potential contaminants.
  • Gentle Tissue Handling: Surgeons are trained to handle tissues with extreme care. Damaged tissue is far more susceptible to infection, making a delicate technique essential.

This entire process is a testament to the detailed planning and execution required for a safe surgical outcome. For those interested in seeing these principles applied, watching professional training videos can offer a deeper appreciation for the skill involved. These coordinated efforts inside the OR create the safest possible environment for your procedure and recovery.

Post-Operative Vigilance: Protecting Your Wound After Surgery

The surgery is over, but your most important job in preventing a surgical site infection is just getting started. The days and weeks that follow are a critical window where your attention to detail can make all the difference. Think of yourself as the most essential member of your own recovery team.

A hand gently touches a medical patch on an arm, with hand sanitizer and a health app on a smartphone.

This post-op period is a partnership. Your surgeon has done their part in the operating room; now it’s up to you to follow their instructions to the letter. Doing so protects the delicate healing process and paves the way for a smooth, complication-free recovery.

Mastering Your Wound Care Routine

Those discharge papers aren't just a formality—they're your personalized roadmap to healing safely. At the center of these instructions is proper wound care, and it all starts with one non-negotiable rule: clean hands.

Before you ever touch your dressing or the skin around your incision, wash your hands with soap and water for at least 20 seconds. If that's not possible, an alcohol-based hand sanitizer is your next best option. This simple step is your single most powerful weapon against introducing harmful bacteria to the surgical site.

Your instructions will be very specific about how to handle your dressing. Some of the newer dressings are designed to stay on for several days, while others need to be changed regularly. Don't improvise.

  • Follow the Timeline: Change your dressing exactly when you're told to—not sooner, not later.
  • Use the Right Supplies: Stick to the sterile gauze and tape provided or recommended by the hospital.
  • Keep It Dry: Unless you're explicitly told otherwise, keeping the incision dry is a must. This might mean covering it with a waterproof barrier when you shower.

Up to 40% of surgical procedures worldwide can be complicated by SSIs, making them the third-leading cause of healthcare-associated infections. These infections nearly double hospital stays and quadruple readmission risks, with almost half of all cases being preventable through evidence-based strategies. You can review more research about the global impact of SSIs and prevention on frontiersin.org.

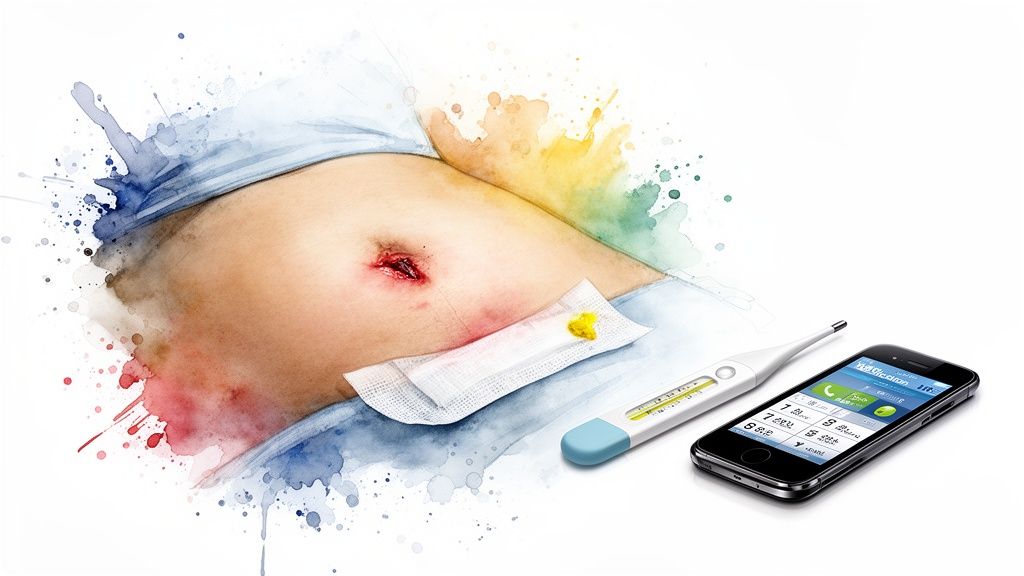
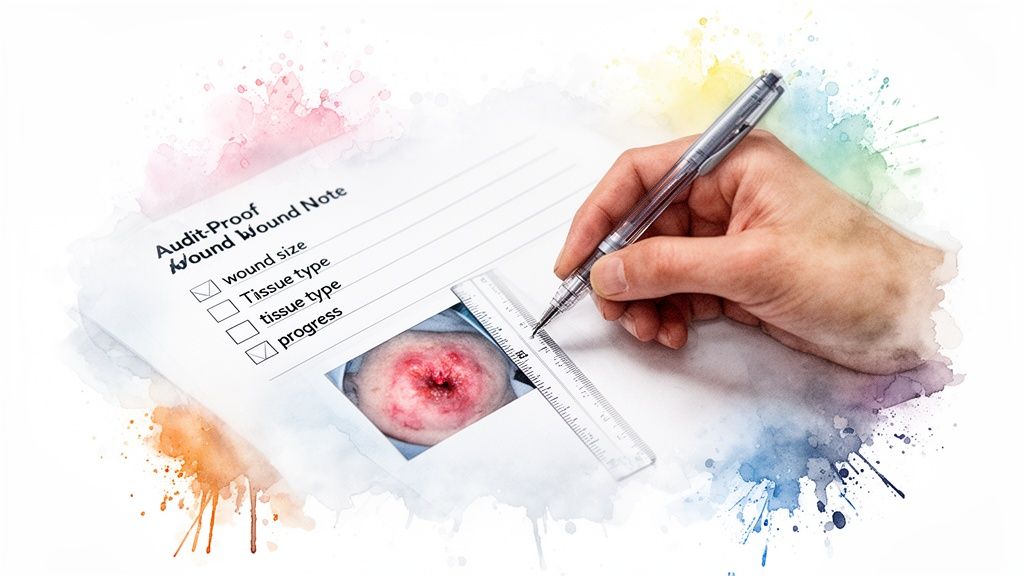
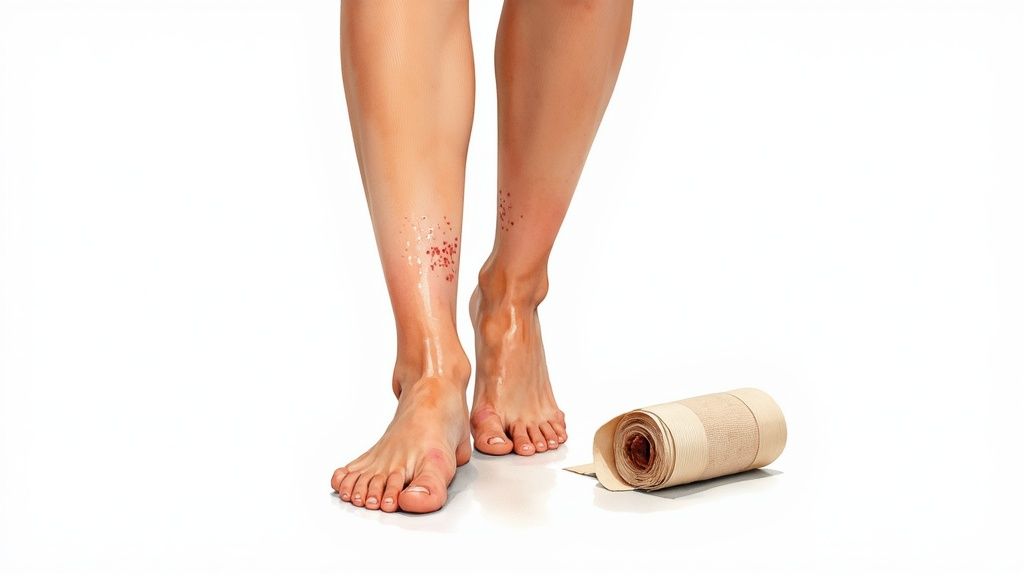
Knowing the Early Warning Signs of Infection

Your body has its own alarm system for when things go wrong. Your job is to listen carefully and know what to look for. Most SSIs start to show symptoms within the first 3 to 7 days after surgery, but it's important to stay vigilant even after that window.

Keep a close eye on your incision site for any of these changes:

  • Spreading Redness or Swelling: Some initial redness is normal, but it should get better over time, not spread out or get darker.
  • Pain That Gets Worse: Post-op pain should gradually fade. If it suddenly intensifies or starts throbbing, that’s a major red flag.
  • Warmth at the Incision: An infected area often feels noticeably warmer to the touch than the skin around it.
  • Drainage or Pus: Any discharge that looks cloudy, yellow, or green is a clear sign of trouble. A foul smell is also a serious warning.
  • Fever: A temperature of 100.4°F (38°C) or higher could mean your body is fighting off a larger infection.

If you spot even one of these signs, don't wait to see if it gets better on its own. Call your surgeon’s office immediately. Catching an infection early often means it can be handled with a simple course of antibiotics, preventing a minor issue from escalating into a serious complication. In some clinical settings, advanced tools like a point-of-care wound imaging device can even help clinicians spot elevated bacterial loads before a crisis develops.

Supporting Your Body's Healing Power

Beyond just caring for the wound itself, your overall health habits are a huge piece of the healing puzzle. Your body needs the right fuel and the right conditions to repair itself and fight off germs.

Think of your recovery as your body's full-time job. To help it perform at its best, stick to the plan laid out in your discharge instructions, especially in these areas:

  1. Nutrition: Your body is rebuilding tissue, which requires extra calories, protein, and vitamins. Focus on a balanced diet filled with lean proteins, fruits, and vegetables.
  2. Hydration: Water is absolutely essential for good circulation, which is how oxygen and nutrients get delivered to your wound. Drink plenty of fluids all day long.
  3. Rest and Activity: Listen to your body and follow every activity restriction. Pushing yourself too hard can strain the incision, but getting enough rest lets your body channel its energy directly into healing.

Following these guidelines isn't just about feeling comfortable; it’s an active strategy for preventing infection. By creating the best possible internal environment for healing, you give your body the upper hand in closing the wound quickly, leaving no opening for bacteria to move in.

Recognizing When to Seek Advanced Wound Care

While diligent post-operative care is your first line of defense, sometimes a surgical wound just doesn't follow the textbook healing process. Knowing when to call in a specialist is crucial. It’s about preventing a minor healing delay from spiraling into a major complication that threatens the patient's recovery.

If a surgical incision isn't showing clear signs of improvement after two weeks, it's time for a much closer look. A wound that hits a plateau—or worse, starts to regress—often needs more than standard care can offer. This is particularly true for patients with underlying health issues like diabetes or vascular disease, which can seriously hamper the body's ability to heal.

Red Flags That Signal a Need for a Specialist

Most surgical wounds heal just fine with standard protocols. But certain warning signs demand a specialist's intervention. Don't adopt a "wait and see" approach with these issues; quick action is the key to getting healing back on track.

Keep an eye out for these indicators:

  • A Stalled Wound: If you see no reduction in size or visible improvement over a 14-day period, you're likely dealing with a chronic, non-healing wound.
  • Spreading Signs of Infection: Redness that creeps far beyond the incision, persistent warmth to the touch, or red streaks moving away from the wound are all signs that an infection is advancing.
  • Recurrent Drainage: Some clear or pinkish drainage is normal at first. But if you see persistent pus-like discharge, especially after a round of antibiotics, it points to a deeper, unresolved problem.
  • Increasing Pain: Post-op pain should steadily decrease. If the pain at the wound site suddenly gets worse or becomes severe, that's a major red flag.

Ignoring these signs can lead to much more serious problems, including deep tissue damage or even systemic infection. A wound care specialist has the tools to find the root cause and deploy advanced diagnostics to figure out what’s really going on.

Advanced Diagnostics: Uncovering the Real Problem

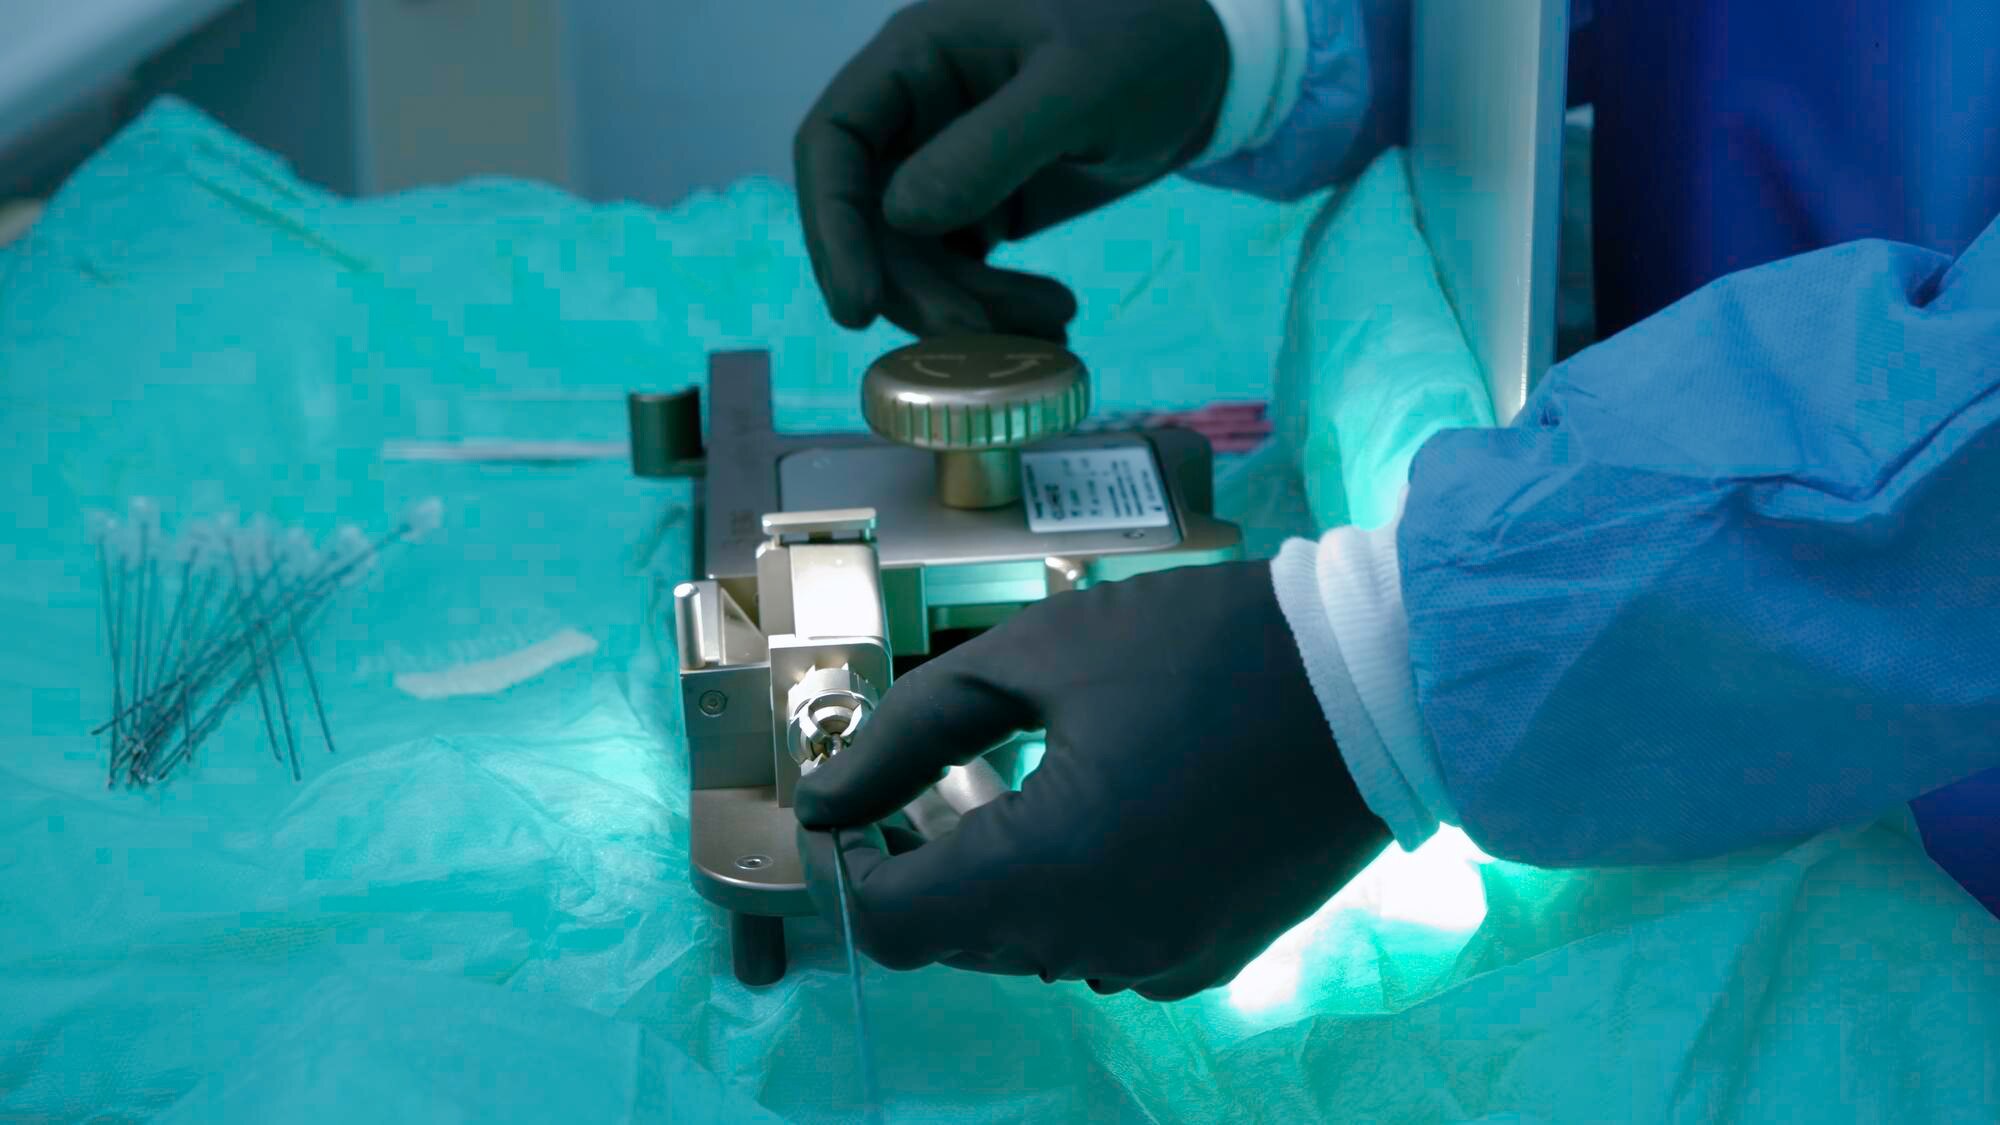
One of the most common reasons a wound fails to heal is a stealthy, undiagnosed infection. Specialists have access to diagnostic tools that go way beyond what the naked eye can see, giving them a clear picture of the microbial battlefield in the wound bed.

A great example is fluorescence imaging. Using a device like the MolecuLight DX, we can shine a specific wavelength of light on the wound, making bacterial colonies glow in real-time. This isn't just a party trick; it allows us to see the exact location and bioburden of contamination, which makes for far more targeted and effective debridement.

Another game-changer is rapid pathogen testing. Forget waiting days for traditional cultures to come back from the lab. These modern tests can identify the specific bacteria causing an infection—and just as importantly, their antibiotic sensitivities—often within a few hours. You can read more about how clinics use advanced pathogen detection to accelerate their decision-making. That speed is invaluable for choosing the right antibiotic from day one and avoiding the trial-and-error approach that lets an infection dig in deeper.

Innovative Treatments for Complex Wounds

Once we have an accurate diagnosis, we can bring in advanced therapies designed to jump-start healing in even the most stubborn wounds. These treatments work with the body's own regenerative processes to create the ideal environment for tissue repair.

For instance, amniotic membrane allografts are proving to be a revolutionary tool for complex wounds. These grafts serve as a natural scaffold, delivering the essential growth factors and structural proteins needed to rebuild healthy tissue. A triple-layer allograft, in particular, provides a robust matrix that encourages new cell growth and can help close wounds that have failed every other treatment.

These advanced interventions are becoming central to modern wound care. From an economic standpoint, surgical site infections are the second most common healthcare-associated infection and are tied to a four-fold increase in hospital readmissions. Specialty wound care tackles this head-on. By using fluorescence imaging for precise cleaning, rapid pathogen ID for effective antibiotic selection, and triple-layer allografts to rebuild tissue, we can dramatically reduce healing times and the administrative burden on providers. For a deeper dive, check out the economic and clinical impact of advanced wound care on xiahepublishing.com. Knowing when to escalate care isn't just good medicine; it's essential for ensuring a safe and complete recovery.

Of course. Here is the rewritten section, crafted to sound like it was written by an experienced human expert, following all the provided guidelines.


Your Top Questions About Preventing Surgical Site Infections

Even with the best surgical plan, it's natural to have questions as you prepare for an operation or navigate your recovery. Let's walk through some of the most common concerns I hear from patients. My goal is to give you clear, straightforward answers so you can feel confident and in control of your care.

How Much of This Is Really Up to Me?

It’s a fair question. While the surgical team has total control over the sterile environment inside the operating room, your role as the patient is absolutely critical, especially before you even get to the hospital and after you go home. Your actions have a direct and powerful impact on your risk of infection.

Think of it as a true partnership. Before your surgery, your job is to:

  • Be an open book. Tell your surgeon everything about your health history, medications, and habits like smoking. No detail is too small.
  • Follow pre-op instructions to the letter. This means diligently using the antiseptic washes they give you, keeping your blood sugar in a tight range if you're diabetic, and stopping smoking as far in advance as possible.
  • Protect your skin. Don't shave the surgical area yourself—this can create tiny nicks that harbor bacteria. Your job is to keep that skin intact and healthy.

Once you're home, you become the primary guardian of your wound. This is a huge responsibility. It means practicing meticulous hand hygiene every time you go near the incision, following wound care instructions precisely, and keeping a close eye out for any red flags.

Can I Just Use My Regular Soap or Lotion Before Surgery?

I strongly advise against it. It's best to stick exclusively to what your surgical team recommends in the days leading up to your procedure. Many everyday soaps, moisturizers, and even deodorants contain ingredients that can completely undermine the effectiveness of pre-surgical antiseptic cleansers like chlorhexidine gluconate (CHG).

These products often leave behind a residue. This film can either neutralize the antiseptic's germ-killing power or, worse, trap bacteria right against your skin. For the best possible outcome, use only the products your care team provides or specifically approves for the 24 hours before your surgery.

The Goal: We're trying to create the cleanest possible canvas for the surgeon to work on. Following the specific skin prep protocol is a simple but incredibly powerful way to lower the bacterial count on your skin and reduce your infection risk.

What Do I Do If I Think I Have an Infection?

If you spot any warning signs—we’re talking spreading redness, pain that’s getting worse instead of better, warmth around the incision, any kind of foul-smelling drainage, or a fever over 100.4°F (38°C)—do not wait. Call your surgeon's office immediately.

It’s a common mistake for patients to think, "I'll just give it another day and see if it gets better." This is a gamble you don't want to take. Early intervention is everything. An issue that could be resolved with a simple course of oral antibiotics can quickly escalate into a serious problem requiring hospitalization or another surgery if it's ignored. When it comes to post-op concerns, there is simply no such thing as being "too cautious."

The sheer scale of surgery performed each year really puts this into perspective. Globally, surgeons perform over 300 million procedures annually. Standardizing these simple prevention measures could prevent nearly half of all potential SSIs. We have solid data showing that when healthcare teams consistently follow evidence-based practices, infection rates drop significantly. You can read more about how prevention bundles reduce SSI rates on xiahepublishing.com.

Ultimately, your active participation is a non-negotiable part of a safe surgical outcome. By understanding your role and keeping an open line of communication with your healthcare team, you empower yourself to have the smoothest, healthiest recovery possible.


If you're dealing with a wound that just isn't healing right, don't wait for it to become a crisis. The team at Specialty Wound Care combines advanced diagnostics with expert clinical care to get you on the fastest path to recovery. Learn how our targeted treatments can make a difference at https://specialtywoundcare.com.

Integrating Cutting-Edge Allograft Therapies into Clinical Practice: A Comprehensive Guide

Primus Healthcare | December 26th, 2025


Integrating Cutting-Edge Allograft Therapies into Clinical Practice: A Comprehensive Guide

You’ve seen how stubborn wounds challenge even the best care teams. Traditional methods often fall short, leaving patients at risk and providers searching for better options. Integrating advanced allograft therapies into your clinical practice offers a powerful approach to improve healing rates and patient outcomes. This guide will walk you through practical steps to adopt these wound healing solutions with confidence. For further insights, explore this related article: [https://www.sciencedirect.com/science/article/pii/S8756328224002023].

Understanding Allograft Therapies

To tackle complex wounds effectively, it’s crucial to grasp the role of allograft therapies in wound care. Let’s delve into their benefits and types, setting the stage for successful integration into your practice.

Benefits of Allograft Therapies

Allograft therapies provide a natural scaffold that supports wound healing. These therapies are not just about filling gaps; they create an environment conducive to cell growth and tissue repair. For instance, using allografts can reduce healing time by up to 30%, allowing patients to recover more swiftly. Imagine offering your patients quicker relief and improved outcomes. This isn’t just about healing; it’s about enhancing overall quality of care.

Additionally, allografts are sourced from donors and undergo rigorous screening, ensuring safety and efficacy. This means you can trust in the reliability of the materials you’re using. By integrating these therapies, you can address wounds that seem resistant to traditional treatments, giving hope where it might have been lost.

Types of Allografts in Wound Care

Several allografts serve different wound care needs. Amniotic membrane allografts offer anti-inflammatory properties and promote re-epithelialization, making them ideal for chronic wounds. Their ability to provide a protective barrier while supporting tissue regeneration is unmatched.

Dermal allografts, on the other hand, are perfect for deeper wounds requiring structural support. These are often used in conjunction with other treatments and have shown remarkable results in rebuilding tissue layers.

Finally, bone allografts are essential in cases where structural integrity is compromised. Each type of allograft serves a unique purpose, and understanding these differences allows you to tailor your approach to the specific needs of your patients.

Integrating Allograft Therapies into Practice

Once you understand the types and benefits of allograft therapies, the next step is to incorporate them into your practice effectively. This integration involves preparation and precise implementation.

Preparing Your Clinical Practice

Before introducing allograft therapies, evaluate your current protocols. Are your staff trained in handling these materials? Staff education is crucial. Consider workshops and certifications to bring your team up to speed.

Next, assess your facility’s infrastructure. Do you have the necessary storage conditions? Allografts require specific environments to maintain their efficacy, and ensuring these conditions are met is vital.

Finally, engage with other healthcare professionals who have successfully integrated these therapies. Their insights can be invaluable. Building a network of experts not only enhances your practice but also provides a support system for troubleshooting any challenges that arise.

Implementing Allograft Procedures

With your practice prepared, focus shifts to procedure implementation. Start with patient selection; not every wound is suitable for allograft therapy. Identify cases where these therapies are most likely to succeed.

During procedures, precision is key. Ensure that all staff involved understand the protocol, from sterilization to application. Regular training sessions can help maintain high standards.

Post-procedure care is equally important. Monitor progress closely and adjust treatment plans as required. This proactive approach ensures the best outcomes for your patients and strengthens trust in your practice. For more on implementation strategies, refer to this insightful piece: [https://www.cgtlive.com/view/marinkovich-integrating-gene-therapy-clinical-practice-dermatologists].

Specialty Wound Care Solutions

Innovations like the Triple-Layer Allograft are transforming the landscape of wound care. Understanding these solutions and their technological underpinnings can elevate your practice’s offerings.

Triple-Layer Allograft Features

The Triple-Layer Allograft is a standout product designed for complex wounds. Its three layers provide distinct benefits: the outer layer acts as a barrier, the middle supports cellular growth, and the innermost layer promotes moisture retention. This combination accelerates healing and reduces infection risk.

This allograft is also FDA-compliant, ensuring it meets rigorous safety standards. Such compliance is important for both regulatory assurance and patient safety. Implementing this product can significantly enhance your wound care capabilities, offering patients faster recovery and fewer complications.

Enhancing Wound Healing Through Advanced Technology

Technology plays a pivotal role in modern wound care. Tools like the MolecuLight DX offer precise imaging and analysis, guiding treatment decisions with unprecedented accuracy. This device can pinpoint bacterial loads, enabling targeted interventions.

Incorporating advanced technology means you can provide comprehensive care. Patients benefit from precise diagnostics and tailored treatment plans, leading to better outcomes and satisfaction. Embracing these tools not only strengthens your practice but positions you as a leader in innovative wound management.

By understanding and integrating these elements, your practice can not only meet but exceed patient expectations. This comprehensive approach to wound care ensures you stay at the forefront of medical advancements, continually improving patient outcomes. For further reading, explore this resource: [https://pmc.ncbi.nlm.nih.gov/articles/PMC12067467/].

Visit now

A Practical Guide on How to Care for Surgical Wounds

Primus Healthcare | December 26th, 2025


Caring for a new surgical wound means keeping it clean and dry, changing the dressing exactly as you were told, and keeping a sharp eye out for signs of trouble, like spreading redness or any pus. Those first 72 hours are everything—they really set the tone for how well and how quickly you'll heal.

Your First 72 Hours of Post-Op Wound Care

Coming home with a surgical wound can be a little nerve-wracking. That initial period right after your procedure is when your body is working its hardest and what you do directly impacts how you heal. For the first three days, the goals are straightforward but absolutely vital: keep the incision protected from germs, manage any initial fluid, and give your body the best possible environment to start knitting itself back together.

Knowing what to expect can make a world of difference. It's completely normal to see a bit of mild redness and swelling right around the incision. You may also spot a small amount of clear or light pinkish fluid (we call this serosanguinous drainage) on that first dressing. This is just a sign of your body's natural healing response kicking into gear.

Setting Up Your At-Home Care Station

Before you even think about changing a dressing, get prepared. Having all your supplies in one clean, easy-to-reach spot will prevent a frantic search later and seriously cuts down on the risk of contamination.

Here’s what you'll want on hand:

  • Sterile Dressings: Get more than you think you'll need of the specific type your surgeon recommended, whether that's gauze pads, non-stick pads, or transparent films.
  • Medical Tape: Paper tape is usually the kindest to your skin.
  • Sterile Saline or Prescribed Cleanser: Don't reach for hydrogen peroxide or alcohol unless your doctor specifically told you to. They can actually harm the delicate new tissue.
  • Clean Towels or Gauze: You'll need these for gently patting the area dry.
  • Disposable Gloves: A must-have. A fresh pair for every dressing change is non-negotiable.
  • Scissors: Keep a clean pair of scissors just for cutting tape or dressings.

With your station ready, you can handle dressing changes calmly and cleanly, which is a huge part of a successful recovery.

Managing the Initial Dressing and Cleansing

Your surgeon will give you precise instructions on when to do that first dressing change. Most of the time, they’ll want you to leave the original surgical dressing on for the first 24 to 48 hours. Think of it as a protective seal. Don’t take it off early unless it gets completely soaked through or wet.

When the time comes, be gentle. Start by washing your hands thoroughly with soap and water, then pop on a pair of disposable gloves. Carefully loosen the tape on the old dressing, always pulling parallel to the skin to avoid causing irritation. If it's being stubborn, a little sterile saline on the edges of the tape can help it release.

Key Takeaway: Never, ever rip off a dressing like a band-aid. You risk tearing away newly forming skin cells and reopening the incision, which can be a major setback for healing.

Once the old dressing is off, take a good look at the wound. You're watching for those normal signs we talked about—a little redness and minimal clear fluid. To clean it, gently wash the area with mild soap and water or whatever solution your doctor prescribed. Avoid scrubbing right on the incision itself. Pat the area completely dry with a clean towel or sterile gauze before putting on the new dressing.

This kind of careful, gentle approach creates a solid foundation for healing. It perfectly aligns with the goals of advanced home wound collaborative care, which is all about empowering you to achieve the best possible healing outcomes right from the start. By mastering these first few steps, you become the most important person on your recovery team.

Mastering the Wound Dressing Change

Changing a surgical dressing at home can feel like a high-stakes job, and it’s completely normal to feel a little anxious about it. But with the right approach and a little practice, it's a skill you can absolutely master, putting you in the driver's seat of your own recovery.

Let's walk through the process together. These are the same steps we teach patients and caregivers every day to build their confidence and ensure the wound has the best possible environment to heal.

Getting Set Up for Success

First things first: create a clean, dedicated space. Clear off a tabletop or counter and give it a good wipe-down with a disinfectant.

Next, lay out all your supplies on a clean paper towel so everything is within easy reach. This usually includes:

  • Sterile dressings (the right size for your wound)
  • Any prescribed ointment or cream
  • Medical tape
  • Disposable gloves
  • Sterile saline or cleansing solution, if your doctor recommended it

Having everything organized from the start prevents any last-minute scrambling and helps keep the whole process sterile and smooth.

The Gentle Removal Process

How you take the old dressing off is just as important as how you put the new one on. After washing your hands thoroughly and putting on a fresh pair of gloves, start by gently loosening the edges of the medical tape.

Here’s a pro tip: always pull the tape parallel to your skin, not up and away from it. This simple technique makes a huge difference in preventing skin irritation and keeps you from accidentally pulling on the delicate, healing tissue underneath. If a stubborn spot on the dressing is stuck, don’t force it. A few drops of sterile saline on the adhesive will usually help it release without a fight.

Cleansing and Preparing the Wound

With the old dressing off, take a moment to look at the wound. This is your chance to check for the signs of healthy healing we discussed earlier.

When it comes to cleaning, always follow your surgeon's specific instructions. Most often, this involves gently cleansing with either mild soap and water or a prescribed sterile saline solution. Use a fresh piece of sterile gauze for each wipe, starting at the center of the incision and moving outward. This simple motion prevents you from dragging germs from the surrounding skin into the wound.

After cleansing, gently pat the area completely dry with another piece of new, sterile gauze.

The key is to be gentle. Never scrub the incision line. Your goal is simply to remove any loose debris or dried drainage, not to disrupt the fragile new cells that are working hard to close the wound.

This simple, three-step mental checklist—assess, cleanse, protect—is a great way to approach every dressing change.

Diagram showing three essential steps for initial wound care: assess, cleanse, and protect.

This visual is a perfect reminder of the core principles of wound care, ensuring you don't miss a critical step in keeping things on track.

The Importance of a Moist Healing Environment

Modern wound care has come a long way from the old advice to just "let it air out." We now have extensive research showing that keeping surgical wounds properly moist can dramatically speed up healing.

In fact, studies show 40-50% faster closure rates for wounds managed with a moist environment compared to traditional dry dressings. This is incredibly important, as poor management of wound fluid (called exudate) is responsible for 25% of all delayed healing cases. This is why your doctor may have prescribed an advanced dressing.

Understanding Different Types of Wound Dressings

It can be helpful to understand a bit about the different types of dressings out there. Your provider chose a specific one for a reason, and this table breaks down some of the most common options and what they do best.

Dressing Type Best For Key Benefit Typical Change Schedule
Gauze Simple, dry wounds with minimal drainage. Absorbent, readily available, and cost-effective. Daily or more often if it becomes wet.
Transparent Film Securing IVs or covering minor wounds with no drainage. Allows for easy wound inspection without removal. Every 3-7 days, depending on the wound.
Foam Dressings Wounds with moderate to heavy drainage. Highly absorbent, provides cushioning and maintains moisture. Every 3-5 days, or when saturated.
Hydrocolloids Wounds with light to moderate drainage. Forms a gel to create a moist environment; self-adherent. Every 3-7 days.
Hydrogels Dry wounds needing added moisture. Donates moisture to the wound bed, promoting cell growth. Every 1-3 days.

This isn't an exhaustive list, but it gives you a good idea of why different dressings are used for different situations, all with the goal of creating the perfect healing environment.

Applying the New Dressing

Now for the final step. With the wound clean and dry, it's time to apply any prescribed antibiotic ointment. Use a sterile cotton swab—never your finger—to apply a thin, even layer directly over the incision line, just as you were instructed.

Finally, place the new sterile dressing over the entire wound. Make sure it extends at least one inch beyond the incision on all sides to create a good seal. Secure it firmly with medical tape, ensuring the dressing lies flat and smooth against your skin without any wrinkles.

And that's it! You've created a secure, sterile barrier that protects the wound from contamination and allows it to heal undisturbed until the next change.

How to Spot and Prevent Surgical Site Infections

A watercolor illustration of an abdomen with an infected surgical wound, a thermometer, and a smartphone for remote care.

An infection is probably one of the biggest worries after surgery, but it’s also highly preventable. The best defense you have is knowing exactly what to look for so you can catch a problem before it becomes a major setback. Think of it this way: vigilance is your most powerful tool in the weeks after your procedure.

Your body’s healing process naturally involves some inflammation, so seeing a little redness right along the incision is totally normal. An infection, though, looks and feels different. It’s all about spotting the shift from normal healing to a potential issue, and the sooner you do, the better.

Decoding the Early Warning Signs of Infection

It helps to go beyond a simple checklist and understand why certain symptoms are red flags. This is your guide to interpreting what your body is trying to tell you about the healing process happening just under the skin.

During your daily dressing changes, keep a close eye out for these specific changes:

  • Spreading Redness and Warmth: A thin pink line is one thing, but redness that starts to creep outward from the incision is a classic sign of trouble. If the skin around the wound feels noticeably warmer than the surrounding area, it’s a sign your body is rushing blood flow there to fight off bacteria.
  • Increased or Worsening Pain: Post-op pain should get a little better each day. If it suddenly gets worse, turns into a constant throbbing ache, or your pain meds stop working, that's a significant warning.
  • Foul Odor or Unusual Drainage: A healthy wound shouldn't have much of a smell. Any foul, strangely sweet, or pungent odor coming from the dressing is a major red flag. Likewise, while a little clear or light pink fluid is okay at first, any thick, cloudy, yellow, or green pus (purulent drainage) signals an active infection.
  • Fever or Chills: A fever (usually over 100.4°F or 38°C) means your body is launching a full-scale defense. This isn't just a local issue anymore; it suggests the infection might be spreading.

Crucial Takeaway: Never "wait and see" if you suspect an infection. The moment you notice any of these signs, your first and only move should be to call your surgeon or healthcare provider. Getting on top of it early is everything.

Proactive Strategies for Preventing Infection

Of course, the best way to deal with an infection is to stop it from ever starting. Your daily habits and attention to detail are what protect your surgical wound from contamination, and thankfully, the steps are pretty straightforward.

Remember, surgical site infections complicate up to 5% of procedures worldwide, affecting hundreds of thousands of patients in the U.S. alone. But simple things, like keeping the wound covered with a sterile dressing and changing it exactly as directed, can slash your risk. Untreated infections can lead to serious issues and readmission rates as high as 20-30%. You can learn more about the importance of effective wound management and its impact on the healthcare system from ongoing market research. Explore detailed insights on the wound care industry from Spherical Insights & Consulting.

Your Action Plan for Protection

Here are the most effective, evidence-based steps you can take to keep infection at bay:

  1. Practice Meticulous Hand Hygiene: This is the big one. Always, always wash your hands with soap and water for at least 20 seconds before and after you touch your wound or handle any dressing supplies. If you're not near a sink, an alcohol-based hand sanitizer is your next best bet.

  2. Follow Your Care Plan Exactly: Your surgeon’s instructions are not just suggestions; they’re tailored specifically to you. Stick to the guidelines for cleaning the wound, applying ointments, and changing dressings. Don't go rogue and use things like hydrogen peroxide or alcohol unless you've been told to—they can actually harm the new, healing tissue.

  3. Protect the Wound from Contamination: Your job is to keep that dressing clean and dry at all times. This means no baths, hot tubs, or swimming until your doctor gives you the green light. When you shower, use a good waterproof cover to create a solid seal around the dressing.

In a clinical setting, advanced tools are also helping providers spot trouble earlier than ever. New technologies can actually see bacterial problems before they're visible to the naked eye. You can learn more about how a point-of-care wound imaging device detects elevated bacteria right here on our blog. By combining smart prevention habits with careful daily monitoring, you create the safest possible environment for your body to heal up right.

The Role of Nutrition in Wound Healing

A plate featuring grilled chicken, orange, spinach, almonds, and yogurt, labeled with protein, Vitamin C, and zinc.

While mastering dressing changes and watching for infection are vital, true healing starts from the inside out. The food you eat literally provides the raw materials your body needs to rebuild tissue, fight off germs, and get you back on your feet.

Think of your body as a construction site after an earthquake. You can't rebuild without a steady supply of steel, concrete, and lumber. The same goes for healing—without the right nutritional building blocks, the entire project stalls.

Proper nutrition isn't just a nice-to-have; it's an active and powerful part of your recovery plan. When your body is healing, its demand for certain nutrients skyrockets, and meeting that demand can dramatically speed up the whole process.

Fueling Your Recovery with Key Nutrients

Your post-surgery diet should zero in on a few "power nutrients" that play a direct role in tissue repair and immune function. Prioritizing these foods gives your body the specific tools it needs to knit your wound closed and regain strength.

Here are the most important players on your plate:

  • Protein: This is the absolute star of the show. Your body uses protein to build and repair every single tissue. After surgery, your protein needs can jump significantly. Go for lean sources like chicken, fish, eggs, beans, and Greek yogurt.
  • Vitamin C: This vitamin is crucial for making collagen, the protein that acts like scaffolding for new skin. You'll find it in citrus fruits, bell peppers, broccoli, and strawberries.
  • Zinc: An essential mineral for cell growth and immune response, zinc helps your body build new tissue and defend against infection. Good sources include nuts, seeds, lean red meat, and whole grains.
  • Vitamin A: Important for cell development and a strong immune system, Vitamin A is found in sweet potatoes, carrots, and leafy greens like spinach.

By consciously building your meals around these foods, you’re not just eating—you're actively participating in your own healing. A simple breakfast of Greek yogurt with berries and nuts, for example, delivers a powerful combination of protein, Vitamin C, and zinc to get your day started right.

The Impact of Diet on Healing Speed

The link between what you eat and how fast you heal is incredibly direct. Nutritional deficiencies are a major reason for recovery delays. In fact, poor nutrition is linked to delayed wound closure in 30-40% of cases. Find out more about the wound care market and healing factors at Coherent Market Insights.

Making smart food choices can boost the healing process in very real ways. A daily intake of 60-80 grams of protein, for instance, can increase collagen synthesis by 50%, helping your wound close faster and stronger.

Similarly, getting enough zinc (15-30mg/day) and Vitamin C (around 500mg) is critical. Deficiencies in these key nutrients are known to impair recovery in about 20% of chronic wound cases.

Your plate is one of your most effective recovery tools. Every meal is an opportunity to either accelerate or hinder your body’s healing progress.

Lifestyle Factors That Can Slow You Down

Just as certain foods can help, some habits can actively work against your body's efforts to heal. It’s important to know what these roadblocks are so you can manage them during your recovery.

Two of the biggest culprits are smoking and uncontrolled blood sugar. Smoking restricts blood flow by constricting your blood vessels, which means less oxygen and fewer nutrients can actually reach your wound. This oxygen-starved environment is a recipe for slow healing and a higher infection risk.

For anyone with diabetes, keeping blood sugar stable is non-negotiable. High blood glucose levels (anything consistently over 180mg/dL) can impair the function of your white blood cells—your body's primary defense against bacteria. This can increase your infection risk by two to three times. Working closely with your doctor to manage your blood sugar after surgery is one of the most important things you can do to support a smooth recovery.

When to Seek Advanced Professional Wound Care

You’ve been following all the rules. You’ve mastered the art of the dressing change, you’re watching your surgical wound like a hawk, and you’re sticking to your discharge instructions. But what happens when, despite all your best efforts, the healing process just… stops?

Sometimes, a wound can hit a wall, signaling that it needs more than just good home care. Knowing when to raise your hand and ask for specialized help is one of the most important parts of a successful recovery. A stalled wound isn’t a sign you’ve done something wrong; it’s a sign that underlying factors are creating roadblocks that require a more advanced game plan.

Catching these signs early can turn a potential major complication into a minor, manageable setback.

Identifying Signs of Stalled or Complicated Healing

Your body is pretty good at sending signals when a wound is struggling. The key is knowing how to listen and what to look for. If you notice any of the following red flags, it’s time to pick up the phone and call a professional.

  • It’s Not Getting Smaller: A healthy wound should be in a constant state of slowly closing up. If you look at your wound over a two-week period and see no real change in size—or worse, it’s getting bigger—that’s a classic sign that healing has stalled.
  • Drainage That Won’t Quit (Or Gets Worse): Some drainage is normal in the beginning. But if it continues past the first week, increases in amount, or changes to a thick, cloudy, or foul-smelling fluid, that’s a big problem.
  • Lingering Redness and Warmth: The initial inflammation should calm down after the first week or so. If that redness and warmth stick around, or if they suddenly come back, it points to a chronic inflammatory response that’s actively blocking tissue repair.
  • The Wound Bed Looks Stagnant: A healthy, healing wound base should look pink or red and have a slightly bumpy texture (this is called granulation tissue). A wound bed that looks pale, dark, or is covered in a layer of yellowish film isn't making progress.

If you spot any signs of infection or feel your wound just isn't healing right, getting a professional opinion quickly is key. For fast evaluations, options like online urgent care services can be incredibly helpful.

What Advanced Wound Care Looks Like

When your recovery hits a snag, a specialty wound care provider brings a completely different level of analysis and treatment to the table. We’re not just talking about fancier bandages; we’re talking about sophisticated tools and therapies designed to figure out why you’re not healing and kickstart the process again.

A specialist starts with a deep dive into the root cause. They’ll look at everything—your overall health, your nutrition, and any underlying conditions like diabetes or vascular disease that might be getting in the way.

Key Insight: Advanced wound care is about treating the patient, not just the hole. It's a holistic approach that connects the dots between your wound and your overall health to build a targeted, effective treatment plan that actually works.

Diagnostic Tools and Innovative Therapies

To get the full picture, specialists use diagnostic tools that see things the naked eye can’t. For instance, fluorescence imaging can light up high concentrations of bacteria on the wound’s surface, helping guide a much more precise cleaning. Rapid diagnostic tests can identify specific germs and tell us which antibiotics will work best, often in a fraction of the time of a traditional culture.

Once the "why" is clear, the treatments are a world away from what you have at home. One of the most powerful tools in our arsenal is the use of amniotic membrane allografts. Think of these as a natural, biological scaffold placed over the wound. They’re packed with essential growth factors and proteins that signal your own cells to get to work rebuilding tissue.

This is just one of many advanced treatment options a specialty wound care provider can deploy to get your healing back on track.

Just as important is the care coordination. A specialty provider acts as the quarterback for your wound, working directly with your surgeon and primary care doctor to ensure everyone is on the same page. They handle the complex communication and documentation so the entire care team is aligned. This teamwork lifts the burden off your shoulders, letting you focus on one thing: getting better.

Common Questions After Surgery

Even with the best discharge papers, you’re bound to have questions once you get home. It's completely normal. Let's walk through some of the most common things patients ask about caring for a surgical wound, so you can feel more confident in your recovery.

Getting a handle on these day-to-day details is a huge part of healing well. Knowing what to expect reduces a ton of anxiety and helps you know when something is normal and when it's time to call the doctor.

Can I Shower, and How Do I Keep My Wound from Getting Wet?

This is almost always the first question I hear. Most surgeons will clear you to shower within 24 to 48 hours after your operation, but there’s one non-negotiable rule: the incision must stay bone dry.

Your best bet is a high-quality waterproof dressing that creates a complete seal around the entire wound. When you're in the shower, don't let the spray beat directly on the dressing. Just let the water run gently over the area.

Once you’re out, carefully pat the skin around the dressing dry with a clean, soft towel.

Critical Safety Tip: If that dressing leaks and moisture gets inside, you need to change it immediately. A damp environment is the perfect breeding ground for bacteria, which seriously spikes your risk of infection.

Also, it’s crucial to avoid submerging the wound. That means absolutely no baths, hot tubs, or swimming pools until your doctor gives you the green light. Soaking a healing wound is one of the fastest ways to introduce an infection.

What Kind of Pain Should I Expect?

It's totally normal to feel some pain, tenderness, or a pulling sensation around your incision, especially in that first week. This should be manageable with the pain medication you were prescribed and should get a little better each day.

The type of pain is what you want to pay attention to. A dull ache that fades over time is standard. What isn't standard is pain that suddenly gets much worse, becomes a sharp or throbbing ache, or doesn't improve with your medication.

Pain that feels way out of proportion to how the wound looks is a big red flag. If it comes with other symptoms like a fever or a bad smell, it could signal a complication. Don't wait—contact your provider right away.

Why Is My Surgical Wound So Itchy?

I know it's incredibly annoying, but an itchy surgical wound is usually a good thing! Itching is a classic part of the healing process. It often means the tiny nerve endings in your skin are waking back up and your body is busy building new tissue.

No matter how intense the urge, you absolutely must not scratch. Scratching can tear the fragile new skin, introduce bacteria from under your fingernails, and even pop open your incision.

For some relief, try one of these tricks instead:

  • Gently tap or pat the skin next to the wound, not on it.
  • Apply a cool, clean compress to the surrounding skin for a few minutes.
  • Make sure your dressing isn't on too tight, as that can sometimes make things worse.

If the itching comes with a new rash or spreading redness, you might be having an allergic reaction to the dressing adhesive or an ointment. That's something to let your doctor know about.

How Long Until My Surgical Wound is Fully Healed?

Healing is definitely a marathon, not a sprint, and it happens in stages. The timeline is different for everyone and depends on the surgery you had, the size of the wound, your overall health, and how closely you follow your post-op instructions.

Generally speaking, the skin edges should be sealed up in about two to three weeks.

But the real work happens under the surface, and that takes much longer. The deeper tissues will continue to remodel and gain strength for months. Your scar will probably look pink and a bit raised at first, then slowly fade and flatten over the next 6 to 18 months.

The best thing you can do to support this process is stick to your surgeon's advice on nutrition, activity, and wound care. For patients or caregivers who might need to translate medical documents like discharge instructions or prescriptions, using professional medical document translation services can be incredibly helpful for ensuring everything is understood correctly.


At Specialty Wound Care, we know that expert guidance is key to a safe and speedy recovery. If your wound isn’t healing like it should or you need more advanced support, our specialists are here. We use advanced diagnostics and proven therapies to get you back on your feet faster. Learn more about our approach at https://specialtywoundcare.com.

Top Nutrition Tips for Enhanced Wound Healing

Specialty Wound Care | December 25th, 2025


Top Nutrition Tips for Enhanced Wound Healing

Wound healing nutrition plays a crucial role in speeding recovery and improving patient outcomes. Many healthcare providers overlook how targeted nutrition supports tissue repair and immune function. In this post, you’ll find clear, practical tips to enhance wound management through diet, backed by Specialty Wound Care’s expertise in advanced wound care solutions. Let’s explore how the right nutrients can make a measurable difference in healing. For more information, visit this resource.

Importance of Nutrition in Wound Healing

Nutrition isn’t just about maintaining a healthy weight; it’s a powerful tool in wound recovery. The right nutrients can significantly impact the healing process, helping you or your patients recover faster.

Role of Proteins and Amino Acids

Proteins are the building blocks of tissue repair. They help form new skin and muscle cells. Your body needs them to rebuild damaged areas.

  • Protein Intake: Aim for 1.2 to 1.5 grams of protein per kilogram of body weight daily. This supports skin and muscle restoration.

  • Amino Acids: Amino acids like arginine and glutamine are particularly helpful. They aid in collagen production, a vital component of skin repair.

Integrate lean meats, fish, eggs, and dairy into meals. These foods are rich in essential proteins and amino acids. If you’re on a plant-based diet, consider beans, lentils, and tofu. Remember, your protein needs may increase with severe wounds. Learn more about the role of proteins in wound healing.

Vitamins Essential for Recovery

Vitamins are crucial for wound healing. They serve as antioxidants and support immune health.

  • Vitamin C: Essential for collagen synthesis, it also helps fight infection. Citrus fruits, strawberries, and bell peppers are rich in this vitamin.

  • Vitamin A: Supports skin cell production. Carrots, sweet potatoes, and spinach are excellent sources.

These vitamins help speed up the healing process by reducing inflammation and supporting new tissue formation. Explore the importance of vitamins in wound healing.

Mineral Support in Healing

Minerals also play a significant role in the healing process. They work at the cellular level to rebuild tissue and support overall health.

  • Zinc: Vital for skin integrity and immune function. A deficiency can delay healing. Include meat, shellfish, and seeds to boost zinc intake.

  • Iron: Supports oxygen delivery to healing tissues. You can find iron in red meat, beans, and fortified cereals.

These minerals are essential. Without them, your body can’t efficiently repair wounds. Keep your dietary choices varied to ensure you get a wide array of nutrients. Check out more on minerals for wound healing.

Advanced Wound Care Strategies

Combining nutrition with advanced wound care techniques can further enhance healing. Specialty Wound Care offers a blend of modern technology and personalized care.

Integrating Nutrition with Treatment

Nutrition and treatment must go hand in hand. While medical interventions address the physical aspects of wounds, nutrition tackles the internal.

  • Synergistic Approach: By aligning dietary plans with medical treatments, patients experience faster recovery.

  • Nutritional Assessments: Regular evaluations ensure nutrient needs are met, complementing medical care.

This integrated approach allows for comprehensive care, addressing both internal and external healing factors. Understand more about integrating nutrition with wound care.

Personalized Care Plans

Every patient is unique, and so are their healing needs. Personalization is key.

  • Tailored Nutrition Plans: Customize diets based on individual requirements and wound severity.

  • Adjustments: Modify plans as healing progresses, ensuring optimal support throughout recovery.

Personalized care ensures that all aspects of a patient’s recovery are addressed, from dietary needs to medical treatments.

Monitoring and Adjusting Approaches

Continuous monitoring is crucial for effective wound management. It allows for timely adjustments.

  • Regular Check-ups: Frequent evaluations help track progress and modify care plans as needed.

  • Feedback Loop: Patients and caregivers can provide insights, leading to better care strategies.

By staying vigilant, you can ensure that healing is on track and optimal care is provided.

Specialty Wound Care Expertise

Specialty Wound Care excels in delivering comprehensive solutions. Their expertise lies in combining modern technology with patient-centric care.

Comprehensive Patient Solutions

Specialty Wound Care offers a range of solutions to meet diverse patient needs.

  • Holistic Approach: They address both the physical and nutritional aspects of healing.

  • Collaborative Care: Working with healthcare professionals to provide top-notch wound management.

This comprehensive strategy ensures that patients receive complete care, from diagnosis to recovery.

Accelerating Healing with Technology

Modern technology plays a critical role in wound healing. Specialty Wound Care uses cutting-edge tools to enhance patient outcomes.

  • Advanced Equipment: Tools like MolecuLight DX provide detailed wound assessments.

  • Innovative Treatments: Techniques like triple-layer allografts support rapid healing.

These advancements ensure that patients get the best care possible, leading to quicker recoveries.

Improving Patient Outcomes

The ultimate goal is to improve patient outcomes. By combining expertise, technology, and nutrition, Specialty Wound Care achieves exceptional results.

  • Patient-Centric Care: Their focus is on achieving the best possible recovery for each patient.

  • Ongoing Support: Continuous care ensures that patients are supported throughout their healing journey.

By prioritizing patient outcomes, Specialty Wound Care sets itself apart as a leader in wound management. Remember, the longer you wait to address wounds, the more complex they can become. Prioritize care today to ensure the best outcomes.

Visit now

Uncategorized

The Definitive Guide to Wound Care Billing Codes

Primus Healthcare | December 25th, 2025


Getting your wound care billing codes right is non-negotiable for getting paid. It really comes down to choosing the correct code from three key categories: CPT codes for your procedures, ICD-10 codes for the patient's diagnosis, and HCPCS codes for supplies and products you use. For instance, you have to know the difference between procedural codes like 97597 for selective debridement and the surgical debridement series (11042-11047), which is based on how deep the tissue removal goes.

Your Quick Reference for Wound Care Codes

Trying to make sense of wound care billing can feel like learning a new language. This quick reference is your starting point—think of it as a cheat sheet for the most common codes you'll encounter in your daily practice. It's designed to help you quickly identify the right code family before you get bogged down in the finer details.

As a busy clinician or biller, you don't have time to waste. You need context, and you need it fast. Whether you're documenting the application of a skin substitute (CPT codes 15271-15278) or assigning a diagnosis for a diabetic foot ulcer, just knowing where to start is half the battle. This guide gives you that initial leg up.

Key Code Categories at a Glance

To build claims that don't get rejected, you have to be fluent in the function of each code type.

  • CPT (Current Procedural Terminology): These are your "action" codes. They describe the medical services and procedures you actually perform on the patient, like debridement or applying negative pressure wound therapy.

  • ICD-10 (International Classification of Diseases): These are your "why" codes. They establish medical necessity by describing the patient’s diagnosis—a pressure injury, a venous ulcer, you name it.

  • HCPCS (Healthcare Common Procedure Coding System): This category is for all the "stuff" you use. It covers supplies, products, and some services that CPT codes don't, such as specialized dressings, skin grafts, and certain types of equipment.

To make things even easier, the table below provides a quick snapshot of some of the most frequently used codes you'll come across.

Frequently Used Wound Care Codes at a Glance

Here’s a look at some of the heavy hitters in wound care coding, broken down by category. Use this as a quick reference to orient yourself.

Code Category Example Code(s) General Description Critical Billing Tip
CPT 97597, 97598 Active wound care management (selective debridement) Bill 97597 for the first 20 sq cm and 97598 for each additional 20 sq cm. Documentation must prove medical necessity.
CPT 11042-11047 Surgical debridement based on tissue depth Code selection is strictly based on the deepest level of tissue removed, not the wound's surface area.
ICD-10 L89.- series Pressure ulcers (by site and stage) Be as specific as possible. Code to the highest stage observed and specify the exact anatomical location (e.g., L89.153).
ICD-10 L97.- series Non-pressure chronic ulcers of lower limb Link the ulcer to the underlying condition (e.g., atherosclerosis, venous insufficiency) using secondary codes.
HCPCS A6000-A6459 Dressings (e.g., foam, hydrocolloid) Check payer policies. Many dressings are bundled into the procedure payment, especially in a facility setting.
HCPCS Q4100-Q4255 Skin substitutes and cellular tissue-based products (CTPs) Pre-authorization is almost always required. Document the exact size of the product used and any wastage.

This table isn't exhaustive, of course, but it covers the codes that tend to pop up most often. Mastering these will give you a solid foundation for tackling more complex billing scenarios.

Decoding CPT Codes for Wound Care Procedures

Think of Current Procedural Terminology (CPT) codes as the language you use to translate your hands-on clinical services into billable actions. Getting these wound care billing codes right is absolutely essential for proper reimbursement, but the lines between similar procedures can get blurry fast. Let me tell you, misinterpreting these codes is one of the most common reasons claims get denied, so precision is everything.

The single most critical distinction you need to master is the one between selective and surgical debridement. Getting this right determines which code series you'll use and has a direct, significant impact on what you get paid.

This simple flowchart breaks down the main categories you'll be working with.

A wound care coding decision tree flowchart showing procedures, diagnoses, and supply coding options.

As you can see, it separates the core parts of a claim—Procedure (CPT), Diagnosis (ICD-10), and Supply (HCPCS)—into clear paths. Following this logic helps ensure you capture every billable aspect of the care you provided.

Selective Debridement CPT Codes 97597 and 97598

Selective debridement is all about removing specific, devitalized tissue—things like slough, fibrin, or biofilm—without touching the surrounding healthy tissue. The keyword here is "selective." You're carefully picking out only the bad stuff.

  • CPT 97597: This is your code for the first 20 sq cm of a wound you're selectively debriding. This could involve using high-pressure water jets, scissors, or a scalpel to remove that superficial nonviable tissue.
  • CPT 97598: This is an add-on code. You'll use it for each additional 20 sq cm (or any part of it) that you treat in the same session. It can't be billed alone; it always has to be paired with 97597.

For example, if you debride a 45 sq cm wound, your claim would show 97597 x 1 for the initial 20 sq cm and 97598 x 2 for the remaining 25 sq cm.

Surgical Debridement CPT Codes 11042 to 11047

Surgical debridement is a much more invasive procedure. We use these codes when a provider has to cut into and remove viable tissue to get to the deeper, nonviable structures below. The code you choose is based entirely on the deepest layer of tissue removed, not the depth of the wound itself.

Crucial Distinction: I can't stress this enough: your documentation must specify the tissue layer you debrided to. If you bill a CPT 11044 (bone), but your notes only mention debriding subcutaneous tissue, that claim is getting denied—even if the wound does, in fact, go down to the bone.

Here’s how the hierarchy breaks down:

  • 11042 (Subcutaneous Tissue): Debridement stops at the subcutaneous fat layer.
  • 11043 (Muscle/Fascia): Debridement goes deeper, into the muscle or fascia.
  • 11044 (Bone): Debridement continues all the way down to the bone.

Just like selective debridement, each of these primary codes has a corresponding add-on code (11045, 11046, 11047) for every additional 20 sq cm.

Codes for Negative Pressure Wound Therapy

Negative Pressure Wound Therapy (NPWT) has its own family of CPT codes. The main difference between them comes down to the type of equipment you use and the total surface area of the wounds being treated.

  • 97605: NPWT using durable medical equipment (DME) for a total wound surface area of ≤ 50 sq cm.
  • 97606: Same procedure, but for a larger surface area of > 50 sq cm.
  • 97607: NPWT using disposable, non-DME equipment for a total surface area of ≤ 50 sq cm.
  • 97608: The disposable equipment equivalent for a surface area > 50 sq cm.

For these NPWT codes, accurate documentation of both the wound measurements and the specific type of equipment is absolutely vital for choosing the correct code and getting paid.

Assigning Specific ICD-10 Codes for Medical Necessity

Think of it this way: CPT codes tell a payer what you did, but ICD-10 codes explain why you did it. They are the absolute bedrock of medical necessity, creating a direct, defensible link between the patient's diagnosis and the treatment you provided.

Without a precise ICD-10 code, even the most accurately reported procedure will face heavy scrutiny and, frankly, a likely denial. A payer needs to see that the diagnosis justifies the service. A claim for surgical debridement (CPT 11043) is much stronger when it's linked to a highly specific diagnosis like L97.523 (Non-pressure chronic ulcer of other part of left foot with necrosis of muscle) than something vague. That level of detail tells the payer exactly why an invasive procedure was the right call.

Coding for Common Wound Types

The key to getting ICD-10 coding right in wound care is granularity. You have to code to the highest level of specificity available, capturing crucial details like laterality (left vs. right), the exact anatomical location, severity, and any underlying conditions. This isn't optional; it's a non-negotiable part of wound care billing codes.

  • Pressure Injuries (L89.- series): These codes are broken down by both location and stage. It's critical to select the code that reflects the deepest tissue damage you observe. For example, an unstageable pressure injury on the right buttock due to a suspected deep tissue injury gets coded as L89.310.

  • Diabetic Ulcers (E08-E13 with L97.-): Coding for diabetic ulcers is a two-step process. First, you have to code the underlying diabetes (e.g., E11.621, Type 2 diabetes mellitus with foot ulcer). Then, you follow that with the specific ulcer code, like L97.512 (Non-pressure chronic ulcer of right heel and midfoot with fat layer exposed).

  • Venous Stasis Ulcers (I87.2 with L97.-): This works just like diabetic ulcers. You must first code the underlying condition—in this case, venous insufficiency (I87.2). Then, you pair it with the specific ulcer code, such as L97.214 (Non-pressure chronic ulcer of right calf with necrosis of bone).

Linking Diagnosis to Procedure

Your ultimate goal is to create a clear, logical story between the diagnosis and the treatment. A precise ICD-10 code acts as the justification for the CPT code you bill. It effectively tells the payer, "This condition required this specific action."

Billing Best Practice: Always sequence the ICD-10 code that represents the primary reason for the encounter first. If a patient comes in for debridement of a venous ulcer, the ulcer code (L97.-) should come before the venous insufficiency code (I87.2) on the claim form.

Let's look at a quick example. A patient has a traumatic wound on their left lower leg, and you can see exposed muscle.

  • Diagnosis Code: S81.812A (Laceration without foreign body, left lower leg, initial encounter) would be paired with a secondary code that indicates exposed muscle.
  • Procedure Code: 11043 (Debridement, muscle/fascia, first 20 sq cm).

See how that works? The diagnosis directly supports the need for a muscle-level debridement. This creates a claim that makes sense and is far less likely to get kicked back by payers. Mastering this connection is absolutely fundamental to successful reimbursement.

Navigating HCPCS Codes for Products and Supplies

While CPT codes cover the procedures you perform, they don't tell the whole story. What about the advanced products and supplies that are the backbone of modern wound care? That’s where the Healthcare Common Procedure Coding System (HCPCS) Level II codes come into play.

These alphanumeric codes are your key to billing for items like specialized dressings, compression systems, and cellular and/or tissue-based products (CTPs). Getting these wound care billing codes right is absolutely essential to making sure your clinic is reimbursed for all the materials you use.

Think about it—high-cost items like CTPs can be a huge expense. If you're not coding for them correctly, you're leaving significant revenue on the table. Unlike procedural billing, HCPCS coding for supplies often demands meticulous documentation: the product's name, its size, and exactly how much was used versus how much was wasted. It’s all in the details.

Assortment of wound care products including a dressing, vial, and a box highlighting HCPCS codes.

Coding for Cellular and Tissue-Based Products

Cellular and Tissue-Based Products, which many people call "skin substitutes," are billed using HCPCS "Q" codes. These codes are incredibly specific to the product type and always require precise documentation to prove medical necessity. In my experience, payers almost universally demand pre-authorization for these advanced biologics, so don't even think about applying one without it.

You'll run into a few common CTP categories:

  • Amniotic Membranes (e.g., Q4137, Q4145): These codes often get granular, specifying whether the product is a dehydrated or cryopreserved allograft.
  • Allografts/Xenografts (e.g., Q4102, Q4107): These cover grafts sourced from either human or animal tissue.
  • Synthetic Skin Substitutes (e.g., Q4101): This category is for bioengineered products designed to kickstart the healing process.

Let's walk through a real-world example. Say you have a patient with a stubborn diabetic foot ulcer and you apply a 16 sq cm dual-layer allograft. Your claim needs both the application code (like CPT 15275) and the product code (e.g., Q4137 x 16 units). Each square centimeter is billed as a single unit. To make sure you get reimbursed properly, you can learn more about the specific documentation needed for a dual-layer allograft in our detailed guide.

Dressings and Compression Systems

Billing for dressings (A6000-A6459) can feel like navigating a maze because of tricky payer policies and bundling rules. In a hospital or facility setting, the cost of simple dressings is usually just baked into the procedure payment. But specialized dressings or supplies you send home with the patient might be separately billable.

Key Takeaway: Always, always check the payer-specific guidelines. A Medicare Local Coverage Determination (LCD) might have completely different rules for dressing reimbursement than a commercial plan. Never assume a product is billable without verifying it first.

It's a similar story for the multi-layer compression systems we use to treat venous ulcers. You have to use the right HCPCS code for the job:

  • A6453: High compression system (think three-layer).
  • A6454: Moderate compression system (a two-layer setup).
  • A6455: Self-adherent, elastic bandage compression system.

The code you choose hinges on the product's technical specs. Your clinical notes absolutely must justify the medical necessity for that specific compression level, tying it directly to the patient’s diagnosis of venous insufficiency. Without that clear link, you can bet that claims for these supplies will get denied.

Using Modifiers Correctly to Prevent Denials

Think of modifiers as the clarifying details in your billing story. These vital two-digit codes add essential context to your CPT codes, explaining the unique circumstances of a patient encounter. Using them correctly is one of the most effective ways I've seen to prevent automatic claim denials and ensure your reimbursement accurately reflects the complex services you provide.

Without the right modifier, a payer’s automated system can easily—and incorrectly—flag a legitimate service as a duplicate or bundled component. For instance, billing an Evaluation and Management (E/M) service on the same day as a debridement without modifier -25 is a guaranteed denial. These small but mighty codes are absolutely crucial for clean wound care billing codes.

Modifier 25: Significant and Separately Identifiable E/M Service

Modifier -25 is arguably the most important—and most scrutinized—modifier in wound care. You must append it to an E/M code whenever you perform a significant, separately identifiable evaluation on the same day as a minor procedure. It tells the payer, "Hey, I did more than just the procedure here."

You'll need to use Modifier -25 when:

  • A new patient requires a full workup before their first debridement.
  • An established patient presents with a new, unrelated complaint that requires assessment.
  • An established patient’s condition shows a significant change, requiring a new treatment plan that goes beyond the scheduled procedure.

Crucial Documentation Tip: Your note has to back this up. It must clearly separate the E/M service from the procedural work. I always recommend creating a distinct section in your documentation for the E/M component that details the history, examination, and medical decision-making, completely separate from the pre-procedure assessment for the debridement.

Modifier 59: Distinct Procedural Service

Next up is Modifier -59, which you’ll use to identify a procedure or service that is distinct or independent from other services performed on the same day. This modifier is your way of signaling to the payer that a procedure wasn't part of a bundled set and should be paid separately.

This often comes into play for procedures on different anatomical sites or during separate patient encounters on the same day. For surgical debridement (11042-11047), if you debride two wounds to different depths, you code the deepest wound first. Then, you code the second, shallower debridement with modifier -59 to indicate it was a distinct procedure on a separate site.

Example Scenario:
Imagine a patient has a deep ulcer on their right heel debrided down to the muscle (CPT 11043). During the same visit, you also debride a superficial ulcer on their left calf down to subcutaneous tissue (CPT 11042).

  • Correct Billing: 11043, 11042-59
  • Incorrect Billing: 11043, 11042 (This would almost certainly be denied as a bundled service without the modifier.)

From my experience, mastering these common modifiers is a fundamental skill for any successful wound care practice. It's not just about paperwork; proper application reduces denials, protects your revenue, and ensures your claims accurately represent the full scope of patient care you deliver.


Common Wound Care Modifiers and Their Usage

To help clarify things even further, let's break down some of the most essential modifiers you'll encounter. Getting these right is key to avoiding claim headaches.

Modifier Name When to Use (Clinical Scenario) Common Pitfall to Avoid
-25 Significant, Separately Identifiable E/M Appended to an E/M code when a distinct evaluation is performed on the same day as a minor procedure (e.g., a new patient workup before a debridement). Forgetting to separate the E/M documentation from the procedure note, making the E/M service appear incidental.
-59 Distinct Procedural Service Used on a secondary procedure code to indicate it was performed at a different anatomical site or a separate session from the primary procedure on the same day. Using it as a catch-all to unbundle codes. Be sure the service is truly distinct; otherwise, use a more specific X-modifier.
-LT Left Side Applied to a procedure code to specify that the service was performed on the left side of the body (e.g., debriding a wound on the left foot). Applying it to CPT codes that are inherently bilateral or not site-specific.
-RT Right Side Applied to a procedure code to specify that the service was performed on the right side of the body (e.g., applying a skin substitute to the right ankle). Mixing it up with -LT or omitting it entirely when a payer requires anatomical specificity.
-GY Item or Service Statutorily Excluded Used when billing a non-covered service to a payer (like Medicare) to get a formal denial so that it can then be billed to a secondary payer. Using it for services that are denied due to lack of medical necessity. -GY is only for statutorily non-covered services.

Understanding when and how to apply these modifiers will dramatically improve your clean claim rate. Always double-check payer-specific guidelines, as some have their own preferences, but this table covers the universal rules you'll need every day.

Building Audit-Proof Documentation for Medical Necessity

In the world of wound care billing, your codes only tell half the story—your documentation tells the rest. Without solid, detailed clinical notes that clearly establish medical necessity, even the most accurate wound care billing codes will get you a denial. Payers don't just reimburse for what you did; they reimburse for what you documented and why it was absolutely necessary.

Think of your documentation as the bedrock evidence that justifies every single CPT and ICD-10 code on your claim. Vague notes are an auditor's dream and a practice's nightmare. Your goal is to create a record so clear and compelling that it leaves no room for misinterpretation.

A hand measures a wound on an audit-proof wound note, documenting wound size and progress.

Let's be clear: coding and documentation errors are a huge source of lost revenue. Industry analyses show that simple coding mistakes account for roughly 7–10% of all claim rejections each year. On top of that, payers have become much stricter, now explicitly requiring detailed wound measurements, photographic proof, and a clear path toward healing. Practices that haven't adapted are feeling the pain in their denial rates.

Core Components of Defensible Documentation

To build a truly audit-proof record, every single note has to contain specific, quantifiable details. This isn't just a "best practice"—it's a requirement to prove that the services you provided were medically necessary.

Here’s what your essential documentation checklist should always include:

  • Precise Wound Measurements: Always record length, width, and depth in centimeters. This data is absolutely critical for justifying debridement codes based on surface area, like CPT 97597 or 11042.
  • Tissue Characteristics: Be specific. Document the percentage of different tissue types present, such as granulation, slough, or eschar. For instance, a note should read, "Wound bed contains 60% granulation tissue and 40% yellow slough."
  • Exudate Amount and Type: Note the volume (scant, moderate, copious) and the character (serous, purulent, serosanguinous) of any wound drainage.
  • Periwound Skin Condition: Describe the skin surrounding the wound. Is there maceration, erythema, or other signs of infection? Get it in the note.
  • Documented Progress (or Lack Thereof): Your notes need to show a clear trajectory of care. If the wound is improving, document it. If it’s static or getting worse, your notes must explain why and justify any changes you're making to the treatment plan.

Aligning Notes with Specific Code Requirements

Your documentation must directly support the codes you bill. It's that simple. If you're billing for a surgical debridement code like CPT 11043, your note needs to explicitly state something like, "Debridement was performed down to healthy, bleeding muscle tissue." That kind of precision creates an unbreakable link between your actions and your billing.

As you build audit-proof documentation, ensuring the security of your records is also paramount. For a complete guide on this, check out this excellent resource on HIPAA Compliant Electronic Signatures.

Getting this level of detail right comes down to solid team habits. Implementing proper training and documentation protocols is key. You can explore our resources to strengthen your team's skills right here: https://specialtywoundcare.com/training-documentation/

Navigating Payer Policies and Bundling Rules

Knowing your CPT and ICD-10 codes is just one piece of the puzzle. To really succeed in wound care billing, you have to get inside the heads of the payers and understand how they interpret and apply their own complex rules. It’s these payer-specific policies, especially bundling rules like the National Correct Coding Initiative (NCCI) edits, that trip up most practices and lead to frustrating denials.

Think of it this way: certain services are considered built-in to a primary procedure, so you can't bill for them separately. A classic example is applying a simple dressing after a debridement. That's almost always bundled into the debridement payment. If you try to bill for it on its own, you’re guaranteeing a rejection.

Getting a Handle on NCCI Edits and Bundling

The NCCI edits are essentially automated red flags that Medicare and most commercial payers use to catch improper payments before they happen. They act as digital guardrails, stopping incorrect code combinations in their tracks.

  • Procedure-to-Procedure (PTP) Edits: These prevent you from billing for two procedures that shouldn't be reported together. For instance, you can't bill separately for a simple wound assessment when it's already considered part of the debridement service you performed.
  • Medically Unlikely Edits (MUEs): These put a cap on how many units of a single code you can bill for on one day. You can't, for example, bill 10 units of an add-on debridement code if the wound size you documented doesn't back it up.

The real challenge here is that the goalposts are always moving. The American Medical Association pushes out hundreds of CPT code updates every year, introducing new codes and revising old ones that directly impact how you report procedures. At the same time, CMS is making its own changes through the Medicare Physician Fee Schedule, finalizing payment adjustments and new policies that ripple across the industry. You can see the full scope of these yearly adjustments and learn more about how the AMA releases its CPT 2025 code set to stay informed.

Why Proactive Policy Management is a Must

If you want to stay ahead of denials, your practice can't afford to be reactive. You have to be proactive. That means making it a non-negotiable part of your routine to review Local Coverage Determinations (LCDs) from your Medicare Administrative Contractor (MAC) and the specific clinical policies of your top commercial payers.

A common pitfall is assuming one payer’s rules apply to another. A commercial plan may have a completely different policy on skin substitute application or NPWT documentation than Medicare.

Set up an internal protocol to review these policies at least quarterly. This simple habit ensures your billing team is always armed with the most current information, which is especially critical for advanced treatments or high-cost supplies. That diligence is truly the key to aligning your claims with what payers expect, cutting down on denials, and ensuring you get paid consistently for the work you do.

Optimizing Your Billing Workflow for Efficiency

Getting paid in wound care involves a lot more than just picking the right codes. The real key to maximizing reimbursement—and minimizing headaches—is building a streamlined, proactive billing workflow from the moment a patient checks in until the final payment is posted.

It all starts with accuracy at every single step. This means integrating your clinical documentation directly with your billing software to cut down on manual entry errors. A rock-solid pre-authorization process for big-ticket items like CTPs and NPWT is also non-negotiable. It's always better to catch a coverage problem before a procedure than to fight a denial after you've already provided the service.

Integrating People and Technology

A truly efficient workflow is one where your team and your tech are perfectly in sync. This means your clinical staff knows exactly what documentation details the billers need, and your billers have the right tools to quickly verify every piece of information.

Here are a few key areas where that integration makes a huge difference:

  • Automated Charge Capture: Your software should be smart enough to suggest codes based on the documented procedures and supplies. This simple step can drastically reduce missed revenue.
  • Eligibility Verification: Implement automated checks to confirm a patient's coverage and benefits before every single appointment. No more post-treatment surprises.
  • Claims Scrubbing Software: Before any claim goes out the door, it should run through a "scrubber." This software is designed to check for common errors against payer rules, catching mistakes that would otherwise lead to instant denials.

Taking the time for a deep dive into understanding claims processing can seriously elevate your billing department’s game and help you get a better handle on shifting payer policies.

The Financial Impact of an Optimized Workflow

The financial stakes in our field are massive and only getting bigger. Global wound care spending was recently pegged at around USD 148.65 billion, and the North American market alone is projected to hit USD 25.27 billion by 2034.

These big numbers matter to your clinic because reimbursement policies from payers directly impact whether you can offer advanced treatments. An optimized workflow is your best defense, ensuring your practice can successfully navigate this complex economic landscape.

Common Questions About Wound Care Billing

Even when you have a good handle on the rules, wound care billing can throw some curveballs. Let's walk through some of the most common questions we see, with clear, practical answers to help your team navigate these tricky spots.

How Do I Correctly Bill Debridement for Multiple Wounds

Billing debridement for more than one wound in a single visit is a frequent point of confusion, and the right way to do it depends entirely on the type of debridement performed.

When it comes to surgical debridement (CPT codes 11042-11047), you need to add up the surface areas of all wounds debrided to the exact same tissue depth. From there, you'll choose the one CPT code that matches the total combined area and depth. You absolutely should not bill these codes separately for each wound.

For selective debridement (CPT codes 97597/97598), the approach is different. You can generally bill for each wound individually. However, it’s critical to double-check individual payer policies, since some have unique rules that overrule this standard practice.

What Documentation Supports Billing an Amniotic Allograft

To justify billing for an amniotic allograft (using the right HCPCS Q code), your documentation has to be rock-solid. Your notes must paint a clear picture of medical necessity, showing that you’ve already tried and failed with standard wound care.

Your documentation has to include:

  • The wound's characteristics, size, and location.
  • The specific product name and its size in square centimeters.
  • A clear note on how much of the product was applied versus how much was wasted.
  • A detailed procedure note that describes exactly how you applied it.

Audit-Proof Tip: Always physically affix the product sticker into the patient's chart. This creates an undeniable record of the specific product used, which can be a lifesaver during a payer audit.

Can I Bill an E/M Service on the Same Day as a Procedure

Yes, you can, but there are strict rules. You can only bill an Evaluation and Management (E/M) service on the same day as a procedure if the E/M work is significant and separately identifiable from the tasks already included in the procedure. To signal this to the payer, you have to append modifier -25 to the E/M code.

Your chart note must clearly separate the E/M portion from the standard pre-procedure assessment. For a deeper dive into different scenarios, you can find more details in our comprehensive wound care FAQs.


At Specialty Wound Care, our billing specialists and purpose-built software are here to guide your practice through these complexities. We focus on ensuring you get paid accurately while lifting the administrative weight off your shoulders. Learn how we can support your wound care practice.

Effective Infection Prevention Strategies in Wound Management: A Comprehensive Guide

Specialty Wound Care | December 24th, 2025


Effective Infection Prevention Strategies in Wound Management: A Comprehensive Guide

Infection prevention remains one of the toughest challenges in wound management today. Even slight missteps can lead to serious complications for your patients. This guide shows how Specialty Wound Care’s advanced wound care tools—like MolecuLight DX and our triple-layer allograft—help healthcare professionals stay ahead of infections and promote faster, safer healing. For more detailed information on infection prevention practices, you can refer to this guide.

Advanced Infection Prevention Strategies

Infection prevention in wound management is crucial for patient safety and recovery. Specialty Wound Care offers advanced solutions to help you navigate these challenges effectively.

Pathogen Identification with MolecuLight DX

Identifying pathogens quickly is key to preventing infections. The MolecuLight DX is a game-changer in this area. It allows you to see bacteria in real-time, which helps in making informed decisions about wound care. Imagine being able to target bacteria with precision. This technology not only guides your cleaning and sampling but also helps in choosing the right treatment path.

Traditional methods can take days or even weeks. But with MolecuLight DX, you can act immediately, reducing time to treatment and improving patient outcomes. Learn more about its effectiveness in this study.

Benefits of Triple-Layer Allograft

The triple-layer allograft is another innovation you can rely on. It acts as a scaffold, supporting new tissue growth while protecting the wound from infections. This allograft is meticulously designed to meet FDA standards, ensuring its safety and effectiveness.

Patients and healthcare professionals alike have noted faster healing times with this solution. It’s like giving the body a head start in the healing race. For an in-depth look at its benefits, check out this resource.

Enhancing Wound Management Practices

Building on infection prevention, enhanced wound management practices integrate modern technology and proven techniques. These practices are essential for healthcare professionals dedicated to patient recovery.

Integrating Technology in Wound Care

Modern technology has transformed wound care practices. Tools like the MolecuLight DX and advanced software solutions allow for more precise and efficient management. Digital tools help track progress, adjust treatments, and document outcomes seamlessly.

By harnessing such innovations, you can deliver higher quality care and improve patient satisfaction. The integration of technology not only boosts efficiency but also ensures a personalized approach to healing. For more information, visit this guide.

Effective Techniques for Healthcare Professionals

Effective wound care techniques are the backbone of successful treatment plans. Simple steps, like thorough cleaning and precise dressing application, make a significant difference. Regular training and staying updated with new methods are crucial.

Professionals who adopt these strategies often see improved patient outcomes. Remember, even small actions can lead to significant improvements in healing. To explore more techniques, see this quick guide.

Specialty Wound Care Solutions

Partnering with Specialty Wound Care can elevate your practice and ensure exceptional patient care. They offer solutions that are both innovative and reliable.

Partnering with Healthcare Providers

Collaboration is at the heart of Specialty Wound Care’s approach. By working closely with you, they tailor solutions to fit your specific needs. This partnership model ensures you have access to the best resources and support.

When you partner with Specialty Wound Care, you join a network dedicated to improved healthcare standards and patient recovery.

Access Free eBook and Newsletter

Staying informed is vital in the ever-changing landscape of healthcare. Specialty Wound Care provides a free eBook and newsletter to help you keep up with the latest in wound management. These resources offer insights, tips, and updates on new technologies and treatments.

Sign up to stay ahead and equip yourself with the knowledge needed for excellence in wound care.

Specialty Wound Care stands ready to assist you in advancing your practice and enhancing patient outcomes. Discover their solutions today and be part of a community committed to excellence in wound management.

Visit now

Uncategorized

Pressure Ulcer Prevention Guidelines for Modern Care

Primus Healthcare | December 24th, 2025


Preventing pressure ulcers isn't just one action—it's a comprehensive game plan. It combines smart risk assessment, dedicated skin care, strategic repositioning, and targeted nutrition to stop skin breakdown before it even has a chance to start. This proactive approach is always better, more effective, and far more humane than trying to heal an injury that’s already taken hold.

Why Pressure Ulcer Prevention Is a Critical Priority

Think of a pressure ulcer (or pressure injury) like a fire smoldering beneath the surface. It often starts out of sight, deep in the tissue, where constant pressure has choked off the blood supply. If you don't catch it, that small, hidden problem can erupt into a painful, full-thickness wound that devastates a person's quality of life.

Stopping that fire requires a vigilant, coordinated effort from the entire care team. This isn't a passive, check-the-box task; it's an active mission. Clinicians, nurses, home health aides, and even family members are all on the front line, playing a critical role in defending the patient.

The stakes couldn't be higher, both for the patient’s well-being and for the healthcare system. These injuries carry a staggering economic weight, with preventable cases costing billions each year. In the U.S. alone, an estimated 2.5 million patients in acute care facilities develop pressure injuries annually. The financial fallout from these hospital-associated injuries is a mind-boggling $26.8 billion every year, with the most severe wounds driving a huge portion of that cost. You can read the full research on the economic impact of pressure injuries to see the breakdown.

A pressure injury is a clear signal that a patient's defenses have been overwhelmed. Prevention is about reinforcing those defenses before the first sign of trouble, recognizing that most of these injuries are avoidable with the right strategies in place.

This guide lays out a clear roadmap built on international pressure ulcer prevention guidelines. We'll focus on four core pillars:

  • Risk Assessment: Identifying who is most vulnerable using proven tools like the Braden Scale.
  • Proactive Skin Care: Building daily routines that maintain the skin's strength and resilience.
  • Strategic Repositioning: Methodically offloading pressure to keep blood flowing to at-risk areas.
  • Targeted Nutrition: Giving the body the fuel it needs to build and maintain healthy tissue.

By mastering these pillars, care teams can shift from a reactive treatment model to a proactive prevention mindset. It’s how you effectively extinguish the threat of a pressure ulcer before the fire even starts.

Mastering Risk Assessment with The Braden Scale

Any solid pressure ulcer prevention plan starts with one critical question: Who is most at risk? Think of it like a ship's captain checking the weather forecast before setting sail. You need a reliable tool to predict the risk of skin breakdown, and for clinicians, the Braden Scale for Predicting Pressure Sore Risk is the gold standard.

Instead of just another checklist, view the Braden Scale as a systematic way to inspect a patient's unique defense systems against pressure. It breaks down risk into six key areas, giving you a clear, data-driven picture of a patient’s vulnerabilities so you can act before an injury ever forms.

To do this right, your assessment needs to be thorough. If you want to brush up on the fundamentals, this comprehensive head-to-toe assessment guide is a great starting point. It's that foundational knowledge that ensures no small detail gets missed.

Decoding the Six Braden Subscales

Each piece of the scale zooms in on a specific factor that contributes to pressure injury risk. Getting the "why" behind each one is what turns a simple score into an effective care plan.

  • Sensory Perception: This is all about the ability to feel and react to pain or discomfort. A patient with poor sensory perception is like a house with a broken smoke alarm—the initial signs of tissue damage go completely unnoticed, letting the danger build silently.
  • Moisture: How much is the skin exposed to moisture from sweat, urine, or feces? Skin that's constantly damp becomes fragile and weak, much like a paper towel that falls apart the second it gets wet.
  • Activity: This simply looks at a patient's level of physical activity. Someone who is bedfast or chairfast has constant, prolonged pressure on the same few spots, which concentrates the risk significantly.
  • Mobility: This is different from activity. Mobility is about a patient's ability to independently change and control their body position. Someone might be "active" but unable to shift their weight off their sacrum, preventing them from offloading pressure where it counts.
  • Nutrition: What's the patient's typical food intake? Good nutrition provides the essential building blocks—protein, vitamins, minerals—that keep skin tough and resilient. Poor nutrition is like trying to build a brick wall with weak mortar; it’s bound to crumble under stress.
  • Friction and Shear: This one’s a two-for-one. Friction is the damage from skin rubbing against a surface, like sheets. Shear is more insidious; it happens when the skin stays put but the bones underneath move, stretching and tearing tiny blood vessels and cell walls below the surface.

From Score to Actionable Care Plan

The final Braden score, ranging from 6 to 23, places a patient into a specific risk category. A lower score always means a higher risk. But the number itself is just the beginning—its real power comes from translating it into an immediate, targeted plan of action.

The Braden Scale isn't meant to be a static label. Think of it as a dynamic tool that should immediately trigger a set of evidence-based interventions tailored to that patient’s specific weak spots. A low score in "Mobility," for example, is a direct signal to implement a strict repositioning schedule.

A structured approach is everything. It ensures every single person on the care team—from nurses to aides—understands the urgency and knows exactly what to do next.

Here’s a quick overview connecting Braden Scale scores to the interventions that should follow.

Braden Scale Score and Corresponding Initial Interventions

Braden Score Range Risk Level Key Interventions to Initiate
19-23 No Risk • Continue routine skin care and monitoring.
• Encourage activity and mobility.
• No specialized interventions typically needed unless a new risk factor appears.
15-18 Mild Risk • Initiate a turning and repositioning schedule (at least every 2-4 hours).
• Use pressure-redistributing cushions or mattress overlays.
• Protect heels from pressure.
• Manage moisture and offer nutritional support.
13-14 Moderate Risk • Implement a more frequent turning schedule (e.g., every 2 hours).
• Upgrade to a higher-specification foam mattress or alternating pressure surface.
• Involve a dietitian for a nutritional assessment.
• Minimize friction and shear during transfers.
10-12 High Risk • Use an advanced support surface (e.g., low-air-loss or alternating pressure mattress).
• Enforce a strict turning schedule (every 1-2 hours), including small shifts in position.
• Provide nutritional supplements as ordered.
• Consult with a wound care specialist.
<9 Very High Risk • Maximize all interventions from the "High Risk" category.
• Consider a specialty bed with advanced features like continuous lateral rotation therapy.
• Involve the entire interdisciplinary team for a comprehensive plan.
• Reassess risk daily or with any change in condition.

This table helps turn the abstract score into a concrete starting point for your care plan, ensuring no time is wasted in protecting the patient.

This decision tree shows how these actions fit together. Assessment is always the first pillar that holds up everything else.

A prevention pillars decision tree showing four steps: Assess, Protect, Reposition, and Nourish with icons.

As you can see, a solid assessment informs every other step you take, from protecting the skin to ensuring the patient is well-nourished.

Most importantly, risk assessment is never a one-and-done task you check off at admission. A patient's condition can change in a heartbeat. The person who was low-risk yesterday might develop a fever or a new medication side effect that makes them high-risk today. Regular reassessment—at scheduled intervals and any time their condition changes—is completely non-negotiable.

Proactive Skin Care And Integrity Management

Think of healthy skin as a fortress. It has its own natural defenses built to withstand the daily siege of pressure, friction, and moisture. International pressure ulcer prevention guidelines make it clear: maintaining this fortress isn't a passive job. It’s an active, hands-on strategy built on gentle cleansing, consistent moisturizing, and smart protection.

Elderly hands applying a pH-balanced cleanser to a foot, with a product bottle nearby.

Great skin care starts with understanding the skin's delicate ecosystem. A vital part of this is the acid mantle, a slightly acidic film on the surface that acts as the first barrier against harmful bacteria. Using harsh, alkaline soaps is like power-washing this protective layer away, leaving the skin exposed and vulnerable.

This is exactly why pH-balanced cleansers are non-negotiable. They get the job done without stripping the skin of its natural defenses. The goal is always to clean, not to damage.

The Daily Skin Inspection Routine

You can't protect what you don't inspect. A daily, systematic skin check is one of the most powerful tools in your prevention arsenal. This isn't a quick glance; it's a methodical examination focusing on bony hotspots where injuries are most likely to start.

Be sure to check these areas every single day:

  • Sacrum and Coccyx: The base of the spine is a prime target, especially for anyone who sits for long stretches.
  • Heels and Ankles: These spots bear a huge amount of pressure when a person is lying down.
  • Elbows and Shoulder Blades: Constant contact with a bed or chair puts these points at risk.
  • Back of the Head: This is especially critical for infants and immobile individuals.

You're looking for more than just obvious redness. Pay close attention to subtle changes in skin temperature (is it warmer or cooler than the surrounding area?), texture (does it feel firmer or softer?), and color. In people with darker skin, redness might show up as a purple or maroon hue. Catching these early warnings lets you step in before real damage occurs. Technology is even helping us see what the naked eye can't; for instance, some clinicians are exploring how a specialized point-of-care wound imaging device detects bacteria, which just goes to show how detailed assessment has become.

Mastering Moisture And Protection

Managing moisture is a balancing act. Skin that’s too dry will crack and break down easily. On the other hand, skin that's constantly damp from incontinence, sweat, or drainage becomes soft, weak, and prone to injury. The sweet spot is a healthy, hydrated equilibrium.

"A multi-clinic study from the National Spina Bifida Patient Registry identified urinary incontinence as one of seven key factors associated with pressure injuries."

When dealing with incontinence, moisture barrier creams or ointments are your best friend. These products create a protective seal over the skin, shielding it from the corrosive effects of urine and stool. They should be reapplied after every cleaning to maintain that defense. And don't forget that resilient skin starts from the inside—understanding the importance of hydrating your skin is key to supporting its natural pliability.

The final piece of the puzzle is proactive protection. For anyone at high risk, this means applying prophylactic dressings—like multi-layer silicone foam dressings—to bony areas before you see any sign of trouble. These dressings act as a soft cushion between the skin and the surface, absorbing shear forces and spreading out pressure. It’s a simple, preemptive step that can dramatically cut the risk of pressure injuries on hotspots like the sacrum and heels.

Repositioning Schedules and Support Surfaces

Once you’ve sized up a patient's risk, the next move is to get a handle on the physical forces pressing down on their body. Think of constant pressure like a heavy weight blocking a garden hose. When that pressure squeezes the tiny blood vessels in the skin, it cuts off the flow of oxygen and nutrients. If the hose stays crimped for too long, the tissue on the other side starts to wither and die. That's how a pressure injury begins.

Repositioning is your way of taking the weight off the hose. It's a straightforward but incredibly powerful way to get blood flowing again and give vulnerable tissue a break. This is the simple science behind the classic two-hour repositioning rule, a true cornerstone of preventing pressure injuries.

Healthcare professional adjusting a hospital bed for a patient with colorful watercolor background.

This isn't just old-school wisdom; it’s backed by solid evidence. We’ve seen that guideline-based prevention plans—which bundle regular repositioning with nutrition support and the right support surfaces—have made a huge difference over the last few decades. Just turning patients every two hours can slash their risk by as much as 50%. It’s our first and best line of defense. You can discover more insights about these prevention bundles to see how they're changing outcomes worldwide.

Effective Positioning Techniques

Turning every two hours is the starting point, but how you position the patient is just as critical. The real goal is to strategically offload pressure from those bony danger zones.

One of the most important techniques is the 30-degree lateral tilt position. Instead of rolling a patient fully onto their side (at 90 degrees), which just moves the pressure point directly to the hip bone, this gentler tilt spreads their weight out more evenly across the buttock and back. It's a simple change that keeps direct force off the vulnerable hip bone (the trochanter).

You don't need fancy equipment to nail this and other protective positions:

  • Pillows and Wedges: Use them to prop up the back and maintain that 30-degree angle, stopping the patient from rolling flat.
  • Heel Offloading: The heels are notorious hotspots for pressure injuries. Use pillows or special heel suspension boots to "float" the heels completely off the mattress. You should be able to easily slide a hand between the heel and the bed.
  • Sacral Protection: For patients sitting up in a chair, encourage them to make small, frequent weight shifts. Even leaning slightly to one side for a few minutes can work wonders for restoring blood flow to the sacrum.

Demystifying Support Surfaces

If repositioning is your active strategy, think of support surfaces as your passive defense. A support surface is any specialized mattress, overlay, or cushion designed to redistribute pressure. It's the foundation of your entire prevention plan. While a standard hospital mattress lets a person's weight sink into their bony points, a therapeutic surface spreads that load over a much wider area.

The right support surface doesn't replace the need for repositioning. Instead, it works in tandem with it, providing a safer baseline of pressure distribution between turns.

Choosing the right surface comes down to the patient's specific risk level and how much they can move on their own. They generally fall into two main camps.

Understanding Static vs. Dynamic Surfaces

Surface Type How It Works Best For
Static Surfaces These are non-powered surfaces. They use materials like high-spec foam, gel, or air-filled cells to spread pressure out. They stay in a fixed state. Patients at mild to moderate risk who can still move and reposition themselves a bit.
Dynamic Surfaces These are powered surfaces that actively shift pressure. This includes alternating pressure mattresses that inflate and deflate different cells, or low-air-loss beds that help manage the skin's microclimate. Patients at high or very high risk who are completely immobile and cannot reposition on their own.

Matching the surface to the patient is a clinical decision that can make or break your prevention efforts. A static foam mattress might be perfect for someone who can still shift their weight post-op, but it's totally inadequate for an immobile patient in the ICU. By using the Braden Scale score to guide your choice, you can give every patient the precise level of protection they need.

The Critical Role of Nutrition and Hydration

While we spend a lot of time focused on external factors like repositioning schedules and specialized mattresses, we can't ignore the powerful defense system working inside the body. It’s a core piece of any solid pressure ulcer prevention plan.

Think of it like building a brick wall. You can have the best bricks in the world—your skin cells—but the wall will crumble under pressure without strong mortar holding them together.

Nutrition and hydration are that mortar. Key nutrients like protein, vitamins, and minerals, along with water, give skin its strength, flexibility, and ability to bounce back from stress. If you neglect nutrition, you're essentially leaving your fortress unguarded from within. External strategies alone just can't make up for that vulnerability.

Building Resilient Skin from the Inside Out

Good nutrition isn't just a nice-to-have; it's a non-negotiable part of prevention. When the body is stressed from illness or immobility, its demand for nutrients goes through the roof. Without enough fuel in the tank, the body starts breaking down its own tissues—including skin and muscle—which leaves it wide open to pressure injuries.

International guidelines are crystal clear on this. They strongly recommend that nutritional screening be a standard part of every risk assessment. That's because at-risk individuals often need a major boost in specific nutrients to keep their skin's defenses up.

Leading clinical practice guidelines recommend that individuals at risk for pressure injuries should target a daily protein intake of 1.25 to 1.5 grams per kilogram of body weight. This is a big jump from the standard recommendation for healthy adults.

This focused approach makes sure the body has a steady supply of the raw materials it needs to maintain and repair tissue day in and day out.

Key Nutritional Targets and Practical Tips

Hitting these higher nutritional goals can be tough, especially for patients who have a poor appetite or are dealing with other medical issues. A proactive, well-rounded plan is the only way to succeed.

Here are the key nutritional players you need to have on your team for pressure ulcer prevention:

  • Protein: This is the undisputed star player. Protein is absolutely essential for regenerating cells and forming collagen, which is what gives skin its structure and integrity. Great sources include lean meats, fish, eggs, dairy, beans, and high-protein oral supplements.
  • Calories: The body needs enough raw energy to run its systems so it doesn't have to start burning protein for fuel. A solid caloric intake spares that precious protein for its main job: building and repairing tissue.
  • Vitamin C and Zinc: Think of these micronutrients as the foremen on a construction site. They are vital for synthesizing collagen and keeping the immune system sharp, directing the protein "bricks" where they need to go.
  • Arginine and Glutamine: These specific amino acids have been shown to play a direct role in wound healing and are often found in specialized nutritional formulas designed for high-risk patients.

Don't Forget About Hydration

Just as crucial as solid food is getting enough fluids. When skin is dehydrated, it becomes like a dry, brittle leaf—it loses its pliability and is far more likely to crack and break under pressure or friction.

Properly hydrated skin, in contrast, is supple, elastic, and much more resilient. Good hydration also supports healthy blood flow, which is how oxygen and nutrients get delivered to the skin cells in the first place. Make sure to encourage patients to drink water consistently throughout the day, unless they are on a fluid restriction for another medical reason.

One of the most effective things you can do is advocate for a nutritional consultation with a registered dietitian. They can put together a personalized plan that fills any nutritional gaps, works with the patient's preferences, and includes supplements when needed. This makes nutrition a truly formidable pillar in your pressure ulcer prevention strategy.

Your Prevention Implementation Checklist

Turning solid pressure ulcer prevention guidelines into consistent, everyday practice is where the real work happens. It all comes down to having a structured, repeatable workflow. This checklist pulls together everything we’ve covered into a practical tool built for the fast pace of clinical and home care settings. It's designed to make these critical steps a routine part of care, not an afterthought.

Effective prevention is a team sport, and clear documentation is the playbook. Keeping consistent, detailed records isn't just about continuity of care—it's essential for tracking progress and making smart improvements over time. For a deeper dive into this, we have some fantastic resources on training and documentation to get your team on the same page.

To make things easier, this checklist is broken down by key moments in the care timeline, helping you weave these steps seamlessly into your day.

On Admission or Start of Care

This is ground zero. The initial assessment and planning phase sets the tone for the entire prevention strategy. Getting this right from the moment a patient comes through the door is your best shot at identifying risks and building a protective plan from day one.

  • Complete Braden Scale Assessment: The first few hours are crucial. Conduct a full, head-to-toe skin assessment and lock in that initial Braden Scale score.
  • Establish Baseline Care Plan: That score is your guide. Use it to choose the right support surface (like a high-specification foam or dynamic mattress) and map out an initial repositioning schedule.
  • Confirm Nutritional Status: Don't overlook nutrition. Screen for any risks and bring in a dietitian if the patient is malnourished or could be headed that way.
  • Educate Patient and Family: Bring them into the circle. Explain the risks of pressure injuries and empower them to be part of the solution by reporting any pain or skin changes they notice.

A proactive plan launched on day one is the single most effective strategy you can have. It shifts the entire focus from reacting to skin damage to actively preventing it from ever happening.

Daily and Per-Shift Checks

Prevention lives and dies by consistency. These are the daily habits that reinforce your initial plan and, just as importantly, let you make quick adjustments as a patient's condition changes.

  • Inspect Skin Methodically: Every time you reposition, bathe, or change the linens is an opportunity. Do a focused skin check on all the usual suspects—sacrum, heels, elbows, and hips.
  • Maintain Skin Hygiene: Keep the skin clean and healthy. Use a pH-balanced cleanser, apply moisturizer to dry spots, and use a moisture barrier cream if incontinence is an issue.
  • Adhere to Repositioning Schedule: Stick to the plan. Turn and reposition the patient as scheduled (e.g., every two hours) and document every single turn. Use pillows and wedges to offload those high-pressure areas.
  • Check and Manage Devices: Anything touching the skin can be a problem. Inspect the skin under medical devices like oxygen tubing or splints at least twice a day.

With Any Change in Condition

A patient's risk level isn't set in stone; it's a moving target. Any significant shift in their health—good or bad—should be an immediate trigger to reassess the prevention plan and make sure it's still doing its job.

  1. Re-evaluate Braden Score: If you notice a change in their mobility, how much they're eating, or their level of consciousness, it’s time for a new Braden Scale assessment.
  2. Adjust the Care Plan: Based on that new score, you might need to tweak the plan. This could mean more frequent repositioning, upgrading their support surface, or dialing up nutritional support.
  3. Communicate with the Team: Make sure everyone is in the loop. Therapists, aides, and other caregivers need to know about the updated risk level and the new game plan.

Frequently Asked Questions

When you're dealing with pressure ulcer prevention every day, you're bound to run into some specific questions. We get it. Let’s clear up a few of the most common ones we hear from clinicians, home health teams, and even family caregivers.

How Often Should The Braden Scale Be Reassessed?

There's no single, rigid rule for this—the right frequency for Braden Scale reassessment really depends on the care setting and how stable the patient is. Think of the scale as a live weather report for a patient's skin; you have to update it as conditions change.

In a busy acute care hospital, the standard is to do an assessment on admission and then at least every 48 hours for stable patients. But if that patient’s condition suddenly takes a turn, you'll want to increase that to every single shift.

For long-term care, the rhythm is a bit different. It’s typically done on admission, weekly for the first four weeks, and then quarterly after that. In a home health setting, the assessment should happen at the start of care and any time there's a significant shift in the patient's health.

Are Donut Cushions Recommended For Pressure Ulcer Prevention?

Absolutely not. In fact, donut-shaped cushions are strongly discouraged by every current pressure ulcer prevention guideline. It’s a common misconception, but they can do more harm than good.

While they look like they'd relieve pressure, they actually concentrate it on the ring of tissue around the cutout. This can choke off blood flow and make a pressure injury more likely, not less. Instead of donuts, stick with pillows, foam wedges, or other professional offloading devices that are designed to spread pressure over a much larger surface area.

What Is The First Sign Of A Pressure Ulcer?

The earliest red flag for a Stage 1 pressure injury is something we call non-blanchable erythema. In plain English, it's a patch of red skin that doesn't turn white when you press on it with your finger and then let go.

It's crucial to remember that in individuals with darker skin tones, this redness can be much harder to spot. You have to be a detective and look for other clues: changes in skin color to purple or maroon hues, a shift in temperature (warmer or cooler than the surrounding skin), or a change in texture (the area might feel firmer or softer).

The patient might also complain of pain, tenderness, or a tingling sensation in that spot. Catching this first sign is the most critical moment to act. You need to offload all pressure from that area immediately to stop the injury from getting worse.

For more detailed answers to common concerns, check out these comprehensive wound care FAQs.


At Specialty Wound Care, our mission is to accelerate the healing journey for patients with complex wounds. We combine advanced diagnostics with evidence-based treatment protocols to deliver personalized care, helping patients get back to their lives faster. See how our focused approach makes a real difference at https://specialtywoundcare.com.

Unveiling the Science of Triple-Layer Allografts in Wound Healing

Specialty Wound Care | December 23rd, 2025


Unveiling the Science of Triple-Layer Allografts in Wound Healing

Triple-layer allografts have changed how we approach wound healing, especially for tough cases that resist traditional care. If you’ve struggled with slow recovery or infection risks, understanding this technology could improve your results. In this post, we’ll explain how triple-layer allograft supports tissue repair and why Specialty Wound Care leads in applying this advanced wound care solution. Learn more here.

Understanding Triple-Layer Allografts

In recent years, medical breakthroughs have offered promising solutions for challenging wounds. One standout is the triple-layer allograft. This innovation holds the potential to improve outcomes significantly.

Science Behind Allograft Technology

Triple-layer allografts are built on the principles of regenerative medicine. These grafts harness the healing properties found in natural tissues. At their core, these allografts act as scaffolds, promoting new cell growth. This growth aids in the natural repair of damaged tissues. The magic lies in the structure itself, which supports cell integration and vascular growth. A study highlighted in NCBI illustrates how these grafts enhance tissue repair by mimicking the body’s natural healing processes.

Through rigorous scientific testing, allografts have shown their ability to lower inflammation and infection risks. These benefits make them a reliable choice for those facing stubborn wounds. Imagine a healing solution that works with your body, not against it. The result is not just healing—it’s restoration.

Structure of Triple-Layer Allografts

The fascinating aspect of these allografts is their layered composition. Each layer serves a distinct purpose. The outer layer offers protection, while the middle layer supports cell growth. The innermost layer ensures connection with the existing tissue. This three-tier design mimics the skin’s natural structure, enhancing its effectiveness.

Think of the allograft as a well-constructed building. Each level supports the one above, creating a solid foundation for healing. This design is why many healthcare providers are now choosing triple-layer allografts for complex wound care cases. The structured layers not only facilitate healing but also protect against further damage. It’s like giving your wounds the ultimate shield and support system.

Role in Advanced Wound Care

The potential of triple-layer allografts in wound care is expansive. They offer a new frontier for patients and providers alike, addressing the toughest healing challenges.

Enhancing Wound Healing Processes

Triple-layer allografts play a significant role in speeding up recovery. They integrate smoothly with the body, reducing the time wounds take to close. For patients, this means a quicker path to recovery. But how do they work? These grafts boost cell growth and reduce inflammation, two critical factors in wound healing. By doing so, they cut down healing time, allowing you to return to daily life sooner. Learn more.

The true advantage lies in their ability to adapt to various wound types. From burns to chronic ulcers, triple-layer allografts offer a flexible solution. This versatility makes them a preferred choice for healthcare providers aiming for speedy and effective outcomes.

Benefits for Patients and Providers

The benefits of triple-layer allografts extend beyond just healing. For patients, they offer reduced pain and a lower risk of complications. For providers, they mean fewer follow-up visits and improved patient satisfaction. Imagine a treatment that not only heals but also enhances your quality of life. That’s what these allografts offer.

For medical professionals, the advantages are clear. By using these allografts, you can ensure better patient outcomes and streamline treatment processes. This innovation allows healthcare providers to focus more on care and less on complications. In a world where time is precious, these benefits are invaluable.

Specialty Wound Care Expertise

Specialty Wound Care stands at the forefront of this transformative technology. Their approach combines innovation with a deep commitment to patient care.

Leadership in Wound Management

As leaders in wound care, Specialty Wound Care has pioneered the use of triple-layer allografts. By integrating cutting-edge technology, they have set new standards in the field. Their expertise ensures that patients receive the latest and most effective treatments available. This leadership is reflected in their consistent success rates and patient satisfaction levels.

Partnering for Optimal Outcomes

Specialty Wound Care’s approach is collaborative. By working closely with healthcare providers, they ensure optimal patient outcomes. This partnership model means that every patient receives personalized care tailored to their needs. Through these collaborations, they have built a network of professionals committed to advancing wound care. This synergy not only enhances healing processes but also fosters innovation within the field. With Specialty Wound Care, you’re not just receiving treatment; you’re gaining a partner in health.

In conclusion, triple-layer allografts represent a new era in wound healing. Their unique structure and benefits make them an invaluable tool in advanced wound care. Specialty Wound Care’s expertise further enhances their effectiveness, offering patients and providers a reliable path to recovery.

Visit now

Uncategorized

A Clinician’s Guide to the 8 Main Types of Chronic Wounds in 2025

Primus Healthcare | December 23rd, 2025


A wound that doesn't heal is more than just a break in the skin; it's a complex clinical challenge that signals a disruption in the body's natural repair mechanisms. Chronic wounds, formally defined as those that fail to proceed through an orderly and timely reparative process, affect millions of people and represent a significant burden on healthcare systems.

Far from being a single entity, these persistent injuries arise from a multitude of causes, each requiring a distinct diagnostic and therapeutic strategy. Differentiating between the various types of chronic wounds is the foundational step toward effective management and successful outcomes. An accurate diagnosis prevents treatment delays, avoids therapies that could be harmful, and paves the way for advanced interventions that can accelerate healing. Most importantly, it helps prevent devastating complications like severe infection or amputation.

This guide provides a comprehensive roundup of the primary categories of chronic wounds, from common pressure injuries to complex arterial ulcers. We will explore the defining characteristics of each, offering clinicians, caregivers, and patients a clear roadmap for:

  • Identification: Pinpointing the specific wound type based on clinical features.
  • Management: Understanding common treatment approaches and when to seek specialty care.
  • Prevention: Implementing targeted strategies to reduce the risk of occurrence and recurrence.

By breaking down the key types of chronic wounds, this article offers actionable insights to improve diagnostic accuracy, streamline care, and ultimately support the healing journey.

1. Pressure Injuries (Pressure Ulcers/Bedsores)

Pressure injuries, often called pressure ulcers or bedsores, are localized damage to the skin and underlying soft tissue. They typically occur over bony prominences like the sacrum, heels, hips, and elbows. This type of chronic wound develops from intense and prolonged pressure, or pressure combined with shear or friction, which cuts off blood supply to the tissue, leading to cell death.

These injuries are a significant concern for individuals with limited mobility, such as those who are bed-bound, wheelchair users, or patients in long-term care facilities. The severity is categorized into stages, ranging from Stage 1 (non-blanchable redness on intact skin) to Stage 4 (full-thickness tissue loss with exposed bone, tendon, or muscle), and also includes unstageable and deep tissue pressure injuries.

Elderly man with highlighted pain points on an adjustable bed, receiving foot care.

Key Causes and Risk Factors

The primary cause is sustained pressure that exceeds capillary blood pressure, obstructing blood flow. Key risk factors include immobility, sensory impairment (like in spinal cord injuries), malnutrition, dehydration, and medical conditions affecting blood flow such as diabetes and vascular disease. Excessive moisture from incontinence can also weaken the skin, making it more susceptible to breakdown. Preventing skin breakdown is paramount in avoiding pressure injuries. A practical guide to effective perineal care highlights essential techniques for patient care.

Diagnosis and Treatment

Diagnosis begins with a thorough skin assessment, often using validated risk scales like the Braden or Norton scales to identify at-risk patients. Clinicians look for signs of tissue damage, such as changes in skin color, temperature, or firmness. Early detection is critical, and advanced diagnostic tools can play a role. Point-of-care fluorescence imaging, for example, helps clinicians detect and locate elevated bacterial presence in and around the wound, which can guide treatment and prevent infection. To explore how this technology aids in managing complex wounds, you can learn more about point-of-care wound imaging.

Treatment focuses on removing pressure from the affected area, keeping the wound clean and dressed, managing pain, and ensuring proper nutrition. Key strategies include:

  • Regular Repositioning: Turning and repositioning patients at least every two hours.
  • Support Surfaces: Using pressure-reducing mattresses, cushions, and other devices.
  • Wound Care: Selecting appropriate dressings to maintain a moist healing environment and debriding necrotic tissue when necessary.
  • Nutrition: Ensuring adequate intake of protein, calories, vitamins, and minerals to support tissue repair.

Referral to a specialty wound care clinic is recommended for non-healing Stage 2 wounds or any Stage 3 or 4 injuries, as they often require advanced therapies like debridement, specialized dressings, or negative pressure wound therapy.

2. Venous Leg Ulcers

Venous leg ulcers (VLUs) are the most common type of lower extremity ulcer, accounting for approximately 70% of all leg ulcers. They arise from chronic venous insufficiency (CVI), a condition where the veins in the legs, particularly the valves, fail to efficiently return blood to the heart. This leads to a buildup of pressure in the lower leg veins (venous hypertension), which causes fluid to leak into the surrounding tissues, leading to edema, inflammation, and eventual skin breakdown.

These wounds typically develop on the medial (inner) side of the lower leg, often just above the ankle, an area known as the "gaiter region." They are often shallow, have irregular borders, and may be accompanied by a significant amount of exudate (fluid drainage). The surrounding skin frequently shows signs of venous disease, such as varicose veins, hemosiderin staining (a brownish discoloration), and lipodermatosclerosis (hardening and tightening of the skin).

Close-up of lower legs and feet with a skin rash or open wounds and a medical bandage.

Key Causes and Risk Factors

The root cause of VLUs is sustained venous hypertension from CVI. Key risk factors that contribute to this condition include a history of deep vein thrombosis (DVT), varicose veins, obesity, multiple pregnancies, and occupations that require prolonged standing. Other contributing factors are advanced age, limited mobility, a family history of venous disease, and previous trauma to the leg.

Diagnosis and Treatment

Diagnosis is primarily clinical, based on the characteristic appearance and location of the ulcer along with a patient history consistent with CVI. An Ankle-Brachial Index (ABI) test is crucial to rule out significant arterial disease before initiating compression therapy, which is contraindicated in cases of severe arterial insufficiency. Doppler ultrasound studies can confirm venous reflux and identify incompetent veins.

The cornerstone of VLU treatment is managing the underlying venous hypertension. Key strategies include:

  • Compression Therapy: Applying sustained, graduated compression (usually 30-40 mmHg) via multi-layer bandages or stockings is the gold standard. This reduces edema and supports venous return.
  • Leg Elevation: Regularly elevating the legs above the level of the heart helps reduce swelling and venous pressure.
  • Wound Care: This involves cleaning the wound, managing exudate with appropriate absorptive dressings to maintain a moist environment, and debriding any non-viable tissue.
  • Exercise: Encouraging calf muscle pump exercises, such as walking or ankle flexions, improves circulation.

For complex, non-healing ulcers, a referral to a specialty wound care clinic is necessary. They may consider advanced treatments, including advanced biologic skin substitutes to promote healing. Explore how a dual-layer allograft can aid in healing venous leg ulcers. In some cases, surgical interventions like vein ablation may be required to correct the underlying venous reflux.

3. Diabetic Foot Ulcers

Diabetic foot ulcers (DFUs) are a serious complication of diabetes, developing from a combination of peripheral neuropathy (nerve damage causing loss of sensation), peripheral arterial disease (poor circulation), and impaired healing. These open sores, typically located on the bottom of the foot, occur in approximately 15% of individuals with diabetes and are a leading cause of non-traumatic lower limb amputations. Even minor cuts or blisters can progress into severe ulcers because the patient may not feel the initial injury.

Watercolor illustration of a human foot with a dark, eye-like object embedded in the ankle, showing redness.

Key Causes and Risk Factors

The primary contributors are neuropathy, which diminishes the protective sensation of pain, and peripheral arterial disease, which reduces blood flow needed for healing. Structural foot deformities like bunions or hammertoes can create pressure points, leading to callus formation and eventual breakdown. Poor glycemic control is a major risk factor, as high blood sugar levels impair immune function and slow the healing process. Other risks include a history of previous ulcers, improper footwear, and vision problems that prevent patients from noticing foot injuries.

Diagnosis and Treatment

Diagnosis involves a comprehensive foot examination, including testing for neuropathy (using a monofilament), assessing circulation (checking pulses and ankle-brachial index), and inspecting the ulcer. The wound is classified using systems like the Wagner Ulcer Classification Scale to determine its depth and the extent of infection or gangrene. Advanced imaging, such as point-of-care fluorescence imaging, can be crucial for detecting high bacterial loads that are not clinically apparent, helping to guide debridement and antimicrobial strategies to prevent limb-threatening infections.

Treatment is multifaceted and requires a coordinated approach to address the underlying causes. Key strategies include:

  • Offloading: Relieving pressure from the ulcer using total contact casts, walker boots, or specialized footwear.
  • Debridement: Regularly removing dead or infected tissue from the wound to promote healthy tissue growth.
  • Infection Control: Administering appropriate antibiotics for infected ulcers, guided by wound cultures.
  • Moist Wound Healing: Applying advanced dressings to create an optimal environment for tissue repair.
  • Glycemic Control: Working with the patient to maintain stable blood sugar levels.

For complex or non-healing ulcers, referral to a specialty wound care clinic is essential. Exploring advanced treatment options for diabetic foot ulcers can provide access to therapies like cellular and tissue-based products, which can significantly improve healing outcomes.

4. Arterial Leg Ulcers

Arterial leg ulcers, also known as ischemic ulcers, are wounds caused by inadequate blood supply to the lower limbs. These ulcers account for approximately 10-15% of all lower extremity wounds and develop when arteries become narrowed or blocked by conditions like peripheral arterial disease (PAD), often a result of atherosclerosis. The reduced arterial blood flow deprives tissues of essential oxygen and nutrients, leading to tissue death and the formation of a painful, difficult-to-heal wound.

These ulcers commonly appear on the toes, feet, heels, or ankles. They often have a characteristic "punched-out" look with well-defined edges, a pale or necrotic base, and minimal to no drainage. Patients frequently experience significant pain, especially at night or when the leg is elevated (rest pain), which is a sign of critical limb ischemia.

Key Causes and Risk Factors

The root cause of arterial ulcers is insufficient arterial circulation. The most significant risk factor is peripheral arterial disease (PAD), which is strongly associated with atherosclerosis. Other major contributors include smoking, diabetes, high blood pressure (hypertension), high cholesterol, advanced age, and a family history of vascular disease. Any condition that compromises blood flow to the extremities can increase the risk of developing these types of chronic wounds.

Diagnosis and Treatment

Diagnosis starts with a physical examination, noting the ulcer's appearance and location, along with assessing for signs of poor circulation like weak or absent pulses, cool skin temperature, and shiny, hairless skin on the leg. The primary diagnostic test is the Ankle-Brachial Index (ABI), a non-invasive measurement comparing blood pressure in the ankle to that in the arm. An ABI value below 0.9 indicates PAD and a high likelihood of an arterial ulcer.

Treatment is complex and requires a dual focus: managing the wound and restoring blood flow. The primary goal is revascularization, which is crucial for healing.

  • Vascular Assessment: Urgent referral to a vascular surgeon is essential to evaluate the extent of arterial blockage and determine options for restoring circulation, such as angioplasty, stenting, or bypass surgery.
  • Wound Care: The wound must be kept dry and protected from infection. Dressings are chosen to manage any minimal exudate without macerating the surrounding skin. Debridement of dry, stable eschar (necrotic tissue) is generally avoided until blood flow is improved.
  • Pain Management: Arterial ulcers are notoriously painful. Pain relief strategies are critical and may involve keeping the limb in a dependent (lowered) position to improve blood flow by gravity.
  • Risk Factor Modification: Addressing underlying causes is vital. This includes smoking cessation, managing blood sugar and blood pressure, and antiplatelet therapy.
  • Avoid Compression: Unlike venous ulcers, compression therapy is strictly contraindicated as it can further impede already compromised arterial blood flow.

Patients with non-healing arterial ulcers, severe rest pain, or signs of gangrene require immediate evaluation at a specialty wound care center or by a vascular specialist to prevent limb loss.

5. Mixed Etiology Ulcers (Venous-Arterial)

Mixed etiology ulcers are complex chronic wounds resulting from a combination of both venous insufficiency and peripheral arterial disease (PAD). These ulcers, which account for up to 15-20% of all lower extremity ulcers, present significant diagnostic and treatment challenges because the management strategies for venous and arterial disease are often contradictory. For example, compression therapy vital for venous ulcers can be harmful if significant arterial insufficiency is present.

These wounds often appear on the lower leg or foot, particularly in the "gaiter" area common for venous ulcers, but may have features of both wound types. They can be painful, slow to heal, and are frequently seen in elderly patients with comorbidities like diabetes, heart disease, and a history of smoking. The presence of both disease processes complicates healing by impairing both the delivery of oxygenated blood and the removal of waste products from the tissue.

Key Causes and Risk Factors

The dual causes are venous hypertension (from faulty vein valves) and inadequate arterial blood flow (from atherosclerosis). This combination creates a uniquely hostile environment for tissue health and wound healing. Risk factors are a blend of those for venous and arterial diseases, including advanced age, a history of smoking, diabetes, hypertension, high cholesterol, obesity, a history of deep vein thrombosis (DVT), and immobility.

Diagnosis and Treatment

Accurate diagnosis is crucial and begins with a comprehensive vascular assessment. The Ankle-Brachial Index (ABI) is a key initial test to quantify the degree of arterial compromise. A low ABI (typically <0.8) suggests significant PAD, while an ABI >1.3 may indicate calcified, non-compressible arteries, often seen in diabetics. A duplex ultrasound is essential to visualize blood flow, identify blockages in arteries, and assess venous reflux.

Treatment for these types of chronic wounds is a delicate balancing act that must address both underlying conditions. Management often requires a multidisciplinary team, including a vascular specialist.

  • Vascular Assessment and Intervention: The first priority is often to address the arterial disease. If severe PAD is present, revascularization procedures like angioplasty, stenting, or bypass surgery may be necessary to restore adequate blood flow before healing can occur.
  • Modified Compression Therapy: Once arterial flow is deemed sufficient (typically an ABI >0.6), modified or reduced compression can be carefully applied to manage the venous component. This must be done cautiously to avoid compromising arterial circulation.
  • Wound Care: Standard wound care principles apply, including debridement of non-viable tissue, managing exudate with appropriate dressings, and preventing or treating infection.
  • Lifestyle and Risk Factor Modification: Patients must receive counseling on smoking cessation, diet, exercise as tolerated, and managing underlying conditions like diabetes and hypertension.

Referral to a specialty wound care clinic and a vascular surgeon is strongly recommended for any patient suspected of having a mixed etiology ulcer due to the complexity of care and the high risk of limb-threatening complications if managed incorrectly.

6. Neuropathic Ulcers (Non-Diabetic)

Neuropathic ulcers are wounds resulting from a loss of protective sensation, which is not exclusively linked to diabetes. These ulcers arise from various neurological conditions that damage peripheral nerves, including spinal cord injuries, Hansen’s disease (leprosy), traumatic brain injuries, and hereditary sensory neuropathies. Much like their diabetic counterparts, these wounds develop due to repeated trauma or unnoticed pressure on an insensate area, typically on the feet or over bony prominences.

The inability to feel pain, pressure, or temperature means that minor injuries like blisters, cuts, or sustained pressure go undetected and untreated. Over time, this repetitive, unfelt trauma causes the skin and underlying tissues to break down, forming a chronic wound. Patients with conditions like spina bifida or those who have suffered severe nerve damage are particularly vulnerable to these types of chronic wounds.

Key Causes and Risk Factors

The fundamental cause is peripheral neuropathy leading to a loss of protective sensation. This sensory deficit is the primary risk factor, as it eliminates the body's natural warning system against injury. Key contributing factors include motor neuropathy, which can cause foot deformities like claw toes and high arches, creating abnormal pressure points. Autonomic neuropathy can lead to dry, cracked skin that is more susceptible to breakdown. Risk is heightened by ill-fitting footwear, foreign objects in shoes, and any form of repetitive mechanical stress on the insensate area.

Diagnosis and Treatment

Diagnosis is primarily clinical, based on a physical examination of the wound and a comprehensive neurological assessment to confirm sensory loss. A patient’s medical history is crucial for identifying the underlying neurological condition. Monofilament testing can quantify the degree of sensory loss. Imaging studies like X-rays may be used to check for underlying bone deformities or osteomyelitis, a common complication.

Effective treatment hinges on addressing the root cause: pressure and trauma. The core strategies are:

  • Aggressive Offloading: This is the most critical component. Total contact casting (TCC), removable cast walkers, or specialized footwear are used to redistribute pressure away from the ulcer.
  • Wound Bed Preparation: The wound must be kept clean, debrided of any non-viable tissue, and covered with appropriate dressings to foster a moist healing environment and prevent infection.
  • Infection Management: Neuropathic ulcers are highly prone to infection, which must be treated promptly and aggressively with antibiotics and, if necessary, surgical intervention.
  • Patient Education: Intensive education on daily self-inspection of feet and skin, proper footwear, and avoiding potential hazards is essential for both healing and prevention.

For complex, non-healing neuropathic ulcers, referral to a specialty wound care clinic is vital. Advanced treatments may include bio-engineered skin substitutes, surgical correction of foot deformities (e.g., tendon transfers), and hyperbaric oxygen therapy to support healing in compromised tissue.

7. Traumatic and Surgical Wounds

While many traumatic injuries and surgical incisions heal uneventfully, they can become chronic wounds when they fail to progress through the normal stages of healing within the expected timeframe, typically lasting longer than three months. This category includes a wide range of injuries, such as burns, deep lacerations, crush injuries, or surgical sites that break down (dehisce) or become infected.

The transition from an acute to a chronic state often occurs due to complicating factors that disrupt the delicate healing cascade. These issues can include persistent infection, poor blood supply to the wound area, significant tissue loss, or inadequate initial wound management. These types of chronic wounds are particularly challenging because they often involve complex damage to multiple tissue layers and may require extensive reconstructive efforts.

Key Causes and Risk Factors

The primary cause is a failure in the healing process following initial trauma or surgery. Key risk factors that predispose a wound to become chronic include severe contamination at the time of injury, the presence of foreign bodies, and extensive tissue damage that impairs vascularity. Systemic factors also play a huge role; patients with diabetes, peripheral vascular disease, compromised immune systems, or poor nutritional status are at a much higher risk. Surgical complications like hematomas, seromas, or high tension on the closure can also lead to wound breakdown and chronicity.

Diagnosis and Treatment

Diagnosis involves a detailed patient history, a physical examination of the wound to assess for signs of non-healing (e.g., persistent inflammation, lack of granulation tissue), and investigation of underlying causes. Cultures are often taken to identify infectious organisms, and imaging studies like X-rays or CT scans may be needed to check for foreign bodies or underlying bone infection (osteomyelitis). Advanced diagnostics, such as fluorescence imaging, can be invaluable for detecting bacterial presence in and around the wound, guiding targeted debridement and antimicrobial therapy to manage biofilm and prevent further complications.

Treatment is multifaceted and aims to address the root cause of the healing failure. Key strategies include:

  • Aggressive Debridement: Removing all non-viable (necrotic) tissue, foreign material, and bacterial burden is critical. This may be done surgically, enzymatically, or through other methods.
  • Infection Control: Systemic and topical antibiotics are used to manage infection based on culture results.
  • Advanced Wound Dressings: Dressings are selected to manage exudate, protect the wound bed, and create a moist environment conducive to healing.
  • Surgical Reconstruction: Wounds with significant tissue loss may require advanced procedures like skin grafts, flap reconstruction, or the use of tissue substitutes to achieve closure.
  • Optimizing Systemic Health: Addressing nutritional deficiencies, managing blood glucose levels, and improving circulation are essential for supporting the body's healing capacity.

Referral to a specialty wound care clinic or a plastic and reconstructive surgeon is often necessary for traumatic and surgical wounds that show signs of becoming chronic, especially in cases of dehiscence, exposed hardware, or extensive tissue loss.

8. Atypical and Inflammatory Ulcers

Atypical and inflammatory ulcers are a complex category of chronic wounds that arise from underlying systemic diseases rather than external factors like pressure or poor circulation. These conditions, which include pyoderma gangrenosum, vasculitis, and necrobiosis lipoidica, represent about 5-10% of all chronic wounds. They are frequently misdiagnosed as more common ulcer types, leading to incorrect treatments that can worsen the wound and delay proper care.

These ulcers often have unique clinical features, such as the rapidly progressing, purplish, undermined borders characteristic of pyoderma gangrenosum or the punched-out lesions seen in vasculitis. Because their root cause is an overactive or dysfunctional immune or inflammatory response, these wounds do not respond to standard wound care protocols and require a completely different management approach focused on treating the systemic disease.

Key Causes and Risk Factors

The primary cause of these ulcers is an underlying pathology that triggers inflammation and tissue destruction. For vasculitic ulcers, inflammation of blood vessels (vasculitis) restricts blood flow, causing skin to die. In pyoderma gangrenosum, a disorder of the immune system leads to painful, rapidly enlarging ulcers. Risk factors are directly linked to these systemic conditions, such as having inflammatory bowel disease (Crohn's disease, ulcerative colitis), rheumatoid arthritis, or other autoimmune disorders. A high index of suspicion is crucial for any wound that appears unusual, is extremely painful, or fails to heal despite appropriate standard care.

Diagnosis and Treatment

Diagnosis is often challenging and relies heavily on a thorough patient history, clinical presentation, and a definitive skin biopsy for histopathological examination. This biopsy is critical to distinguish these inflammatory ulcers from other types of chronic wounds, like infections or malignancies. Screening for associated systemic diseases through blood tests and consultations with specialists like dermatologists or rheumatologists is also a key part of the diagnostic process. Importantly, aggressive debridement must be avoided if pyoderma gangrenosum is suspected, as this can trigger a phenomenon called pathergy, causing the ulcer to expand rapidly.

Treatment is two-pronged, addressing both the systemic disease and the local wound. Management often requires systemic therapies to control the underlying inflammation, which may include:

  • Systemic Immunosuppression: Corticosteroids, biologics, or other immunosuppressive agents are often the primary treatment.
  • Gentle Wound Care: Protecting the wound with non-adherent, gentle dressings is essential to prevent further trauma.
  • Pain Management: These ulcers can be exceptionally painful, requiring a robust pain management plan.
  • Specialist Consultation: Collaboration with dermatology and rheumatology is vital for managing the underlying condition and adjusting treatments based on disease activity.

Referral to a specialty wound care clinic is recommended immediately if an atypical ulcer is suspected. These specialized centers can facilitate the necessary diagnostic workup, including biopsies, and coordinate care with other specialists to ensure the systemic cause is treated effectively.

Comparison of 8 Chronic Wound Types

Condition Implementation complexity 🔄 Resource needs ⚡ Expected outcomes ⭐📊 Ideal use cases 💡 Key advantages ⭐
Pressure Injuries (Pressure Ulcers/Bedsores) Low for prevention; high for advanced stages (surgical care) Moderate–High: pressure-relief devices, staffing, possible surgery 📊 Good with prevention; prolonged healing and infection risk in advanced stages Immobile/bed-bound patients, ICU, long-term care Preventable, clear staging and established protocols
Venous Leg Ulcers Moderate: sustained compression and monitoring Moderate: compression systems, outpatient follow-up, possible venous procedures 📊 High healing rates with compression (>70%); recurrence common (30–40%) Chronic venous insufficiency; medial ankle/lower calf ulcers Responsive to non‑invasive compression; predictable management
Diabetic Foot Ulcers High: multifactorial (neuropathy, ischemia, infection) High: offloading, vascular assessment, glycemic control, multidisciplinary care 📊 Variable; high amputation risk if unmanaged; prevention reduces incidence Diabetic patients with neuropathy or plantar pressure ulcers Preventable with foot-care programs; multidisciplinary treatments available
Arterial Leg Ulcers High: requires urgent vascular assessment and revascularization High: vascular imaging/intervention, specialized vascular care 📊 Poor without revascularization; outcomes improve markedly after revascularization Patients with PAD, ischemic distal ulcers (toes/feet) Clear diagnostics (ABI); vascular repair can dramatically change prognosis
Mixed Etiology Ulcers (Venous–Arterial) Very high: contradictory management needs, complex decision-making Very high: duplex/ABI, tailored compression or reduced compression, vascular/surgical input 📊 Guarded: slow healing, higher failure and infection rates Patients with both venous insufficiency and arterial disease Tailored, multidisciplinary treatment can improve outcomes when arterial flow addressed
Neuropathic Ulcers (Non‑Diabetic) Moderate–High: depends on underlying neurologic condition Moderate: offloading devices, long-term monitoring, possible reconstructive surgery 📊 Healing achievable with offloading; very high recurrence due to persistent sensory loss Spinal cord injury, Hansen's disease, hereditary sensory neuropathies Preventable via aggressive offloading and education; healing possible with consistent care
Traumatic and Surgical Wounds Variable: often lower if vascular supply intact; complex with tissue loss/infection Moderate–High: debridement, grafts/flaps, rehabilitation, infection control 📊 Variable; generally good vascular support aids healing; outcomes depend on injury and timing Burns, dehiscence, crush injuries, post‑op complications Good reconstructive options; clear timelines for intervention and prognosis
Atypical and Inflammatory Ulcers High: requires dermatologic/immunologic diagnosis and tailored therapy High: biopsy, systemic immunosuppression, specialist teams (derm/rheum) 📊 Good when underlying disease controlled; risk of worsening if mismanaged Suspected pyoderma gangrenosum, vasculitis, systemic autoimmune ulcers Treatable with disease‑specific therapy; excellent healing potential once controlled

Integrating Advanced Diagnostics and Therapies for Better Outcomes

Navigating the complex landscape of chronic wounds, from pressure injuries to atypical inflammatory ulcers, requires more than just a foundational understanding. True mastery lies in recognizing the subtle yet critical differences between the various types of chronic wounds and deploying a sophisticated, multi-faceted approach to both diagnosis and treatment. As we've explored, the journey from initial assessment to complete healing is rarely linear. It is a dynamic process influenced by underlying comorbidities, patient adherence, and the specific etiology of the wound itself.

The core takeaway is this: accurate diagnosis is the cornerstone of effective wound care. A venous ulcer will not heal with treatments designed for an arterial insufficiency, and a diabetic foot ulcer requires a different offloading and glycemic control strategy than a post-surgical wound. Misidentifying the wound type or overlooking a mixed etiology can lead to stalled progress, increased patient suffering, and a higher risk of severe complications like infection, amputation, and sepsis. This is precisely why the initial assessment is so critical, demanding a thorough review of patient history, a comprehensive physical examination, and the use of appropriate diagnostic tests.

Embracing a Proactive, Technology-Driven Approach

The modern wound care paradigm is shifting away from reactive, trial-and-error methods toward a proactive, evidence-based model. This evolution is powered by technological advancements that provide clinicians with unprecedented insight into the wound environment.

  • Precision Diagnostics: Instead of waiting days for traditional culture results, rapid diagnostic testing can identify specific pathogens and their antibiotic sensitivities within hours. This allows for the immediate implementation of targeted antimicrobial therapy, preventing the overuse of broad-spectrum antibiotics and combating resistance.
  • Real-Time Visualization: Advanced fluorescence imaging tools like MolecuLight DX have revolutionized bedside care. By making high bacterial loads visible in real-time, clinicians can perform more precise, targeted debridement, ensuring all non-viable tissue is removed while preserving healthy granulation tissue. This technology also guides swab sampling for more accurate culture results.

Key Insight: Integrating these technologies creates a powerful feedback loop. Imaging guides treatment, rapid diagnostics confirm the microbial threat, and advanced therapies are applied with greater precision, dramatically accelerating the healing trajectory.

By combining these diagnostic insights with state-of-the-art therapies, such as cellular and tissue-based products (CTPs) like amniotic membrane allografts, we can create an optimal healing environment. These regenerative therapies provide a scaffold rich in growth factors, recruiting the body's own cells to rebuild damaged tissue more effectively. This synergistic model, which marries diagnostic clarity with therapeutic innovation, is the future of managing all types of chronic wounds.

Patient-Centered Care and Actionable Next Steps

Ultimately, the goal of understanding these wound types is to restore function and improve the patient's quality of life. Healing is not just a clinical outcome; it's a deeply personal journey. A holistic approach must therefore include robust patient education, empathetic communication, and a focus on the overall patient experience. Beyond the clinical aspects, patient experience is also vital for long-term care adherence. To ensure comprehensive patient care, it's beneficial to explore strategies for improving patient satisfaction scores.

For patients and caregivers, the most crucial next step is to seek specialized care at the first sign of a non-healing wound. Do not wait for complications to arise. For clinicians, the call to action is to embrace these advanced diagnostic and therapeutic tools and to build collaborative relationships with wound care specialists. By working together, we can ensure every patient receives an accurate diagnosis and a personalized, effective treatment plan, transforming the prognosis for even the most challenging chronic wounds.


Are you a clinician managing complex patients or a patient struggling with a non-healing wound? Partner with the experts at Specialty Wound Care to access the advanced diagnostics and evidence-based therapies needed to achieve superior outcomes. Visit Specialty Wound Care to learn how we bring specialized, comprehensive wound management directly to you.

Optimizing Wound Care Protocols: The Power of Cutting-Edge Diagnostic Tools

Specialty Wound Care | December 22nd, 2025


Optimizing Wound Care Protocols: The Power of Cutting-Edge Diagnostic Tools

Forget everything you know about traditional wound care assessments. Many protocols rely on visual inspection alone, missing critical details that delay healing. Using advanced diagnostic tools like MolecuLight DX changes how you evaluate wounds, leading to more precise treatment and better patient outcomes. Let’s explore how these technologies can optimize your wound care protocols and support faster recovery. For more insights, visit this link.

Latest Diagnostic Tools in Wound Care

In the fast-paced world of healthcare, staying ahead means embracing the best tools available. Wound care is no exception. Let’s delve into the latest advances that are transforming how wounds are analyzed and treated.

Improving Wound Analysis

Imagine the time saved with tools that reveal what the naked eye cannot see. This is now a reality with exciting diagnostic advancements. Traditional methods often miss hidden bacteria, leading to prolonged treatment times. New instruments, however, pinpoint these issues swiftly.

The use of fluorescence imaging, as seen in tools like the MolecuLight DX, allows you to identify bacterial presence in real-time. This means you can direct your treatment efforts precisely where they’re needed, reducing guesswork and improving care quality. It’s not just about healing faster; it’s about healing smarter.

New technologies also offer digital wound measurement, providing accurate data that supports better decision-making. This helps you track progress and adjust treatments effectively, ensuring patients receive the best care possible.

Enhancing Patient Outcomes

The ultimate goal of any medical advancement is to improve patient results. With new diagnostic tools, this goal is more attainable than ever. Faster and more accurate wound analysis translates to tailored treatment plans that meet individual needs.

By offering a more precise picture of the wound, these tools help you avoid unnecessary treatments. Patients benefit from fewer complications and reduced healing times, leading to quicker recoveries and less time spent in care facilities.

Moreover, these innovations bring peace of mind. Patients and their families can feel confident knowing that healthcare professionals are equipped with the best tools for their care. This confidence in technology and treatment fuels better compliance and more positive health outcomes.

The Role of MolecuLight DX

In the previous section, we explored how advanced tools are reshaping wound analysis and patient outcomes. Now, let’s zoom in on one of the game-changers: MolecuLight DX.

Precision in Wound Management

Precision is key in treating wounds effectively. The MolecuLight DX offers unmatched accuracy by highlighting areas of concern invisible to the naked eye. This tool uses special light to detect bacterial presence, providing you with immediate insights.

Consider a scenario where a patient has a wound that’s not healing as expected. By using the MolecuLight DX, you can identify hidden bacteria that might be impeding recovery. This enables you to adjust the treatment instantly, enhancing the care you provide.

Moreover, the device captures images and videos, assisting in documenting wound progress over time. This documentation is invaluable when communicating with patients about their healing journey.

Accelerating Wound Healing

Speeding up healing is not just about faster recoveries; it’s about reducing the risk associated with prolonged wounds. MolecuLight DX aids in this by ensuring you have the most accurate data at your fingertips.

A study showed that using fluorescence imaging led to a 40% reduction in healing time for chronic wounds. This is a significant improvement, offering a glimpse into the future of wound care. By addressing issues early, you can prevent complications and promote faster healing.

The device also supports effective cleansing and debridement by highlighting areas with high bacterial loads. This targeted approach ensures that every step you take moves the patient closer to recovery.

Benefits of Advanced Technology

Having explored the role of MolecuLight DX, it’s time to understand the broader benefits that advanced technology brings to wound care. These innovations are not just about precision; they revolutionize treatment protocols and support healthcare professionals in myriad ways.

Enhancing Treatment Protocols

Advanced tools ensure that treatment protocols are not only effective but also adaptable. With access to precise data, you can create personalized treatment plans that address the unique needs of each wound.

Take, for instance, the use of artificial intelligence-powered dressings. These dressings adjust to the wound’s condition, releasing medication as needed. Such innovations represent a shift from one-size-fits-all treatments to bespoke solutions that drive better outcomes. Learn more about these advancements here.

Healthcare professionals can also rely on accurate assessments to minimize the use of antibiotics, combating resistance and preserving these critical drugs for future use.

Supporting Healthcare Professionals

Technology is a powerful ally in overcoming the challenges of wound care. With tools like MolecuLight DX, healthcare professionals can make informed decisions quickly and confidently.

These tools also enhance communication among care teams. By providing clear, visual evidence of a wound’s condition, they facilitate collaborative decision-making, ensuring that all team members are on the same page. This collaboration is crucial for maintaining high standards of care and optimizing patient outcomes.

Finally, by automating some aspects of wound management, these technologies free up time for healthcare professionals. This allows you to focus more on patient interaction, delivering compassionate care alongside technological excellence.

The future of wound care is bright, and with these advanced tools, you are well-equipped to lead the way in providing exceptional care.

Visit now

Facebook
Instagram
LinkedIn
SOCIALICON
Youtube
X (Twitter)
Bluesky