
Primus Healthcare
When it comes to wound care, one of the first questions on everyone's mind is, "How often should I change this dressing?" For a long time, the answer was simple: every single day. But we've learned a lot since then, and it turns out, that old advice might actually do more harm than good.
The truth is, there's no magic number. The right schedule depends entirely on the wound itself, the type of dressing you're using, and how much the wound is draining. The goal has shifted from a rigid, calendar-based routine to a more flexible approach that listens to what the wound needs.
Think of a healing wound as a delicate construction site. Every time you lift the dressing, you expose that site to the outside world. The wound bed's temperature plummets, and it can take up to four hours for the cellular healing activity to get back up to speed.
Since the cells that rebuild tissue do their best work at a consistent temperature—around 91.4°F (33°C)—frequent changes can feel like hitting the pause button on healing over and over again. You can read more about this dynamic and why clinicians now aim for just one to three changes per week for a stable wound in these insights on dressing change frequency. This is why modern wound care is built on a "less is more" philosophy.
A wound isn’t just a break in the skin; it’s a complex microenvironment. Protecting that environment is just as crucial as cleaning it. The right dressing, left in place for the right amount of time, acts as a shield, letting the body do its remarkable work without constant interruption.
So, how do we find that perfect rhythm? It comes down to balancing three key factors. Getting this balance right is what separates a healing plan that works from one that stalls.
We’ll dig into each of these, but here’s a quick look:
Understanding how these elements work together is the first step. With guidance from a wound care specialist, you can create a schedule that truly supports healing instead of accidentally getting in its way.
Before we dive deeper, here is a quick-reference table to give you a general idea of how these factors influence dressing changes.
| Wound Condition | Typical Change Frequency |
|---|---|
| Clean, Low-Exudate Wounds | Every 3-7 days |
| Moderate Exudate Wounds | Every 2-4 days |
| Heavy Exudate Wounds | Daily, or more often as needed |
| Infected Wounds | At least once daily, or as directed |
| Post-Surgical Incisions | Often left for 48 hours initially, then every 2-7 days |
| Skin Grafts/Allografts | Initial dressing often left undisturbed for 5-7 days |
Remember, this table is just a starting point. Your specific plan will always be tailored to your unique situation.
Figuring out how often to change a wound dressing isn’t a one-size-fits-all situation; it’s a careful balance based on several moving parts. Think of it like caring for a garden. You wouldn't water a cactus and a fern on the same schedule, especially if one is in a humid greenhouse and the other is in a dry, sunny window. A wound is just as dynamic.
To get the timing right, clinicians focus on three main things: the wound itself, the type of dressing being used, and the amount of fluid—what we call exudate—the wound is producing. These factors work together to create a personalized plan. For example, a dry, clean wound with an advanced hydrocolloid dressing might stay put for days, while a heavily draining wound covered in simple gauze could need changing several times a day.
The nature of the wound is the first piece of the puzzle. A clean surgical incision has very different needs than a chronic venous leg ulcer. The first mainly needs protection from bacteria, while the second often needs help managing moisture to encourage new tissue to grow.
Likewise, dressings are tools designed for specific jobs.
Each dressing type has its own ideal wear time based on what it's designed to do.
Of all the factors, the amount of wound drainage is often the most critical driver of a dressing change schedule. Some exudate is a normal, healthy part of healing. But too much can damage the skin around the wound, and too little can let the wound bed dry out, stalling progress.
This isn't just theory; it's what happens in clinics every day. A Swedish survey found that while wounds with low drainage were changed about twice a week, highly draining wounds needed fresh dressings almost daily—that’s nearly seven times per week. It’s a clear sign that the wound's output, not a fixed calendar, should dictate the schedule. You can see more on how drainage levels drive dressing frequency in this in-depth wound care study.
The flowchart below gives a simple look at how this decision-making process works, from checking the wound to scheduling the next change.
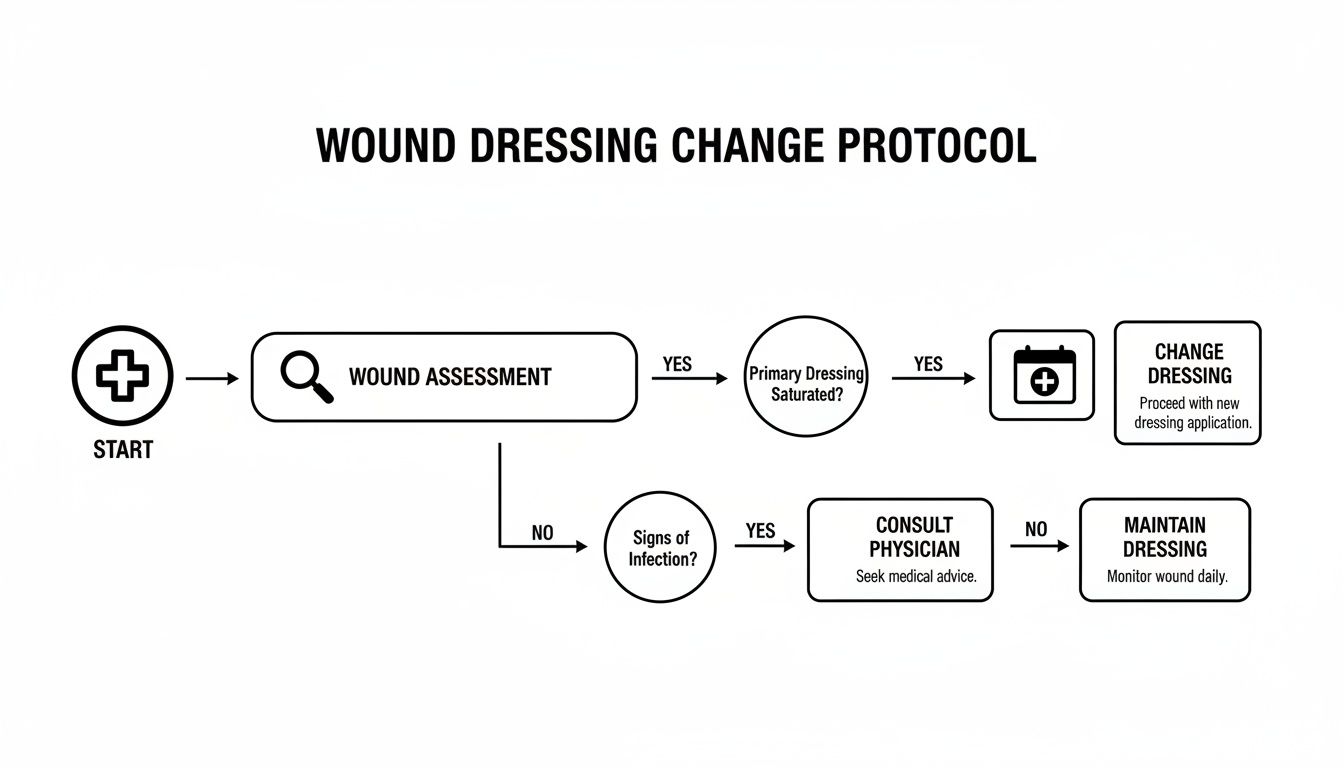
This visual guide shows that the wound's condition—especially its drainage and any signs of infection—is the real signal for when a change is needed. Placing these individual decisions into the context of wider healthcare process improvement initiatives helps ensure we're getting the best patient outcomes while using our resources wisely.
When we talk about wound care principles, it’s easy to get lost in the theory. But applying them to real-world situations is where things click. The "right" frequency for changing a dressing isn't a single answer; it's a practical schedule built around the unique needs of the wound itself.
Let's walk through a few common scenarios. You'll see that every wound has its own healing journey, and a clean surgical cut behaves entirely differently than a chronic ulcer. That means the dressing schedule has to match.
For a clean, closed surgical incision, the first 48 hours are absolutely critical. This is the window where the wound is most vulnerable to infection. The number one goal is simple: provide an undisturbed, sterile shield while the body begins its initial repair work.
Evidence backs this up. A major 2023 analysis on post-operative dressing changes found that waiting until the 48-hour mark for the first change was linked to the lowest risk of surgical site infections. Changing it sooner didn't help, and waiting much longer could actually introduce risk.
After that crucial two-day period, if the incision is clean and dry, it might only need a new dressing every two to seven days. The exact timing depends on the type of dressing and whether there's any minor drainage.
Typical Schedule for Surgical Wounds:
- First 48 Hours: The initial sterile dressing should be left alone to act as a barrier against bacteria.
- Day 2-3: The first dressing change happens now. It’s a chance to inspect the incision for good healing or any early signs of trouble.
- Following Changes: If everything looks good, changes can be spaced out to every 2-7 days until the wound is fully closed.
Diabetic foot ulcers (DFUs) are a different beast entirely. These chronic wounds are notorious for moderate to heavy drainage and a high risk of infection, thanks to underlying issues like poor circulation and nerve damage. The dressing schedule here is much more hands-on and dynamic.
Frequency is driven almost entirely by managing exudate and the need for regular cleaning and debridement. A foam or alginate dressing might need to be changed every 1-3 days just to keep the wound bed clean and control the moisture levels.
With these tough-to-heal wounds, advanced treatments can completely change the game plan.
Venous leg ulcers are often defined by one thing: heavy drainage. Because of underlying circulatory problems, these wounds produce a lot of fluid, and the primary goal of the dressing is absorption. It has to soak up a large amount of exudate to keep the surrounding skin from breaking down.
Multi-layer compression therapy is the gold standard for these ulcers. The dressing change is usually timed to coincide with the reapplication of the compression wraps.
Here, the schedule is almost completely dictated by the amount of drainage. At the start, that might mean daily changes. But as compression therapy begins to work and the swelling goes down, drainage lessens. This allows us to stretch the changes out to every 3-7 days. The golden rule is simple: change the dressing before it gets saturated.
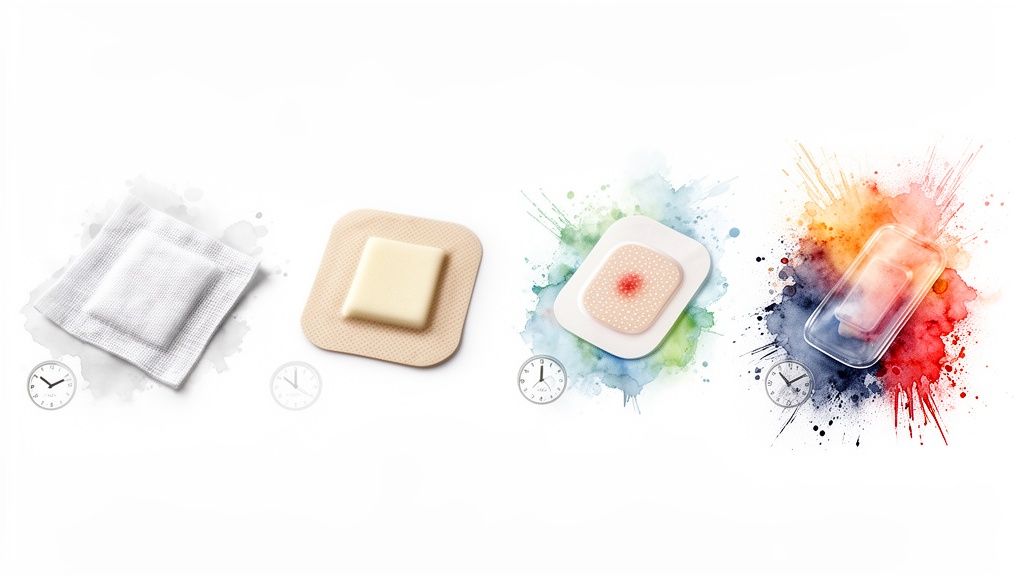
Wound dressings aren't a one-size-fits-all solution. How often a dressing needs to be changed comes down to the materials it's made of and the job it’s designed to do. Some dressings are built to absorb fluid, others donate moisture, and some just act as a simple shield.
Think of it like choosing the right tool for a household repair. You wouldn't use a hammer to turn a screw. In the same way, putting a highly absorbent dressing on a dry wound can actually slow down healing, while a simple film over a heavily draining wound will fail in no time. Understanding what a dressing does is the first step in knowing how long it can stay on.
The most familiar dressing, traditional gauze, is a workhorse for absorption. Its main drawback is that it’s non-selective, meaning it can dry out the wound bed and stick to delicate new tissue. Because of this, gauze often requires changing at least once a day, and sometimes more.
Modern dressings, on the other hand, are engineered with specific goals in mind, allowing them to stay in place longer and create a more stable healing environment.
To make it easier to see how these compare, here’s a quick-reference table.
This table breaks down some of the most common dressing materials, what they're best used for, and their standard wear time. It’s a helpful guide for patients and caregivers trying to understand their wound care supplies.
| Dressing Type | Primary Use | Typical Change Frequency |
|---|---|---|
| Gauze | General absorption and wound packing | 1-2 times daily |
| Transparent Film | Protective cover for low-exudate wounds, securing other dressings | Up to 7 days |
| Foam | Moderate to heavy exudate absorption, cushioning | 3-7 days |
| Hydrocolloid | Light to moderate exudate, promoting moist healing | 3-7 days |
| Alginate | Heavy exudate absorption | 1-3 days |
| Hydrogel | Donating moisture to dry wounds | 1-3 days |
Remember, these are just typical timeframes. The actual frequency will always depend on the specific wound's condition, as instructed by your healthcare provider.
When a wound is more complex, you need to bring in specialized materials. These dressings are designed to handle tough challenges like heavy drainage or stalled healing.
Alginates, which come from seaweed, are superstars of absorption. They can soak up an incredible amount of fluid—up to 20 times their own weight. This makes them perfect for wounds with heavy drainage, like venous leg ulcers. The change schedule is dictated entirely by the drainage, usually falling between 1 to 3 days.
Choosing the right dressing is about creating an ideal microenvironment for healing. The goal is to balance moisture, protect new tissue, and manage bacteria with the fewest disturbances possible. The dressing’s material directly impacts how long that ideal state can be maintained.
For chronic, non-healing wounds that just won't close, clinicians may turn to advanced biologics like amniotic allografts. These are much more than a simple cover; they are therapeutic products that provide a structural scaffold and growth factors to actively kick-start tissue regeneration.
When a specialist at a clinic like Specialty Wound Care applies an amniotic allograft, the primary goal is to leave it undisturbed for as long as possible. The initial dressing placed over the allograft might stay in place for 5 to 7 days or even longer, based on the provider's specific instructions. Subsequent changes are carefully timed to monitor progress, not just to swap out a dressing. This hands-off approach creates the stable, uninterrupted environment these powerful regenerative therapies need to do their work.
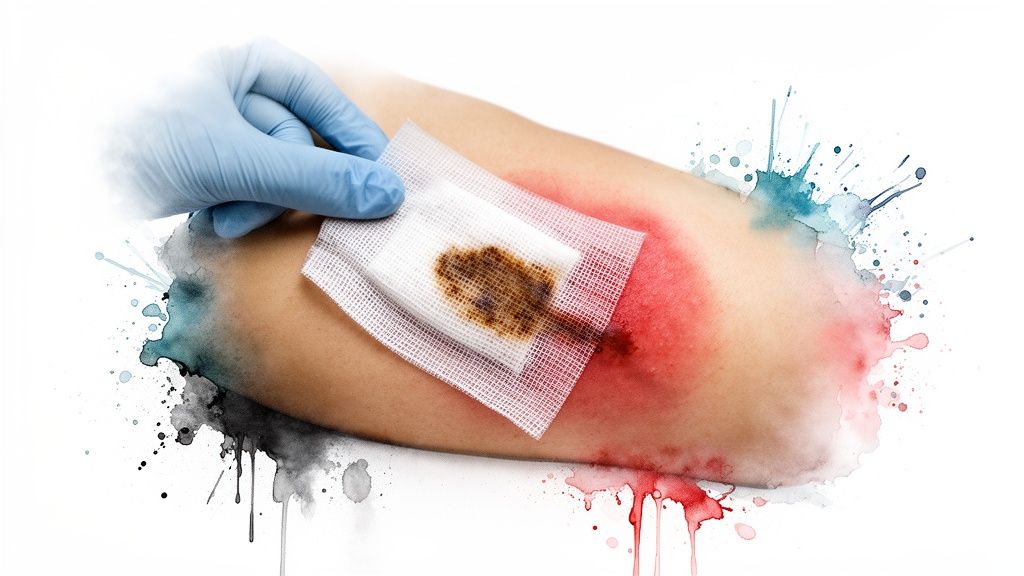
While having a planned dressing schedule is great for routine, your wound is the ultimate authority on its own needs. Think of the schedule as a guideline, not a hard-and-fast rule. It's absolutely critical to recognize the warning signs that demand a dressing be changed immediately, no matter when it was last applied.
Consider these signs your body’s own emergency alert system. Ignoring them can open the door to complications like a serious infection or a major setback in healing. Acting fast keeps you ahead of potential problems and ensures your recovery stays on track.
You need to pay close attention to what the wound and the dressing are telling you. If you spot any of the following signs, it’s time for an unscheduled change and a prompt call to your provider.
Beyond the dressing itself, the skin surrounding the wound offers vital clues. During a change, or if you can see the nearby skin, be on the lookout for these warning signs.
A wound that is healing well should show progress, not distress. Increased pain, unusual drainage, and spreading redness are clear signals that the healing environment has been compromised and needs immediate intervention.
Spreading redness, warmth, or swelling in the skin around the wound are classic signs of a developing infection. If you notice the red area seems to be expanding, it’s a good indication the infection is getting worse.
Additionally, any discolored drainage—like yellow, green, or cloudy fluid—is a sign that you should contact your clinician. Advanced technologies, like those used to help detect elevated bacterial presence in wounds, are crucial in these situations for guiding the right treatment.
Knowing how often to change a dressing isn't about following a rigid schedule; it’s about creating the perfect healing environment with as few disruptions as possible. While this guide gives you a solid foundation, some wounds just don't play by the rules.
If you're dealing with a non-healing wound, a serious infection, or a complex situation like a diabetic ulcer, it can feel overwhelming. This is exactly when you should bring in a dedicated wound care specialist. Their involvement shifts your care from guesswork to a precise, evidence-based plan.
A professional wound care provider does a lot more than just tell you when to change a bandage. They bring a whole coordinated strategy to the table, designed for safer, faster healing.
Partnering with an expert takes the mystery out of the healing process. It replaces uncertainty with a clear, actionable strategy. This dramatically cuts down the risk of serious complications like infection or amputation and helps you get back to your life that much sooner.
For those managing complicated health conditions that require continuous wound management at home, looking into specialized complex care services can provide that crucial layer of professional support.
Here’s the bottom line: if a wound shows no signs of improvement after two weeks, seems to be getting worse, or is tied to a chronic condition, it’s a clear signal to get help. Don’t wait for a small problem to turn into a major one. You can easily book a consultation with a wound care expert to get the targeted support you need for a successful recovery.
Even with the best wound care plan, questions are bound to pop up. Feeling confident about the small, practical details is key to keeping your healing on the right track.
That’s a great question, and the answer comes down to what kind of dressing you’re using.
Some materials, like transparent films and certain hydrocolloids, are designed to be waterproof. They create a seal that shields the wound from water, so a quick shower is usually fine. On the other hand, traditional materials like gauze offer no protection from water and have to stay completely dry.
If a non-waterproof dressing gets wet, it’s a problem. Moisture can create a pathway for bacteria to get into the wound. You’ll need to change it out for a fresh, dry one immediately. Your provider will give you specific instructions—always follow their lead.
The first rule is: don't panic and don't pull. Forcing or ripping off a dressing that’s stuck can tear away the delicate new tissue that’s working so hard to form. You’d be taking one step forward and two steps back.
Instead, try moistening the dressing with a sterile saline solution. Let it soak for a few minutes to gently loosen the adhesive. If it’s still stuck or trying to remove it causes sharp pain, just stop. It’s better to leave it and contact your healthcare provider for guidance. They might recommend switching to a non-adherent dressing to prevent it from happening again.
A slight, mild odor from old wound fluid can be normal when changing a dressing. However, a foul, pungent, or sweet smell is a major red flag for infection and requires immediate medical attention, especially if paired with increased pain or discolored drainage.
For a deeper dive into common wound care concerns, you can explore this helpful list of frequently asked questions put together by wound care specialists. It's a great resource for getting more clarity as you manage your healing at home.
At Specialty Wound Care, our mission is to provide clear answers and advanced solutions for even the most complex wounds. If you have questions about your care plan or are dealing with a wound that just won’t heal, our team is ready to help. Visit us to learn more about our patient-centered approach.

Primus Healthcare
Accurate wound assessment is the bedrock of effective treatment, yet relying solely on subjective observations and a simple ruler is no longer sufficient. The complexity of chronic and non-healing wounds demands a more sophisticated, evidence-based approach. For nurses on the front lines, mastering a combination of validated scales, diagnostic technologies, and structured documentation methods is critical to accelerating healing, preventing complications, and securing appropriate reimbursement. This guide provides a comprehensive breakdown of essential wound assessment tools for nurses, moving beyond basic techniques to explore the instruments and frameworks that define modern wound care.
This resource is designed for practical application. We will examine not just what each tool is, but precisely how to integrate it into your daily workflow, interpret its findings accurately, and leverage the data to justify treatment plans and advanced interventions for your patients. From validated scales like the Bates-Jensen and PUSH tools to advanced fluorescence imaging and rapid microbiology tests, you will gain a clear understanding of the purpose, limitations, and documentation requirements of each.
We will cover a range of instruments, including:
By the end of this article, you will have a practical toolkit to enhance your clinical judgment, improve patient outcomes, and streamline your documentation process, ensuring your assessments are both comprehensive and defensible.
The Bates-Jensen Wound Assessment Tool (BWAT) is a validated, comprehensive scale that standardizes the process of wound evaluation. Developed by Barbara Bates-Jensen, RN, PhD, it moves beyond simple measurements to provide a structured method for assessing 13 distinct wound characteristics. This tool is one of the most essential wound assessment tools for nurses in specialty settings, converting subjective observations into an objective, numerical score.
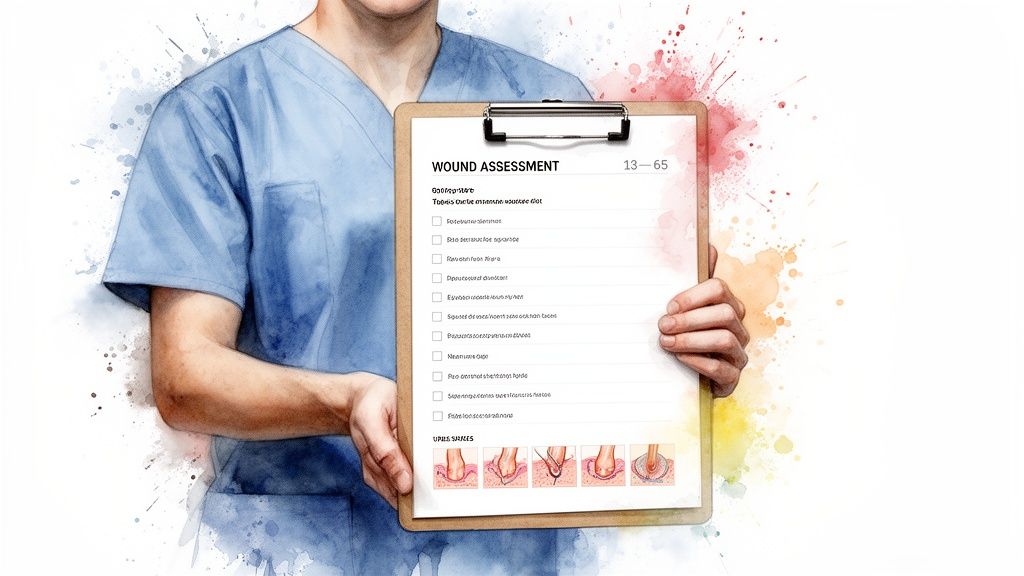
Each of the 13 items, such as necrotic tissue type, exudate amount, and surrounding skin condition, is rated on a 1-to-5 scale. These individual scores are summed to produce a total score ranging from 13 (best) to 65 (worst), creating a clear, quantitative measure of wound status. A decreasing score over time indicates healing, while a rising or stagnant score signals a need to re-evaluate the treatment plan.
The BWAT is highly versatile and integrated into various care settings to drive clinical decisions and justify interventions. For instance, major academic medical centers often mandate its use in their pressure injury prevention programs to ensure consistent documentation. Home health agencies embed the BWAT into their electronic health records (EHRs), allowing for reliable tracking of wound progress between different nurses' visits.
Furthermore, specialty wound clinics use serial BWAT scores as objective evidence to payers when requesting authorization for advanced treatments, like cellular and tissue-based products. The tool’s structure provides the detailed, standardized data required for reimbursement and quality reporting.
To ensure the BWAT is used effectively, consistent application is crucial.
The Pressure Injury Scale for Healing (PUSH Tool) is a straightforward, validated instrument developed by the National Pressure Injury Advisory Panel (NPIAP) to specifically monitor the healing of pressure injuries. Unlike more comprehensive scales, the PUSH Tool focuses on three core parameters: surface area (length × width), exudate amount, and tissue type. It simplifies wound assessment into a targeted scoring system, making it one of the most practical wound assessment tools for nurses in fast-paced settings.
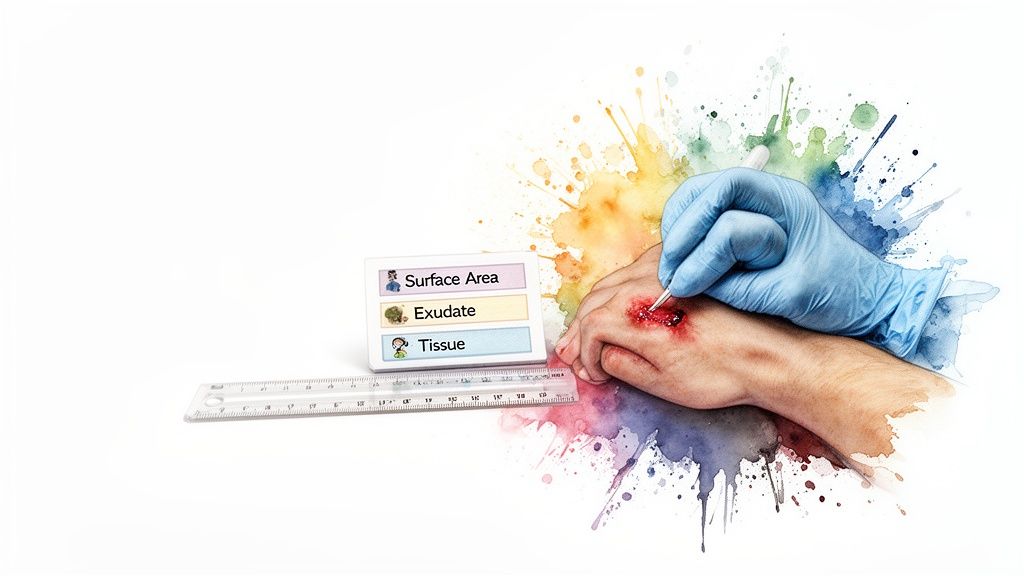
Each of the three items is assigned a score, and these are added together for a total score ranging from 0 (healed) to 17 (worst). A progressively decreasing score over time provides clear, objective evidence that the wound is healing. This simplicity and strong predictive validity for healing outcomes have made it a widely adopted tool, particularly where pressure injuries are a primary concern.
The PUSH Tool's efficiency makes it ideal for settings that require rapid, repeatable assessments. For example, visiting nurse agencies use it during each home visit to quickly flag wound deterioration and alert the supervising physician. Skilled nursing facilities (SNFs) frequently employ the PUSH Tool for regulatory compliance and quality reporting, as its data aligns with metrics required by the Centers for Medicare & Medicaid Services (CMS).
In specialty wound clinics, clinicians may use the PUSH Tool as an initial screening device. A stagnant or worsening score can trigger a more comprehensive evaluation with a tool like the BWAT or justify the use of advanced diagnostics to investigate non-healing factors.
Effective use of the PUSH Tool depends on consistency and accurate technique.
The TIME principle is a dynamic and systematic framework designed to guide wound bed preparation, a crucial step in managing chronic wounds. Popularized by wound care experts like Keith Dowsett and Diane Ayello, TIME is not a numerical scoring tool but rather a conceptual model that helps clinicians organize their assessment and treatment strategy. It stands for Tissue management, Inflammation/Infection control, Moisture balance, and Epithelial (edge) advancement.
This framework guides nurses through a logical sequence of evaluating and addressing the primary barriers to healing. By breaking down the complex wound environment into four manageable components, it ensures a holistic and structured approach. The goal is to create an optimal wound bed that is well-vascularized, free of non-viable tissue and infection, and has a balanced moisture level, all of which are necessary for healing to progress.
The TIME framework's strength lies in its applicability across various clinical settings as one of the most practical wound assessment tools for nurses. Academic wound centers often use it as a foundational model during nurse orientation to instill a systematic assessment process. In multidisciplinary wound care teams, the TIME structure provides a common language for case conferences and grand rounds, ensuring all specialists from podiatry to infectious disease are aligned.
Additionally, home health agencies integrate TIME principles into their electronic nursing notes, promoting consistent documentation and care planning between visits. Primary care providers can use a simplified TIME checklist to identify when a wound is not progressing and a referral to a wound specialist is warranted, ensuring timely intervention for complex cases.
Effective use of the TIME framework depends on its consistent application in clinical practice.
The Sussman Wound Healing Tool (SWHT) is a validated, 10-item scale that provides a quantitative score for tracking wound healing progress. Developed by physical therapist Cathy Sussman, this tool assesses key attributes of the wound and periwound tissue to generate a score that correlates with the physiological phases of healing. As one of the foundational wound assessment tools for nurses, it translates complex clinical observations into a simple, objective number.
The SWHT evaluates characteristics such as wound size, depth, edges, undermining, exudate, necrotic tissue, granulation tissue, and epithelialization. Each item is rated on a scale, and the scores are summed to produce a total score ranging from 10 (healthiest) to 40 (worst). A decreasing score over time provides clear evidence of healing, while a static score can alert clinicians to a stalled wound that requires a new treatment strategy.
The SWHT is particularly effective in settings where tracking healing trajectories over time is critical for both clinical management and reimbursement. For example, diabetic foot ulcer clinics use serial SWHT scores to justify the medical necessity of advanced interventions, such as cellular and tissue-based products, when a wound fails to show improvement. Community wound care centers also rely on the SWHT to provide standardized progress reports to insurance payers.
In post-operative settings, nurses use the SWHT to monitor surgical site incisions. An increasing score can serve as an early warning sign of delayed healing or potential dehiscence, prompting closer evaluation and intervention. Its structured format ensures that all clinicians are evaluating the wound based on the same criteria, improving communication and continuity of care.
For the SWHT to be a reliable instrument, consistent and accurate application is essential.
The MolecuLight DX is a handheld, non-invasive fluorescence imaging device that provides real-time visualization of clinically significant bacteria in wounds. It functions by shining a safe, specific wavelength of light onto the wound bed. Bacteria autofluoresce, emitting a red or cyan glow when present in high concentrations, allowing clinicians to see bacterial burden that is invisible to the naked eye. This makes it one of the most innovative wound assessment tools for nurses, moving beyond subjective signs to provide immediate, actionable diagnostic data at the point of care.
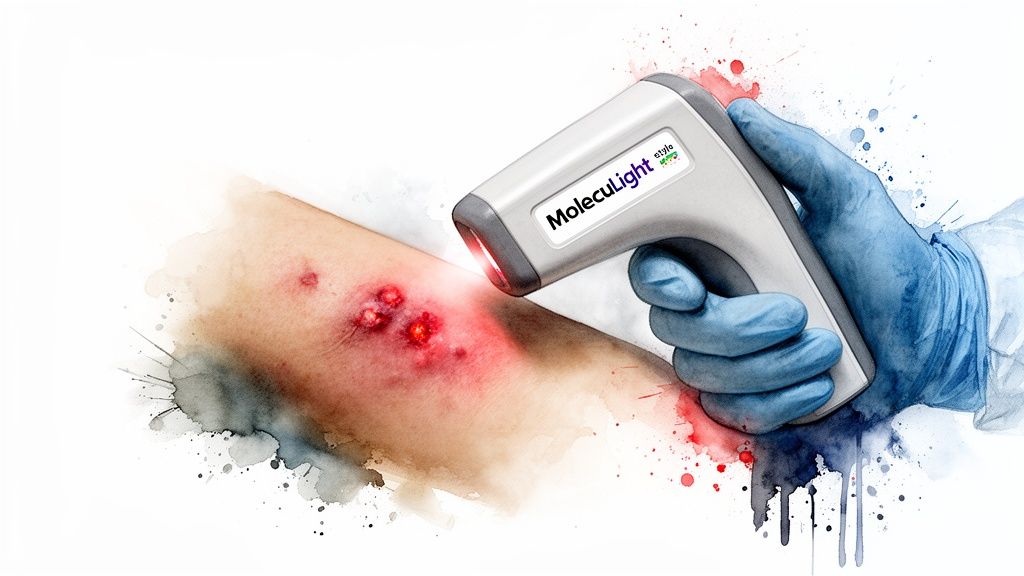
Unlike traditional scales, MolecuLight DX offers a diagnostic adjunct that directly impacts treatment. The presence, location, and load of bacteria are instantly visible, enabling more targeted debridement, precise sampling for cultures, and informed antimicrobial stewardship. The device also includes a built-in measurement feature for consistent, objective tracking of wound dimensions over time.
The MolecuLight DX is rapidly becoming a standard of care in specialty settings to guide interventions and justify treatments. For example, diabetic foot ulcer clinics use its imaging to determine the severity of bioburden and guide decisions between topical antimicrobials and systemic antibiotics. Surgical centers utilize it post-debridement to confirm the wound bed is adequately prepared before applying costly cellular and tissue-based products.
Home health agencies are also piloting the technology and have found it helps identify rising bacterial loads earlier, potentially reducing hospital readmissions. The objective, visual evidence captured by the device is also used to support reimbursement claims for advanced procedures and products, providing clear justification to payers.
To maximize the clinical benefit of the MolecuLight DX, a structured workflow is essential.
Rapid pathogen testing represents a pivotal diagnostic framework rather than a traditional assessment scale. It revolutionizes how clinicians identify and address wound bioburden by significantly shortening the time needed to determine bacterial presence and antibiotic susceptibility. While traditional cultures can take 48-72 hours or more, rapid molecular methods like Polymerase Chain Reaction (PCR) can deliver results in as little as one to two days. This speed allows nurses and providers to correlate clinical wound assessment findings, such as increased exudate or periwound inflammation, with objective microbiological data for timely, targeted interventions.
This diagnostic tool integrates directly into the wound assessment process, providing a crucial piece of the puzzle that visual inspection alone cannot. By rapidly identifying the specific microorganisms colonizing a wound and their resistance patterns, clinicians can move beyond broad-spectrum antibiotics. This approach is fundamental among modern wound assessment tools for nurses, facilitating antimicrobial stewardship and justifying the use of advanced therapies when bioburden is a primary barrier to healing.
The clinical impact of rapid pathogen testing is profound across various care settings. Specialty wound centers frequently send samples from all non-healing wounds for rapid PCR, using the results to de-escalate or change antimicrobial therapies with precision. Diabetic foot ulcer programs rely on this framework to quickly identify complex polymicrobial infections, enabling them to select effective combination antibiotic regimens from the outset.
In post-operative settings, surveillance programs use rapid testing to detect emerging resistant pathogens like MRSA early, helping to prevent progression to deeper infections or sepsis. Home health agencies also leverage this technology by ordering tests at the first sign of infection. The faster turnaround allows for proactive management in the outpatient setting, often preventing costly and disruptive hospitalizations for patients.
Effective integration of rapid pathogen testing requires clear protocols and skilled execution.
A Comprehensive Wound Assessment Checklist (CWAC) is not a scored scale but a structured documentation form that guides nurses through a complete and consistent evaluation. It consolidates critical assessment domains-like wound characteristics, periwound skin condition, infection signs, and patient-specific factors-into a single, standardized template. This organizational framework ensures that no critical element is overlooked, making it one of the most practical wound assessment tools for nurses focused on regulatory compliance and thorough documentation.
The primary function of a CWAC is to enforce a minimum standard of care during every assessment. By prompting the clinician through each necessary step, from measuring dimensions to evaluating exudate and pain levels, it creates a robust, reproducible record. This structured data is invaluable for tracking progress, facilitating clear communication between shifts, and defending clinical decisions during audits.
The CWAC is a foundational tool for standardizing care across large healthcare systems. Major hospital networks often mandate a specific CWAC template within their EHR for all wound care entries, particularly for pressure injuries, to meet regulatory reporting requirements from agencies like The Joint Commission and CMS. Its utility extends beyond acute care; home health agencies equip visiting nurses with printable or digital CWACs to ensure consistent data collection in the field, which is later uploaded to the central EHR.
In specialty wound clinics, custom CWACs are often enhanced with fields for advanced diagnostics. For example, a template might include dedicated sections to document results from fluorescence imaging or rapid pathogen tests, directly linking these findings to the overall assessment. This integration provides a complete clinical picture that practice administrators can leverage to justify higher-acuity billing codes and secure reimbursement for advanced treatments.
Effective implementation transforms the CWAC from a simple form into a powerful clinical governance tool.
Wound Healing Trajectory Assessment is a dynamic method that shifts the focus from single-point evaluations to a continuous, data-driven narrative of healing. It leverages serial assessment data, often from tools like the BWAT or PUSH, and combines it with predictive analytics algorithms. This approach forecasts healing timelines and proactively identifies wounds at high risk for delayed healing, making it one of the most forward-thinking wound assessment tools for nurses.
Instead of a static snapshot, this framework uses longitudinal data comparison, such as comparing baseline measurements to those at week two and week four. By tracking the rate of change, clinicians can detect stalled or worsening trends far earlier than with isolated assessments. This enables proactive escalation to advanced interventions, transforming wound care from a reactive to a predictive discipline, often powered by modern wound care software platforms.
This data-centric approach is being integrated across the continuum of care to improve outcomes and resource allocation. For example, specialty wound networks use predictive analytics to flag chronic wounds approaching the 30-day plateau threshold, automatically triggering specialist referral orders. Large health systems track diabetic foot ulcer cohorts via trajectory analysis to identify patients who are falling behind expected healing rates, which can trigger provider education or more intensive patient follow-up.
In acute care, post-operative wound surveillance programs can alert surgical teams when a wound's trajectory suggests a heightened risk of incisional infection. Similarly, home health agencies use healing trajectory graphs in weekly team meetings to visually prioritize high-risk wounds for additional nursing visits or a telehealth consultation with a wound specialist.
Effective trajectory assessment relies on consistent data collection and analysis.
| Tool | Core features ✨ | Clinical usability & quality ★ | Value / Cost 💰 | Target audience 👥 | Unique selling point 🏆 |
|---|---|---|---|---|---|
| Bates-Jensen Wound Assessment Tool (BWAT) | 13-item numeric scale (13–65); detailed descriptors ✨ | Highly validated for multiple wound types; objective longitudinal tracking ★★★★★ | 💰 Low — free tool; training time investment | 👥 Specialty wound centers, hospitals, home health | 🏆 Granular, evidence-backed scoring for objective trend documentation |
| Pressure Injury Scale for Healing (PUSH Tool) | 3-item scale: area, exudate, tissue; built-in graphing ✨ | Fast (≤5 min); strong predictive validity for pressure injuries ★★★★ | 💰 Low — free; minimal training | 👥 Home health, SNFs, high‑volume clinics | 🏆 Rapid screening + healing prediction calculator for pressure injuries |
| TIME (Wound Bed Preparation) Framework | 4 pillars: Tissue, Infection/Inflammation, Moisture, Epithelialization ✨ | Intuitive clinical decision framework; guides interventions (qualitative) ★★★★ | 💰 Low — framework; training required | 👥 Multidisciplinary teams, primary care, wound clinics | 🏆 Directly links assessment to targeted treatment choices |
| Sussman Wound Healing Tool (SWHT) | 10-item scale (10–40) focusing on healing phases ✨ | Shorter than BWAT; phase-correlated prognostics; validated ★★★★ | 💰 Low — minimal implementation cost; training needed | 👥 Community wound centers, DFU clinics, post-op monitoring | 🏆 Efficient phase-tracking score to support reimbursement requests |
| MolecuLight DX Fluorescence Imaging | Handheld fluorescence imaging of bioburden; measurement tools ✨ | Real-time objective bacterial visualization; improves sampling/debridement ★★★★★ | 💰 High — capital $30k–$50k + licensing/maintenance | 👥 Specialty centers, academic hospitals, networks | 🏆 Visualizes bacterial load at point-of-care to guide targeted care |
| Rapid Pathogen Testing (PCR/Culture Sensitivity) | Molecular ID + rapid susceptibility (24–48 hrs) ✨ | Speeds targeted therapy; improves antimicrobial stewardship ★★★★★ | 💰 Medium–High — $200–$400/test; lab infrastructure | 👥 Specialty centers, clinics ordering targeted antibiotics | 🏆 Fast organism ID & susceptibilities to reduce empiric antibiotics |
| Comprehensive Wound Assessment Checklist (CWAC) | Structured EHR-friendly checklist; integrates images/labs ✨ | Standardizes documentation; reduces variability and chart time ★★★★ | 💰 Medium — IT/customization costs; training | 👥 Health systems, EHR-integrated clinics, home health | 🏆 Ensures complete, defensible documentation for quality & billing |
| Wound Healing Trajectory & Predictive Analytics | Serial scoring + predictive algorithms; dashboards/flags ✨ | Data-driven early warning; supports escalation decisions ★★★★ | 💰 Medium–High — software/subscription + IT integration | 👥 Specialty networks, population health teams, wound programs | 🏆 Forecasts stalled healing and automates escalation to advanced care |
Navigating the complex landscape of wound care requires more than just clinical skill; it demands a strategic, data-driven approach. As we've explored, the most effective wound assessment strategy isn't about finding a single perfect tool. Instead, it’s about skillfully assembling an integrated, multi-modal toolkit that provides a complete, objective picture of the wound environment from every angle. By moving beyond subjective observation and embracing a combination of validated scales, advanced diagnostics, and structured documentation, nurses can transform routine assessment into a powerful therapeutic intervention.
The true power of these wound assessment tools for nurses is realized when they are used in concert. A validated scale like the Bates-Jensen Wound Assessment Tool (BWAT) provides a comprehensive, longitudinal record of wound characteristics, ideal for tracking complex cases over time. In contrast, the Pressure Ulcer Scale for Healing (PUSH) tool offers a rapid, efficient method for quick progress checks, perfect for busy clinical settings or large patient loads.
By layering these foundational scales with advanced diagnostics, you gain unprecedented insight. A fluorescence imaging device, for instance, can reveal the invisible threat of high bacterial loads before overt signs of infection appear, while rapid pathogen testing provides the specific microbial data needed to guide targeted antimicrobial stewardship. This combination empowers you to move from a reactive to a proactive care model, anticipating complications and intervening before they derail the healing process.
Effective tool integration is about creating a clear, defensible narrative of the patient's healing journey. This process hinges on three key pillars:
Beyond traditional assessment methods, nurses should also be aware of advanced therapeutic interventions that can significantly impact a wound's progress. For instance, understanding the principles of wound oxygen therapy for healing can provide another crucial option for patients with compromised perfusion or stalled wounds, complementing the data gathered from your assessment toolkit.
Ultimately, mastering this diverse array of wound assessment tools for nurses elevates your practice. It empowers you to advocate for your patients with confidence, providing clear justification for advanced treatments and securing necessary reimbursement. This methodical, evidence-based approach not only accelerates healing and improves clinical outcomes but also reinforces your role as a critical, strategic leader in the wound care team, dedicated to restoring function and quality of life for every patient you serve.
Ready to elevate your wound care practice with expert support and the industry’s most advanced assessment protocols? Specialty Wound Care partners with healthcare facilities to implement data-driven wound management programs that improve outcomes and ensure compliance. Discover how our specialized teams can integrate these tools into your workflow by visiting Specialty Wound Care.

Primus Healthcare
When faced with a complex or slow-healing wound, the focus is often on advanced treatments, dressings, and clinical interventions. While these are critical, the building blocks for tissue repair are delivered directly through your diet. The food you eat provides the essential proteins, vitamins, and minerals that power cellular regeneration, manage inflammation, and defend against infection. Proper nutrition isn't just a supportive measure; it's a foundational component of effective wound management, working in concert with advanced therapies to achieve the best possible outcomes.
This guide moves beyond generic advice to provide an actionable, evidence-informed roadmap to the best foods for wound healing. We will detail not just what to eat, but why specific nutrients work, how to incorporate them into your daily meals, and practical serving suggestions. Understanding this connection is the first step toward taking an active role in your recovery, ensuring your body has everything it needs to rebuild and restore itself from the inside out. For a comprehensive approach to fueling your body's healing, exploring nutrient-dense options can be a powerful strategy; for instance, some find that learning about the Beef Organ Supplement Benefits for Peak Energy and Recovery offers insights into maximizing micronutrient intake.
From the protein required for new tissue synthesis to the specific vitamins that orchestrate immune responses, each item on this list plays a unique and vital role. We will explore ten key nutritional powerhouses, providing clear, practical guidance for patients, caregivers, and healthcare providers to harness the power of food in the healing process.
Protein is the fundamental building block for tissue repair, making it one of the best foods for wound healing. When your body is injured, it requires a significant amount of amino acids, the components of protein, to build new tissue, form collagen, and support a robust immune response. Without adequate protein, the healing process can stall, leaving wounds vulnerable to infection and delayed closure.
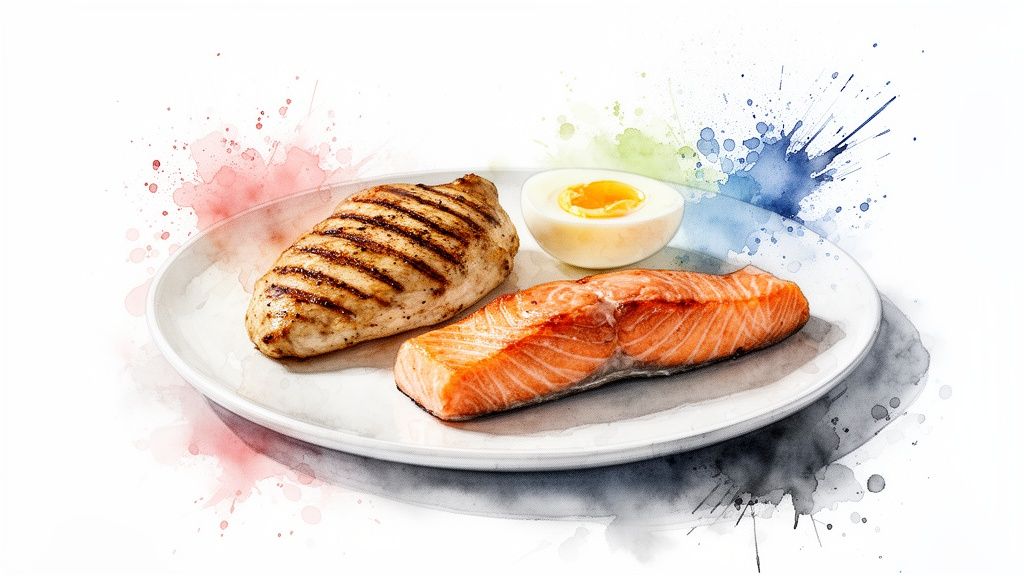
For individuals with significant wounds, protein needs can nearly double. Clinicians often recommend an intake of 1.5 to 2.0 grams of protein per kilogram of body weight. Complete proteins, which contain all essential amino acids, are particularly effective. These are readily found in animal-based sources.
To maximize the benefits of protein, focus on high-quality sources and strategic timing.
For complex wounds that are slow to heal despite dietary changes, specialized interventions may be necessary. Explore the advanced treatment options that complement nutritional support by visiting Primus Specialty Wound Care.
Vitamin C, also known as ascorbic acid, is an indispensable nutrient in the wound healing process. It acts as a crucial cofactor in the synthesis of collagen, the protein that provides structure and strength to new tissue. Beyond tissue formation, vitamin C bolsters the immune system by enhancing neutrophil activity to fight infection and supports the growth of new blood vessels, a process called angiogenesis, which is vital for delivering oxygen and nutrients to the injury site.

Standard dietary allowances for vitamin C are often insufficient for healing. The body’s demand can increase significantly, with recommendations for wound recovery ranging from 200–500 mg daily, and sometimes higher for severe wounds. A deficiency can severely delay healing, weaken newly formed tissue, and heighten the risk of infection. Incorporating a variety of vitamin C-rich foods is a key strategy for accelerating recovery.
To ensure you are meeting the elevated demands for healing, focus on incorporating potent sources of vitamin C throughout your day.
Zinc is a powerful trace mineral that plays a central role in nearly every stage of the healing cascade. It acts as a cofactor for over 300 enzymes essential for protein synthesis, cell division, and immune defense. When the body sustains a wound, the demand for zinc increases significantly to support the rapid creation of new skin cells and connective tissue. A deficiency in this mineral can severely delay healing, weaken new tissue, and increase susceptibility to infection.
For individuals with significant wounds, a daily intake of 15–30 mg of zinc is often recommended, which is higher than the standard dietary allowance. This mineral is crucial for regulating matrix metalloproteinases (MMPs), enzymes that help break down old tissue to make way for new, healthy growth during the remodeling phase of healing. Ensuring adequate zinc levels is a key nutritional strategy for promoting efficient and complete recovery.
Integrating zinc-rich foods into your diet can be straightforward with a few strategic choices.
When nutritional support alone is not enough to close a persistent wound, it may be time to consider more direct interventions. You can explore how advanced modalities complement dietary strategies by learning more about wound care management at Primus Specialty Wound Care.
Omega-3 fatty acids are powerful anti-inflammatory agents, making them some of the best foods for wound healing. While the initial inflammatory stage is a necessary part of the healing cascade, a prolonged or excessive inflammatory response can hinder progress. Omega-3s, particularly EPA and DHA, help modulate this response, promoting the transition from the inflammatory phase to the rebuilding (proliferative) phase.
These essential fatty acids, which the body cannot produce on its own, are incorporated into cell membranes and improve blood flow to the wound site. This enhanced circulation ensures that vital oxygen and nutrients can reach the damaged tissue, accelerating repair and reducing complications.
Incorporating omega-3-rich foods consistently is key to harnessing their anti-inflammatory benefits for wound care.
Effective wound management often requires a team-based approach that combines targeted nutrition with expert clinical care. Learn more about the goals of advanced home wound collaborative care to see how a comprehensive strategy supports optimal healing outcomes.
Iron is a critical mineral for healing, primarily because it is a key component of hemoglobin, the protein in red blood cells that transports oxygen. A healing wound has high metabolic demands and requires a rich supply of oxygen for energy production and cellular functions. Iron deficiency can lead to anemia, which significantly impairs this oxygen delivery system, slowing tissue repair and weakening the immune response at the wound site.
The recommended daily intake is typically 8 mg for adult men and 18 mg for adult women, but these needs may increase if anemia is present. Iron is also an essential cofactor for enzymes involved in the synthesis of collagen, providing another direct link between this mineral and the structural integrity of new tissue. Therefore, including iron-rich foods for wound healing is a non-negotiable part of any recovery plan.
Maximizing iron absorption is just as important as consuming iron-rich foods.
Arginine is a conditionally essential amino acid, meaning your body’s need for it skyrockets during periods of stress, such as when you have a significant wound. It plays a pivotal role in healing by boosting nitric oxide (NO) production, which improves blood flow and oxygen delivery to the injured tissue. This enhanced circulation is critical for clearing debris and supplying the nutrients needed for repair.
During the acute healing phase, arginine requirements can increase dramatically, from a typical 1–2 grams to as high as 15 grams daily. Citrulline, found abundantly in watermelon, is also valuable as the body efficiently converts it into arginine. Meeting these heightened needs through diet and sometimes supplementation makes arginine one of the best foods for wound healing, particularly for chronic or complex wounds.
Safely increasing your intake of these amino acids involves a strategic approach that often combines whole foods with targeted supplementation for significant wounds.
Antioxidants play a crucial protective role in the wound healing process by combating oxidative stress. When tissue is injured, the inflammatory response generates unstable molecules called free radicals. If left unchecked, these molecules can damage healthy cells, impair growth factor signaling, and prolong inflammation, effectively stalling recovery. Antioxidants neutralize these free radicals, creating a more stable environment for cellular repair and regeneration.
This makes foods rich in antioxidants some of the best foods for wound healing, as they help protect the delicate new tissues being formed. Key antioxidants like vitamin E and selenium, along with potent plant compounds like polyphenols and anthocyanins, work together to reduce cellular damage and support the body’s natural repair mechanisms. Maintaining a balance is crucial; while a deficiency can hinder healing, excessive supplementation can interfere with necessary inflammatory signals.
Focus on incorporating a diverse range of whole foods rather than relying on high-dose supplements, which can sometimes be counterproductive.
The B vitamins are a group of essential cofactors that play a critical, behind-the-scenes role in wound healing. Wound repair is a highly energy-intensive process, and these vitamins are indispensable for converting the food we eat into usable cellular energy (ATP). Without sufficient B vitamins, critical processes like cell division, collagen synthesis, and immune cell proliferation can be severely hampered, leading to a stalled or prolonged healing timeline.
Deficiencies in B vitamins, particularly B12 and folate, are surprisingly common, especially among older adults, individuals with gastrointestinal disorders, and those on certain medications. Ensuring a steady supply of these nutrients is crucial for providing the metabolic support needed for effective tissue regeneration, making them one of the best foods for wound healing.
To support the high metabolic demands of healing, focus on incorporating a variety of B vitamin-rich foods into your daily meals.
While individual nutrients are powerful, combining key micronutrients creates a synergistic effect that significantly accelerates collagen production. This "stack" of copper, manganese, vitamin A, and the amino acid glycine targets collagen formation from multiple angles, supporting everything from gene expression to the final cross-linking of collagen fibers. This integrated approach makes it one of the most effective strategies for promoting the best foods for wound healing.

This micronutrient team works together to build, strengthen, and remodel tissue. Copper is essential for the enzyme that cross-links collagen fibers, giving new tissue its strength. Manganese activates other key enzymes, vitamin A directs cellular activity, and glycine provides the literal building blocks, as it makes up one-third of every collagen molecule.
Focusing on a variety of whole foods is the best way to get these synergistic nutrients.
While not a food in the traditional sense, optimal hydration is a non-negotiable foundation for the healing process. Water is a critical component of every cell and is essential for transporting vital nutrients and oxygen to the wound site. Without adequate fluid, cellular function slows, nutrient delivery is impaired, and the body’s ability to build new tissue grinds to a halt.
Dehydration can severely delay healing by impairing new blood vessel formation (angiogenesis) and slowing the migration of skin cells needed to close the wound. Electrolytes such as sodium, potassium, and magnesium work alongside water to maintain fluid balance and support nerve and muscle function, which are crucial for overall recovery. Ensuring a steady intake of fluids is one of the most effective strategies to support the body's natural repair mechanisms.
To effectively support healing, focus on consistent fluid intake and replenishing key electrolytes, especially if there is fluid loss from wound drainage, fever, or diarrhea. For a deeper dive into their essential functions in the body's processes, you can explore understanding the role of electrolytes.
| Nutrient / Food Group | Implementation Complexity 🔄 | Resource Requirements ⚡ | Expected Outcomes 📊⭐ | Ideal Use Cases 💡 | Key Advantages |
|---|---|---|---|---|---|
| Protein (Lean meats, fish, poultry, eggs) | 🔄 Medium — meal planning, distribution across meals | ⚡ Moderate — regular food access or shakes; monitor renal disease | 📊 ⭐⭐⭐⭐⭐ — accelerates epithelialization, collagen deposition, immune support | Post-surgical, acute/chronic wounds, immobilized patients | Widely available; strong clinical evidence; prevents muscle loss |
| Vitamin C (citrus, berries, peppers, greens) | 🔄 Low — include fresh produce or supplement | ⚡ Low — inexpensive foods/supplements; heat-sensitive | 📊 ⭐⭐⭐⭐ — essential for collagen cross-linking and angiogenesis | Deficient patients, delayed healing, need for collagen synthesis | High bioavailability from fresh sources; antioxidant support |
| Zinc (oysters, beef, seeds, legumes) | 🔄 Low–Medium — diet ± supplementation; monitor dosing | ⚡ Low — affordable supplements; bioavailability varies | 📊 ⭐⭐⭐⭐ — improves epithelialization and immune response (if deficient) | Chronic wounds, suspected micronutrient deficiency | Cofactor for collagen enzymes; accessible in animal/plant forms |
| Omega‑3 Fatty Acids (fatty fish, walnuts, flax) | 🔄 Low — dietary inclusion or supplements | ⚡ Moderate — quality supplements or regular fatty fish needed | 📊 ⭐⭐⭐ — modulates inflammation, improves microcirculation | Chronic inflammatory wounds, diabetic ulcers, cardiovascular comorbidity | Anti‑inflammatory effects; cardiovascular benefits |
| Iron (red meat, spinach, lentils, fortified cereals) | 🔄 Medium — requires lab screening and timing strategies | ⚡ Moderate — foods and supplements; manage interactions/side effects | 📊 ⭐⭐⭐⭐ — restores oxygen delivery; crucial if anemic | Anemic patients, large/slow-healing wounds | Improves oxygenation; inexpensive supplementation |
| Arginine & Citrulline (pumpkin seeds, chicken, watermelon) | 🔄 Medium–High — therapeutic doses often need supplements; monitor contraindications | ⚡ Moderate — supplements common; cost for high-dose regimens | 📊 ⭐⭐⭐⭐ — enhances NO-mediated perfusion and collagen deposition | Ischemic wounds, vascular insufficiency, surgical recovery | Boosts blood flow and collagen; evidence for improved healing rates |
| Antioxidants (vitamin E, selenium, green tea, berries) | 🔄 Low — prioritize whole foods; avoid megadoses | ⚡ Low — varied food sources; supplement caution | 📊 ⭐⭐⭐ — protects against oxidative damage; balance required | Wounds with oxidative stress, systemic inflammation | Multiple synergistic sources; additional systemic benefits |
| B Vitamins Complex (whole grains, eggs, legumes, greens) | 🔄 Low–Medium — screen and supplement when needed | ⚡ Low — fortified foods or inexpensive supplements | 📊 ⭐⭐⭐⭐ — supports energy metabolism and cell proliferation | Elderly, malnourished, diabetic, vegan patients | Essential metabolic cofactors; generally safe (water‑soluble) |
| Collagen‑Boosting Micronutrients Stack (Cu, Mn, Vit A, Glycine) | 🔄 High — coordinated dosing, monitor interactions/toxicity | ⚡ Moderate — targeted supplements/food combinations; monitoring advised | 📊 ⭐⭐⭐⭐ — targets collagen synthesis and cross‑linking; accelerates remodeling | Slow‑healing wounds with poor collagen formation | Synergistic mechanism focused on collagen maturation |
| Hydration & Electrolytes (water, coconut water, bone broth) | 🔄 Low — track intake; adjust for comorbidities | ⚡ Low — minimal cost for water/broth; electrolyte drinks when needed | 📊 ⭐⭐⭐⭐⭐ — foundational for cellular function and nutrient transport | Dehydrated patients, high‑output wounds, fever, elderly | Rapid, low‑cost impact on perfusion and healing; easy to implement |
Navigating the path to recovery from a significant wound involves many components, but as we've explored, the food you eat is one of the most powerful and accessible tools at your disposal. Your plate is not just a source of calories; it is a meticulously designed toolkit packed with the raw materials your body needs to rebuild, defend against infection, and restore function. Harnessing the power of the best foods for wound healing is a proactive and essential step toward recovery.
This journey begins with a foundation of high-quality protein to build new tissue, bolstered by the collagen-synthesizing power of Vitamin C. We've seen how crucial minerals like zinc and iron are for cellular replication and oxygen transport, respectively, while anti-inflammatory Omega-3 fatty acids help manage the body's response to injury. The synergy between these nutrients creates an internal environment primed for healing.
Understanding which foods help is the first step; consistently incorporating them into your daily routine is where true progress is made. The goal is not to execute a perfect, restrictive diet, but to make strategic, nutrient-dense choices meal after meal.
Think of it as a strategic checklist for your daily intake:
By framing your nutrition this way, you transform a complex topic into a series of simple, actionable daily goals. Remember, consistency trumps perfection. Small, sustained dietary improvements can lead to significant and measurable advancements in your healing timeline.
Key Insight: Your nutritional strategy is most effective when it is part of a holistic, coordinated care strategy. For complex or non-healing wounds, dietary changes should complement, not replace, advanced clinical interventions.
While a nutrient-rich diet lays the groundwork for recovery, it's crucial to recognize that nutrition is one pillar of a comprehensive wound care plan. This is especially true for individuals managing chronic conditions like diabetes, renal disease, or vascular issues that can complicate the healing process.
Discussing your nutritional plan with your healthcare provider is a non-negotiable step. They can help you tailor your intake to your specific medical needs, ensuring your dietary choices support, rather than hinder, your overall health. For instance, a patient with kidney disease will need to carefully manage protein intake, a detail that requires expert medical guidance.
When facing a complex or non-healing wound, partnering with a specialized provider is paramount. A dedicated wound care center can integrate targeted nutritional counseling with state-of-the-art diagnostics and treatments. They can use advanced tools like MolecuLight™ imaging to assess tissue viability or employ regenerative therapies like amniotic allografts. This integrated approach, which combines the best foods for wound healing with expert clinical management, creates the optimal environment for your body to heal efficiently, reduce the risk of complications, and accelerate your return to a full and active life.
Don't let a non-healing wound control your life. The expert team at Specialty Wound Care integrates advanced treatments with personalized care plans, including nutritional guidance, to create the best possible healing environment. Contact Specialty Wound Care today to learn how our comprehensive approach can accelerate your recovery and help you regain your quality of life.

Primus Healthcare
To really speed up wound healing, you need a proactive plan that kicks into gear from the moment a wound appears. It all starts with a swift and accurate assessment to figure out exactly what you're dealing with, followed by diligent infection control and proper cleansing to prepare the wound bed. This foundational framework is critical for setting the stage for rapid recovery.
When a wound stalls, the first few actions taken by both the patient and the clinician are the best predictors of success. The chronic wound crisis is a massive challenge, impacting approximately 6.5 million Americans who suffer from deficient healing. That number is climbing, thanks to an aging population and rising risk factors like diabetes and vascular disease.
The consequences are severe—from persistent pain and life-threatening infections to amputations. A structured, decisive approach isn't just a good idea; it's non-negotiable. This is why we have to move beyond a "wait-and-see" mindset. A fast, well-thought-out plan can be the difference between a wound that closes in weeks versus one that lingers for months or even years.
To lay the groundwork for effective treatment, we can break down the initial process into a few core pillars. Each one builds on the last, creating a comprehensive strategy for healing.
Here's a quick look at these foundational pillars:
| Pillar | Primary Goal | Key Actions |
|---|---|---|
| Accurate Assessment | To identify the root cause and specific characteristics of the wound. | Measure size and depth, identify tissue types (granulation, slough, eschar), and evaluate the surrounding skin. |
| Infection Control | To eliminate bacterial barriers and prevent complications. | Cleanse the wound properly, use diagnostic tools like fluorescence imaging, and perform targeted debridement. |
| Wound Bed Preparation | To create an optimal environment for new tissue growth. | Remove non-viable tissue (debridement), manage exudate, and ensure the wound bed is ready for advanced dressings or therapies. |
This table simplifies the core principles, but let's dive into what these actions look like in practice.
You can't effectively treat what you haven't accurately identified. The entire course of treatment hinges on that first, thorough wound assessment. A diabetic foot ulcer, for instance, demands a completely different strategy than a post-surgical incision or a pressure injury.
This initial evaluation goes far beyond just a quick look. A clinician will dig into:
Once we know what we're up against, the focus immediately shifts to creating an optimal healing environment. This starts with aggressive infection control and proper cleansing. The goal isn’t just to "clean" the wound—it’s to meticulously prepare the wound bed for regeneration.
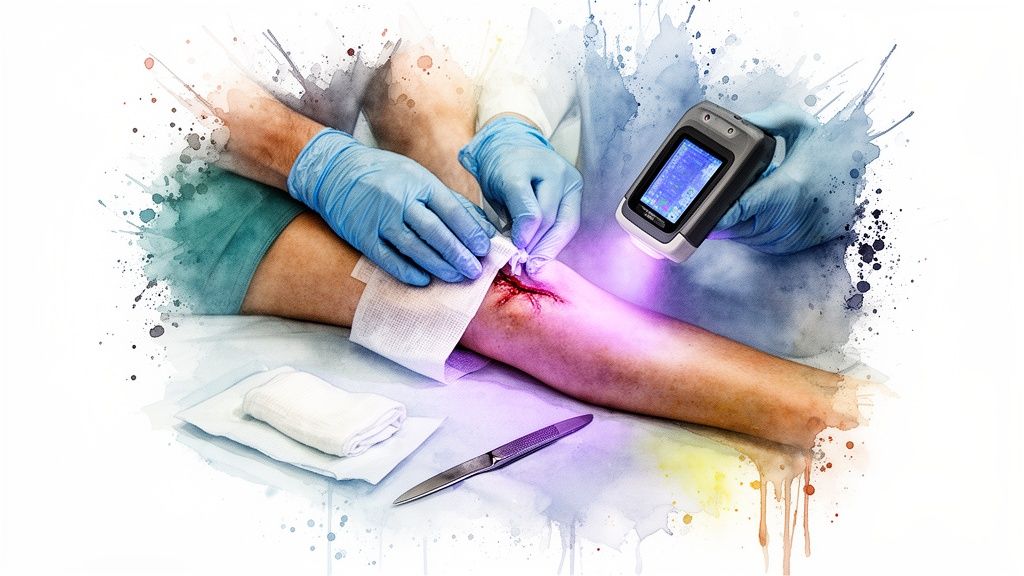
Modern tools have completely changed how we do this. For example, fluorescence imaging lets clinicians see high concentrations of bacteria in real-time, often long before the classic signs of infection ever appear. This technology guides debridement—the removal of dead or infected tissue—with incredible precision, ensuring we only remove non-viable tissue while preserving healthy cells. It's a game-changer for preventing complications.
Key Takeaway: Think of debridement not as cleaning, but as cultivating a garden. You must remove the weeds (dead tissue and bacteria) to allow the flowers (new, healthy tissue) to grow.
The simple illustration below captures this core process flow for foundational wound healing.
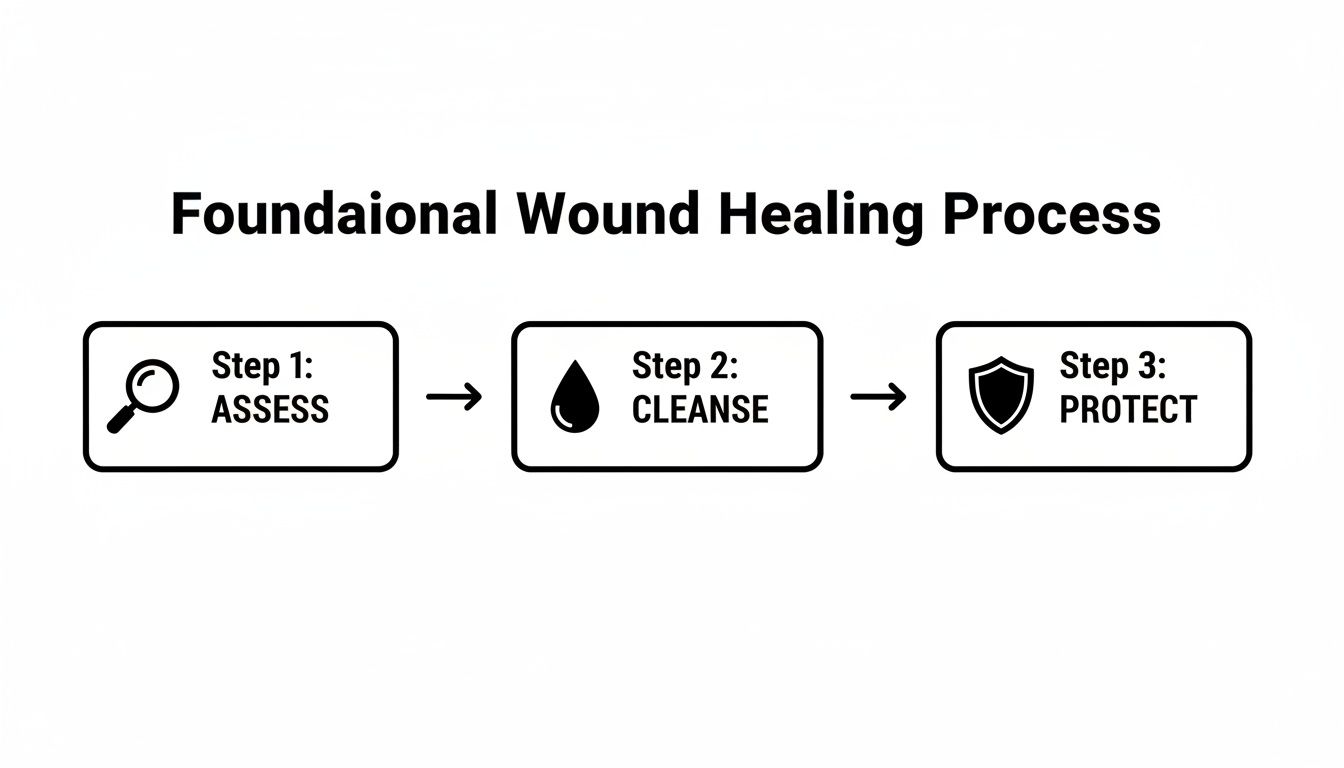
This simple three-part framework—Assess, Cleanse, Protect—forms the backbone of every effective wound care plan. It guides every subsequent action. The collaborative nature of this process is also key; understanding the goals of advanced home wound collaborative care can empower patients to take a more active role in their own recovery alongside their clinical team.
When you're dealing with a non-healing wound, time is the one thing you can't get back. The impulse to "wait and see" is understandable, but it's also one of the biggest roadblocks to recovery. Every single day a wound stays open, the door is also open for complications like infection, biofilm, and further tissue damage.
This isn't just about being patient; it's about biology. A wound that's been around for a few weeks is a completely different beast than one that has lingered for months. Chronic wounds get stuck in a persistent state of inflammation, and their very physiology changes, making them incredibly resistant to healing. Acting fast disrupts this cycle before it becomes deeply entrenched.
Think of a new wound as having a certain "healing momentum." In the early days, the body's repair systems are firing on all cylinders, ready to get the job done. Stepping in during this critical window with the right treatments leverages that natural momentum and guides the wound toward closure.
But if you miss that window, the wound loses its forward progress. The surrounding tissue gets weaker, circulation might drop off, and the wound bed can become a perfect breeding ground for stubborn bacteria. This is exactly why a six-month-old wound often demands a much more aggressive and complex treatment plan than a six-week-old one.
The data backs this up without question. Wound duration is a huge predictor of healing. Studies consistently show that wounds present for a shorter time respond far better to treatment. One major study found that chronic wounds present for less than 12 months were significantly more likely to heal than older wounds, with an odds ratio of 3.378. This pattern held true for all kinds of wounds—traumatic injuries, venous leg ulcers, and pressure injuries alike. You can explore the full study on wound duration and healing outcomes for a deeper dive.
To see how this plays out in the real world, let's look at a common scenario with two patients who both have a diabetic foot ulcer.
Patient A’s ulcer heals within a few weeks because of proactive, targeted care. Patient B, on the other hand, is now facing a long-term battle that could take months of intensive treatment, possibly involving advanced therapies and a much higher risk of serious complications like a bone infection or even amputation. The contrast couldn't be clearer: the best way to speed up wound healing is to get aggressive right from the start.
The Takeaway: Early intervention isn’t about impatience. It’s a strategic decision rooted in the biological reality of how wounds heal. Hesitation allows a manageable problem to spiral into a complex, treatment-resistant condition.
Recognizing the warning signs of a non-healing wound—stalled progress, more pain, a strange odor—and getting a specialist involved is the most powerful move you can make. You have to fight that "wait and see" instinct to avoid the serious fallout that comes with a chronic, unmanaged wound.
When standard care—even excellent standard care—just isn't getting the job done, it's time to bring in more powerful tools. For a stubborn wound that won't close, advanced therapies stop being a future consideration and become a present necessity. Their entire purpose is to break the cycle of a non-healing wound stuck in a chronic state of inflammation.
One of the most effective approaches we have today is the use of amniotic membrane allografts. Don't think of these as just sophisticated wound covers. A better analogy is a biological "scaffold" for the body. The allograft is packed with essential growth factors, collagens, and other proteins that actively signal the body to start rebuilding healthy tissue from the ground up.
This goes far beyond simply protecting a wound. It actively recruits the body's own healing machinery, giving it the structure and chemical signals needed to do its job. It fundamentally changes the wound environment from stagnant to regenerative.
Amniotic membrane allografts come from the amniotic sac, which is carefully screened and donated after a healthy C-section birth. This tissue is uniquely suited for healing because it's immunologically privileged, meaning it rarely causes an immune reaction in the recipient.
Its main functions in wound care are threefold:
This combination of benefits jump-starts the healing cascade, effectively pushing a chronic wound back into an active healing phase. The patient experience is often quite straightforward; the allograft is applied directly to the prepared wound bed in a clinical setting. It's common to see tangible signs of progress, like the appearance of healthy pink granulation tissue, relatively quickly.
A key advantage of these therapies is their ability to transform the wound bed. Instead of just waiting for the body to heal, we are giving it the precise biological instructions and materials to accelerate tissue repair and regeneration.
The impact of these advanced therapies isn’t just theoretical—it's backed by solid clinical evidence. For particularly challenging wounds, or when looking to significantly boost recovery, exploring these options is just smart medicine. You can learn more about similar regenerative approaches in a masterclass on peptides, stem cells, and hormone replacement for injury healing.
Take dehydrated amnion/chorion membrane (DHACM) allografts, for example. Clinical research shows their remarkable ability to speed up closure. A landmark multicenter trial on chronic venous leg ulcers found that patients treated weekly with DHACM achieved a 75% healing rate at 12 weeks. That was a dramatic improvement over the 30% healing rate in patients who only received compression therapy.
Another case series showed that approximately 86% of patients with various chronic wounds achieved complete closure, with an average healing time of just 7.9 weeks. These aren't just numbers; they represent real patients getting better, faster.
These statistics highlight a crucial point. For the right patient, these therapies aren't a last resort but an evidence-based choice to avoid severe complications and get them back on their feet.
So, how do you know when it’s time to consider these options? The decision is always made in partnership with a wound care specialist, but a few key indicators often point toward the need for advanced intervention.
A wound may be a candidate if it:
By understanding the advanced treatment options available through specialty wound care, both patients and clinicians can make more informed decisions. The goal is always to match the right therapy to the right wound at the right time, creating a clear and efficient path toward complete healing.
Advanced treatments are incredible, but they're only half the battle. Real, sustainable healing happens from the inside out, powered by the food you eat every single day. The connection between what's on your plate and how fast you recover is crystal clear—your body needs specific building blocks to reconstruct skin, grow new blood vessels, and keep infections at bay.
This isn't about some miserable, restrictive diet. It’s about being smart and strategic with your food choices to give your body the raw materials it needs. Think of your body as a construction site. You can have the most skilled crew in the world, but if they don't have bricks, mortar, and steel, the project grinds to a halt.
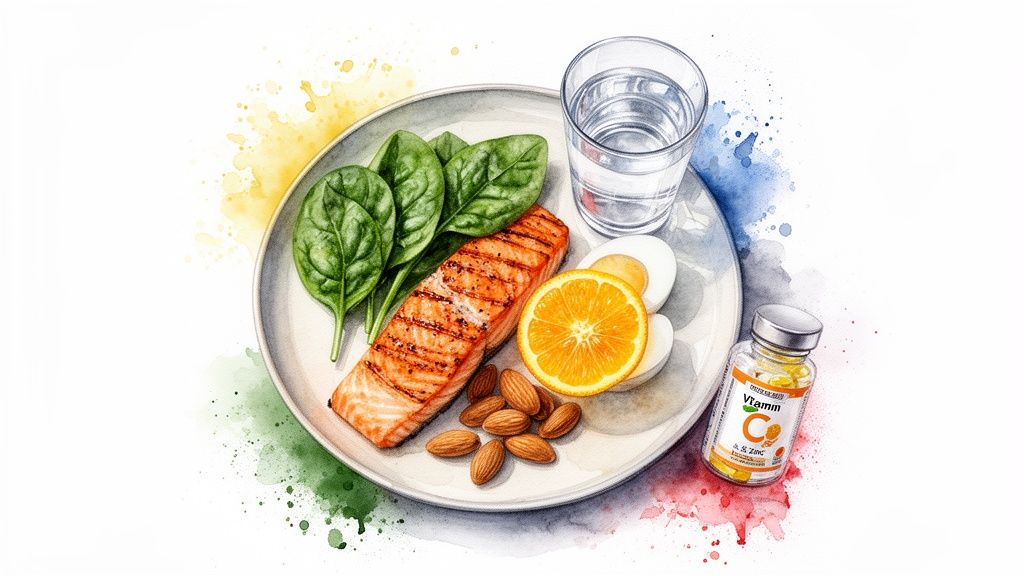
When it comes to healing, protein is the star player. It's the primary building block for every single new cell your body is trying to make—skin, muscle, blood vessels, you name it. When you're recovering from a wound, your protein needs can shoot up, sometimes requiring 1.2 to 1.5 grams of protein per kilogram of body weight.
Skimping on protein will directly slow down collagen production, leaving new tissue weak and fragile. The good news is that getting enough is straightforward if you incorporate high-quality sources into every meal.
It can be as simple as adding a scoop of Greek yogurt to your breakfast, tossing some grilled chicken on your salad at lunch, and having a side of lentils with dinner. Small changes add up quickly.
Beyond the big stuff like protein, certain micronutrients have very specific, critical jobs in the healing process. They're like the foremen on the construction site, making sure every task happens correctly and on time.
Key Insight: Many nutrients are "co-factors" in healing. This means that without them, vital steps like forming collagen simply can't happen efficiently. A deficiency in just one area can create a major bottleneck in your recovery.
Two of the most important players here are Vitamin C and Zinc.
Vitamin C is absolutely essential for creating collagen, the fibrous protein that gives new skin its strength and structure. Without enough of it, the tissue your body builds will be weak and prone to breaking down.
Zinc is a workhorse, helping with cell growth and supporting your immune system. It helps your body both build new tissue and defend the wound from bacteria.
To make it easier, here's a quick cheat sheet of key nutrients and where to find them.
This table is a simple reference guide to the essential nutrients your body needs for tissue repair and the best places to find them.
| Nutrient | Role in Healing | Excellent Food Sources |
|---|---|---|
| Vitamin C | Critical for collagen production and immune support. | Citrus fruits (oranges, grapefruit), bell peppers, strawberries, broccoli. |
| Zinc | Aids in cell growth, protein synthesis, and immune defense. | Shellfish, lean meats, nuts, seeds, chickpeas, yogurt. |
Keep this handy when you're making your grocery list to ensure you're stocking up on healing foods.
Finally, let's talk about two factors that are often overlooked but can make or break your healing progress: hydration and blood sugar.
Staying hydrated is non-negotiable. Water is what transports all those vital nutrients and oxygen to the wound, and it’s also what flushes away waste products. When you're dehydrated, your blood thickens, circulation slows down, and the whole healing process can grind to a crawl. The goal is to sip water consistently all day long, even before you feel thirsty.
For anyone with diabetes, controlling blood sugar is arguably the single most powerful thing you can do to promote wound healing. Persistently high glucose levels paralyze white blood cells, damage circulation, and create a five-star hotel for bacteria. Diligent blood sugar management isn't just about managing a chronic condition; it's a direct and potent wound healing therapy.
For a deeper dive, check out these essential nutrition tips that can give your body an extra edge. By fueling yourself correctly, you stop being a bystander and become an active, powerful partner in your own recovery.
What happens to a wound between clinical appointments is just as crucial as the treatment itself. We can apply the most advanced therapies, but they can be completely undone by the simple, repetitive forces of daily life. This is where two critical concepts come into play: advanced dressings and pressure offloading.
Thinking of a dressing as just a passive bandage is an outdated idea. Modern dressings are active tools engineered to create the perfect microenvironment for healing. They do far more than just cover a wound; they meticulously manage moisture, shield fragile new tissue, and can even help control bacteria.
The goal of a modern dressing is to maintain a state of moist wound healing. I’ve seen countless wounds stall simply because they were too dry. On the flip side, a wound that’s too wet can lead to maceration, causing the healthy skin around the edges to break down. The right dressing strikes that perfect balance.
Different wounds demand different types of dressings to manage this moisture effectively. For instance:
The choice of dressing is a clinical decision based on the wound's specific needs, which can absolutely change from one week to the next. The key is that the dressing is an active part of the treatment plan, not just an afterthought. For a deeper understanding, a point-of-care wound imaging device can help clinicians assess bacterial load with incredible precision, guiding a more informed dressing selection.
For wounds on the lower extremities, especially diabetic foot ulcers, pressure is the silent enemy of healing. Imagine trying to repair a crack in a sidewalk while people continue to walk on it all day. Every step a patient takes can crush delicate new cells and restrict vital blood flow, effectively erasing any progress made in the clinic.
This is why offloading—the process of removing pressure from the wound area—is absolutely non-negotiable. Without it, many lower extremity wounds simply will not heal. It's a hard truth, but one we have to face.
Real-World Impact: Constant pressure on a foot ulcer doesn't just slow healing; it can actively reverse it. Offloading is a 24/7 commitment that protects the investment made in advanced therapies and gives new tissue the uninterrupted time it needs to mature.
Effective offloading requires specialized equipment and, just as importantly, a commitment from the patient to use it consistently.
Common offloading methods include:
Protecting the wound is a full-time job. It’s a true partnership between the clinician's choice of an active dressing and the patient's dedication to offloading pressure. This dual approach ensures the wound has the protected, optimized environment it needs to finally close.

Think of healing as a journey you're actively navigating, not just a destination you're waiting to arrive at. You’re in the driver’s seat. Everything we've covered—from the initial assessment and advanced treatments to nutrition and daily wound protection—are the tools that empower you to take control of your recovery.
A huge part of this is knowing what to look for. When you can confidently tell the difference between a wound that’s on the right track and one that’s heading for trouble, you become an invaluable partner to your clinical team. This partnership is what truly accelerates healing.
It's always encouraging to see clear evidence that your hard work is paying off. Keep an eye out for these positive signs that your wound is healing properly:
On the flip side, some signs demand immediate attention from your wound care specialist to get ahead of any potential complications. Don't wait to make the call if you notice any of the following:
Your active involvement is the final, essential piece of the puzzle. By recognizing these signs, communicating with your team, and seeking expert care when needed, you’re paving a clear and hopeful path toward full recovery.
When you're focused on recovery, a lot of practical questions can pop up. Let's cut through the noise and get straight to the answers for some of the most common concerns we hear from patients about speeding up the healing process.
A healing wound gives you clear, positive feedback. You should see it gradually getting smaller. Look for the development of healthy granulation tissue—that’s the pink or reddish, slightly bumpy tissue that fills the wound bed. Another good sign is that the drainage lessens over time.
Infection, on the other hand, sends out alarm bells. Be on the lookout for redness spreading out from the wound, skin that feels warm to the touch, or noticeable swelling. Pus-like drainage (often yellow or green), a bad smell, or pain that’s getting worse instead of better are all red flags. If you spike a fever, that’s a sign the infection could be spreading.
This is where modern tools really shine. Things like fluorescence imaging can spot high bacterial loads long before the classic signs of infection show up, which is why regular checks with a specialist are so important.
That's a hard no. While many of us grew up with hydrogen peroxide or rubbing alcohol as the go-to for cuts and scrapes, we now know better, especially for chronic wounds.
These harsh solutions are cytotoxic, a technical term that means they kill living cells. That includes the delicate, brand-new cells your body is working so hard to build. Using them can actually set your healing back significantly.
So, what's the right move? Stick to a gentle, pH-balanced wound cleanser or sterile saline solution, just as your provider recommends. The goal is to clean away debris and bacteria without harming the fragile new tissue that’s trying to grow.
Expert Insight: Proper wound cleansing is a balancing act. It must be aggressive enough to remove barriers to healing but gentle enough to protect the new tissue that signals recovery. Harsh antiseptics disrupt this delicate balance.
It sounds complex, but the concept is pretty straightforward. An amniotic membrane allograft is a medical product made from the amniotic sac, which is donated with full consent after a healthy, scheduled C-section.
The tissue is processed under strict, sterile guidelines to preserve all its natural healing power. This includes a rich supply of growth factors that act as a scaffold, encouraging your own cells to build new tissue.
These allografts are considered very safe and are regulated by the FDA. Because the tissue is immunologically privileged, it rarely triggers an immune reaction from the recipient. It's become a powerful, evidence-based tool we use to jump-start healing in wounds that have stalled with standard care.
Your body's demand for protein skyrockets during the healing process. Think of it as the essential building material for all the new tissue you need to create.
While a typical healthy adult needs about 0.8 grams of protein per kilogram of body weight, someone with a major wound might need 1.2 to 1.5 grams per kilogram.
Let’s make that real. For a 150-pound (68 kg) person, that’s a jump to about 82-102 grams of protein every single day. You can hit this target by focusing on high-quality sources like lean meats, fish, eggs, dairy, beans, and lentils. A wound care specialist or a nutritionist can help you dial in the exact amount you need to give your body the fuel it needs for recovery.
At Specialty Wound Care, we’re focused on one thing: accelerating healing for patients with complex wounds. Our team brings together advanced science and deep clinical experience to create treatment plans that get results. See how our approach can help you or your patients by visiting https://specialtywoundcare.com.
Primus Healthcare

The process of wound healing is a complex and dynamic one, involving multiple physiological stages. Traditionally, wound care has relied on basic methods such as cleaning, dressing, and managing infection. However, with the advent of advanced approaches and technologies, medical professionals are now equipped with more sophisticated tools to enhance healing outcomes. This article explores some of the most effective advanced wound care methods available today.
Before delving into advanced treatment options, it is crucial to understand the stages of the wound healing process. Wound healing typically proceeds through four overlapping phases:
Disruptions in any of these phases can lead to chronic wounds. Therefore, employing advanced methods can be crucial in managing and expediting the wound healing process effectively.
Common treatments for wounds have traditionally included physical cleaning, antiseptic application, and basic dressings. While these methods are effective for minor injuries, more complex wounds may require advanced solutions to optimize healing. Advanced wound care methods target specific phases of the healing process and are especially beneficial for chronic or non-healing wounds.
Hyperbaric Oxygen Therapy involves breathing pure oxygen in a pressurized chamber. This approach increases oxygen delivery to the wound site, promoting enhanced cell function and quicker healing. HBOT is particularly effective in treating diabetic foot ulcers, radiation injuries, and other chronic wounds.
Negative Pressure Wound Therapy, also known as vacuum-assisted wound closure, uses a sealed dressing and a vacuum pump to reduce air pressure around the wound. This method increases blood flow, decreases edema, and promotes tissue granulation. It is commonly used for large, complex, or surgical wounds.
Bioengineered skin substitutes provide a scaffold for new tissue growth and can be made from natural or synthetic materials. These substitutes mimic the skin’s structure and offer a temporary cover that fosters the wound healing environment. They are particularly useful in treating burns and chronic ulcers.
Growth factors and cytokines play a pivotal role in the wound healing process by regulating cell proliferation and differentiation. Advanced therapies involving the application of recombinant growth factors can significantly enhance healing, particularly in non-healing wounds.
Gas plasma technology is an emerging field in wound care, utilizing ionized gas to sterilize the wound environment and stimulate healing. This method exhibits strong antimicrobial properties without damaging healthy tissue, making it a promising option for complex wounds.
Nanomedicine leverages nanoparticles to deliver drugs or other therapeutic agents directly to the wound site. This targeted approach minimizes side effects and enhances the efficacy of treatments, such as antimicrobials or growth factors, thereby accelerating the healing process.
Advanced wound care methods offer numerous benefits over traditional approaches. These include:
While advanced wound care methods offer significant benefits, they also present certain challenges. The cost and accessibility of high-tech treatments can be prohibitive for some patients. Additionally, healthcare providers must be adequately trained to implement these advanced therapies effectively. It is essential for medical professionals to evaluate each patient’s unique needs and consider the most appropriate treatment options.
The field of advanced wound care is rapidly evolving, with ongoing research focused on developing new technologies and improving existing methods. Future directions may include:
These innovations hold the potential to revolutionize wound care, offering more efficient and effective healing solutions.
Advanced wound care methods represent a significant leap forward in the management of complex wounds. By leveraging cutting-edge technologies such as gas plasma, nanomedicine, and bioengineered skin substitutes, healthcare providers can enhance the wound healing process and improve patient outcomes. As the field continues to evolve, it is crucial for medical professionals to stay informed about the latest advancements and integrate these strategies into their clinical practice. The ultimate goal is to provide patients with the most effective and comprehensive wound care, thereby improving their quality of life.

Primus Healthcare
Let’s be honest, successful wound care billing isn't just about codes. It all starts with a bulletproof foundation of clinical documentation. This is where you connect your clinical expertise directly to your practice's financial health.
Think of your patient chart as the ultimate storyteller. It has to paint a vivid, detailed picture for the payer, leaving zero doubt about the medical necessity of the care you provided. Without this detailed narrative, even the most accurately selected codes can get kicked back.
Payers operate on a simple principle: if it wasn't documented, it wasn't done. This is why seeing documentation as just another administrative chore is a critical, and often costly, mistake. Instead, it should be your first and best line of defense against claim rejections and audits.
To create documentation that can withstand scrutiny, every single note has to contain specific, objective details that justify your treatment choices. Vague descriptions like "wound improving" just won't cut it. Your notes must be a precise log of the wound's status and your interventions.
Here are the essential elements your notes must include every time:
Viewing your documentation as a chore is a critical financial error. Instead, see it as your best defense against audits and denials, directly connecting your clinical skill to your practice's financial health.
Imagine a patient with a chronic diabetic foot ulcer. A weak note might just say, "Patient seen for DFU. Debrided wound. Dressing applied." This tells the payer next to nothing and provides no real justification for the service.
Now, here's what a strong, defensible note looks like. It tells the whole story:
"Patient presents for follow-up of a 3.5 cm x 2.8 cm x 0.4 cm plantar ulcer on the right foot. Wound bed contains 60% adherent yellow slough and 40% pale granulation tissue with moderate serosanguinous drainage. Periwound shows 1 cm erythema. Sharp excisional debridement was performed to remove all non-viable tissue down to the subcutaneous layer. Post-debridement measurements are 3.6 cm x 3.0 cm x 0.5 cm with a 100% granular base."
See the difference? This level of detail proves the medical necessity for the debridement (CPT 11042) and justifies the E/M service. If you're looking to elevate your team's skills, exploring structured training can provide invaluable workflows and templates. You can learn more in our guide on wound care training and documentation: https://specialtywoundcare.com/training-documentation/
And remember, ensuring all patient records are handled securely is non-negotiable. For a deep dive into making sure your documentation and transmission methods meet regulatory standards, this guide on HIPAA compliant faxing in healthcare is an invaluable resource.
The financial impact of getting this wrong is huge. In 2025, coding and documentation errors are a major source of lost revenue, with CMS reporting that these mistakes lead to 7–10% of all claim rejections annually. That statistic alone highlights the high stakes in a field where services range from simple dressing changes to complex debridements and advanced allografts.
Once your documentation is ironclad, the next step is to translate that clinical story into the right CPT and HCPCS codes. This is a common stumbling block for many practices. Even a minor coding mistake can lead to denied claims, lost revenue, and unwanted attention from auditors.
Think of it this way: CPT and HCPCS codes are the language payers understand. Choosing the correct one isn't just a suggestion; it's essential for getting paid accurately for the work you do. This means digging into the subtle but critical differences between similar code sets to find the one that perfectly matches the service you documented.
Debridement coding is probably one of the trickiest areas in wound care. Payers scrutinize these codes, so you absolutely have to know the difference between the two main categories. It all comes down to the method used and how deep you go.
To help clear things up, here’s a quick comparison of the debridement code families.
| Code Type | CPT Codes | Method Used | Basis for Coding | Key Documentation Requirement |
|---|---|---|---|---|
| Selective | 97597 / 97598 | Sharp instruments, high-pressure water jets to remove specific, non-viable tissue. No anesthesia required. | Surface area of the wound(s) in square centimeters. | Detailed description of the non-viable tissue removed (e.g., slough, fibrin). |
| Excisional / Non-Selective | 11042 – 11047 | Surgical excision with instruments like scalpels or curettes to remove tissue down to a viable base. | Deepest layer of tissue removed (e.g., subcutaneous, muscle, bone) and surface area. | Clear identification of the deepest tissue layer cut away and removed. |
The most important thing to remember is that you can’t bill for both types of debridement on the same wound during the same visit. Your notes have to paint a clear picture that justifies the code you picked.
Key Takeaway: Always code debridement based on the deepest layer of tissue removed, not the deepest layer visible in the wound bed. If a wound extends to the bone but you only debride subcutaneous tissue, you must use the code for subcutaneous tissue (11042).
Negative Pressure Wound Therapy (NPWT) is a go-to treatment in wound care, and its coding is very specific. The main CPT codes you'll use are 97605-97608. Picking the right one boils down to two things: the wound size and whether the device is considered durable medical equipment (DME).
Accurate wound measurements are non-negotiable here—they are your proof for the code you've chosen. Also, keep in mind that applying a multi-layer compression system, which often goes hand-in-hand with NPWT, is a separate service. You might be able to bill for it with its own code if it’s medically necessary.
This simple decision tree drives home the financial impact of getting your documentation right.
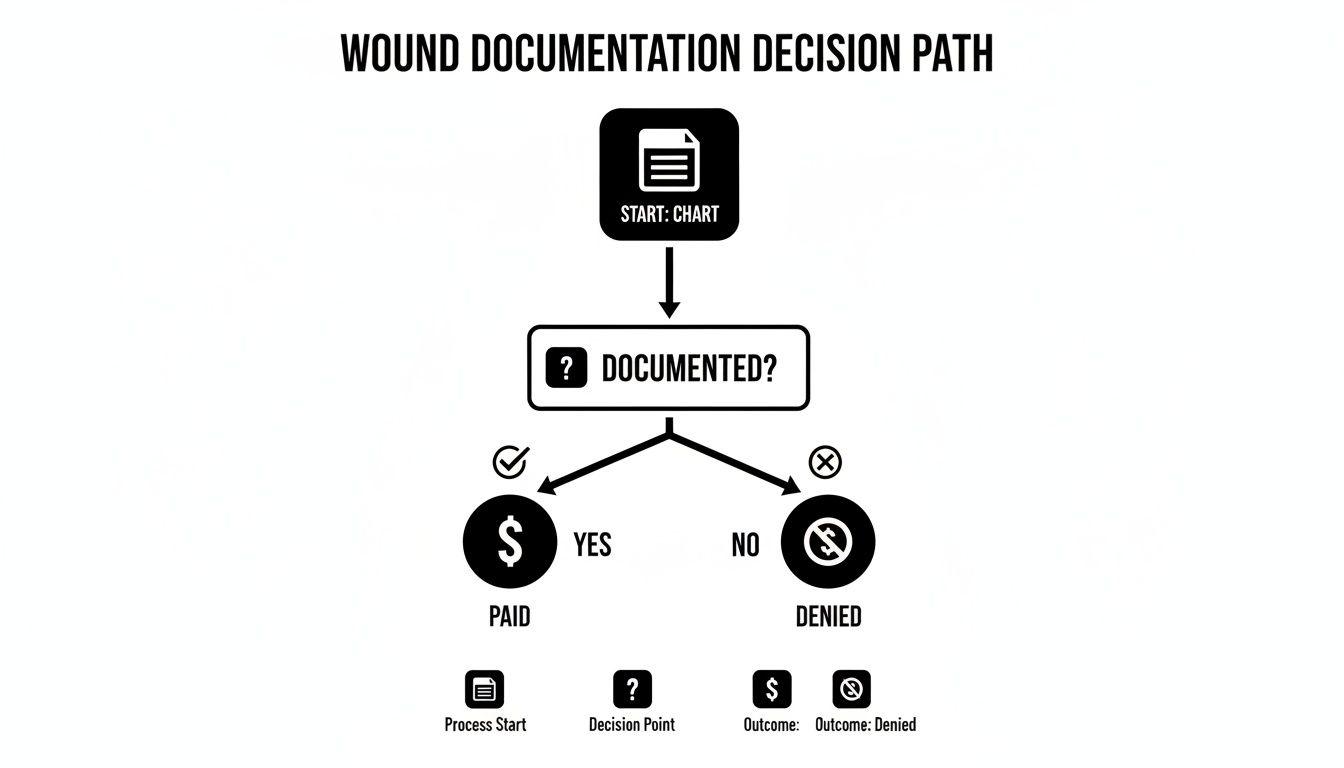
As you can see, a documented service gets paid. A service without documentation gets denied. It’s a straightforward but powerful reality in our field.
Advanced treatments, like applying skin substitutes or cellular and/or tissue-based products (CTPs), introduce another layer of coding complexity. These are usually billed with HCPCS codes that change depending on the exact product used (think high-cost vs. low-cost grafts). You have to document the product name, the size, how much was applied, and how much was wasted.
On top of that, many wound care visits also include an Evaluation and Management (E/M) service. You can bill an E/M code on the same day as a procedure like debridement, but only if the E/M is a significant, separately identifiable service. This means you need to append modifier -25 and have documentation that clearly separates the thinking and decision-making (the E/M) from the hands-on procedure. For example, if a patient is scheduled for debridement but also presents with a new, unrelated issue that you have to assess and manage, that E/M work is likely billable.
For clinicians looking to integrate more of these therapies, exploring the advanced treatment options by Primus Specialty Wound Care can offer valuable insight. Getting these codes right ensures your practice is compensated fairly for the complexity and value of the care you provide.
Let's get one thing straight: an accurate diagnosis code does way more than just identify a wound. It tells the payer the entire patient story, justifying every single service you provide and proving why your care is medically necessary.
Think of it this way. Your CPT codes explain what you did, but the ICD-10-CM codes explain why you did it. Mastering the ICD-10-CM code set for wound care isn't just about checking a box for compliance—it's about painting a crystal-clear clinical picture that gets you paid.
Using a generic ulcer code is like telling a mechanic "there's a problem with the car." It’s useless. But a highly specific code is like saying, "there's a slow leak in the front-left tire from a nail puncture." Now the mechanic knows exactly what’s needed. Vague coding forces payers to guess, and that guesswork almost always leads to denials.
For chronic, non-healing ulcers, coding to the highest level of specificity is absolutely non-negotiable. You have to capture every last detail about that wound and the patient's overall health.
To really build that clinical narrative, your diagnosis coding has to be multi-layered. Just coding for "pressure ulcer" won't cut it. Payers need to know the location, the severity, and all the underlying factors that are making the wound so stubborn.
Here are the critical details that need to be reflected in your ICD-10-CM code selection every time:
Precise ICD-10 coding is your most powerful tool for demonstrating medical necessity. It connects the wound to the patient's systemic health, building an undeniable case for the care you provide and improving quality metrics in a value-based care world.
Let's walk through a common scenario to see how this all comes together. A home health nurse is treating an 82-year-old bed-bound patient with a pressure ulcer.
A lazy or inexperienced coder might just use L89.159 (Pressure ulcer of sacral region, unspecified stage). This code is a red flag. It’s incomplete and practically begs for a denial or a request for more information because it lacks any real detail.
A robust, defensible coding approach tells the complete story:
This combination of codes provides a comprehensive clinical snapshot. It tells the payer this isn't just some simple wound; it's a severe, Stage 4 pressure injury on a patient with compromised circulation and other chronic illnesses. This is the level of detail payers need to see to approve claims for services like frequent debridement or advanced wound dressings without a fight. Getting this right is crucial for your financial viability.
Think of modifiers as the essential fine print on your wound care claims. While CPT and ICD-10 codes tell payers what you did and why you did it, modifiers add that crucial bit of context. Get them right, and you have a paid claim. Get them wrong, and you're looking at an immediate denial.
These simple two-digit codes are your way of clarifying special circumstances, preventing incorrect bundling, and ultimately, defending your reimbursement. Honestly, ignoring modifiers in wound care is like sending a text without any punctuation—the core message might be there, but the real meaning gets lost. For a payer, that missing context often signals an unbillable service, leading to rejections that just drain your time and resources.
Let’s start with a common one that trips people up: Modifier 25. You'll need to append this to an Evaluation and Management (E/M) code when you perform a significant, separately identifiable E/M service on the same day as another procedure.
Here’s a real-world scenario. A patient comes in for a scheduled debridement of a venous leg ulcer. During that visit, they mention a new, painful lesion that’s popped up on their other foot. To address it, you have to perform a separate exam, dig into their history, and go through the medical decision-making process for this brand-new problem.
In this case, you’d bill the appropriate E/M code (like 99213) with Modifier 25 attached. This signals to the payer that your E/M work went above and beyond the standard care baked into the debridement procedure. Without it, they'll almost certainly bundle the E/M service into the procedure payment, leaving you uncompensated for that extra work.
Another workhorse in wound care is Modifier 59, which identifies a "Distinct Procedural Service." This is your go-to when you need to tell a payer that two procedures done on the same day aren't related and should each be paid separately. It’s often considered the modifier of last resort when a more specific one doesn't fit the bill.
A classic example is treating multiple, distinct wounds. Imagine you perform an excisional debridement (CPT 11042) on a sacral pressure ulcer and a selective debridement (CPT 97597) on a diabetic foot ulcer—all during the same visit.
Since CPT codes 11042 and 97597 aren't typically billed together for the same wound, you absolutely must use Modifier 59 on CPT 97597. This clearly indicates it was performed on a different anatomical site, stopping the payer's automated system from flagging it as a duplicate service.
When you’re dealing with services that have frequency limits, the KX modifier is your key to proving medical necessity. Payers like Medicare often cap how many debridements a patient can receive in a certain timeframe. The KX modifier is your official attestation that the documentation in the patient’s chart fully supports the need to exceed those limits.
Think of a patient with a rapidly deteriorating wound that requires debridement more often than the local coverage determination (LCD) usually allows. By adding the KX modifier to the debridement code, you are certifying two things:
Be warned: using this modifier without rock-solid documentation is a huge compliance risk. Your notes must paint an unmistakable picture of why the additional service was not just helpful, but absolutely essential to the patient's care plan.
To help you keep these straight, here's a quick-reference guide to some of the most essential modifiers you'll encounter in wound care. It's a handy cheat sheet to ensure you're applying them correctly and telling the full story on your claims.
| Modifier | Description | When to Use in Wound Care (Example) |
|---|---|---|
| 25 | Significant, Separately Identifiable E/M Service by the Same Physician on the Same Day of the Procedure or Other Service | A patient is scheduled for a debridement. During the visit, they present a new, unrelated complaint (e.g., a suspicious skin lesion) that requires a separate workup. You would append Modifier 25 to the E/M code. |
| 59 | Distinct Procedural Service | You perform a debridement on a right foot ulcer (CPT 97597) and apply a skin substitute to a left leg ulcer (CPT 15275) in the same session. You would use Modifier 59 on the second procedure code to show it was a separate site. |
| KX | Requirements Specified in the Medical Policy Have Been Met | A patient with a severe, rapidly necrotizing wound requires debridements more frequently than the payer's policy typically allows. Appending the KX modifier attests that documentation supports the medical necessity for the increased frequency. |
| 76 | Repeat Procedure or Service by Same Physician or Other Qualified Health Care Professional | The same physician has to repeat an unplanned debridement on the same wound later in the same day due to sudden, severe necrosis. Modifier 76 indicates it is not a duplicate charge. |
| LT/RT | Left Side / Right Side | Used to specify which side of the body a procedure was performed on, which is critical for clarity when treating bilateral wounds. For example, billing for debridement of a wound on the right heel (using RT). |
Mastering these modifiers isn't just about administrative box-ticking; it's a fundamental skill for running a financially healthy wound care practice. Correctly applying them ensures you are properly compensated for the vital, and often complex, work you do.
You can nail the CPT, HCPCS, and ICD-10 codes every single time, but that’s only half the battle. Let’s be real—perfect coding doesn’t guarantee payment if your claims don’t line up with the tangled web of rules set by each payer.
This is where you have to get proactive.
Think of every payer, from a Medicare Administrative Contractor (MAC) to a commercial insurer, as having its own unique rulebook. These are often called Local Coverage Determinations (LCDs) for Medicare or just clinical policies for private payers. They spell out exactly what they consider medically necessary, how often a service can be done, and what proof they need. Ignoring them is just asking for a denial.

Those denial letters can feel cryptic, but after a while, you start to see the patterns. Most rejections in wound care boil down to a handful of common culprits. Getting familiar with them is the first step toward stopping them before they start.
A denied claim isn't just a one-time financial loss; it's a data point. Use it to identify weaknesses in your documentation or billing workflow so you can fix the root cause and prevent similar denials in the future.
This landscape is constantly shifting. The introduction of over 420 CPT code updates in 2025, including 270 new codes, is reshaping wound care billing. These changes, effective alongside 252 new ICD-10-CM codes, demand rigorous training to capture wound specifics—essential for codes like E11.621 for diabetic foot ulcers. You can learn more about these upcoming coding and compliance changes to stay ahead.
When a denial inevitably lands on your desk, a well-written appeal is your best shot at getting paid. A weak appeal that just says "we disagree" is a waste of time. A strong one builds a logical, evidence-based case that makes it easy for the reviewer to say yes.
Let's say a claim for excisional debridement (CPT 11043) was denied for "lack of medical necessity." Here’s how to build an appeal that works:
To really get ahead of denials, many practices are finding that automated claims processing can be a huge help. It’s a proactive approach that gives your practice the tools to prevent denials from happening in the first place, not just react to them after the fact.
Even when you feel you’ve mastered the fundamentals, certain situations in wound care billing can make the most seasoned pros second-guess themselves. Let's walk through some of the tricky questions we see pop up in daily practice and give you direct answers you can use on your very next claim.
These are the exact scenarios where practices often lose revenue or accidentally take compliance risks. Getting them right is non-negotiable for a healthy revenue cycle.
This one comes up all the time. The short answer is yes, but you have to be very careful and use Modifier 24. This modifier flags an "Unrelated Evaluation and Management Service by the Same Physician or Other Qualified Health Care Professional During a Postoperative Period."
Think of it this way: a patient is in their 90-day global period after surgery on their right leg. They come in for a scheduled follow-up but also point out a new problem—an infected cyst on their back. The E/M service you perform for that cyst is completely separate and billable with Modifier 24. Why? Because it has absolutely nothing to do with the original surgery.
Key Takeaway: You can't use Modifier 24 for anything related to the surgery itself. That includes managing complications like a surgical site infection. All of that work is already bundled into the global surgery payment.
Coding multiple wounds hinges entirely on the depth of debridement. The rules here are straightforward, but you have to follow them to the letter to avoid bundling errors and denials.
Same Depth: If you debride multiple wounds to the same tissue depth (say, all are subcutaneous), you need to add up the surface area of all the wounds. Then, you report that total using a single CPT code series (like 11042 for the first 20 sq cm and +11045 for each additional area).
Different Depths: This is where it gets more granular. If the wounds are debrided to different depths—one down to muscle and another to bone—you must code each one separately. Each wound gets its own primary CPT code based on its specific depth and size.
Mixing these two scenarios is one of the most common mistakes we see, and it almost always results in a denial.
In most cases, no. A routine dressing change is considered part of the E/M visit or post-op care. Payers just assume the work and supplies for a standard change are baked into the payment for the main service.
There is an exception, though. If the dressing change is unusually complex and involves procedural work—like meticulously removing embedded, non-viable tissue—it might qualify as a form of debridement. In that case, you could potentially use a code like 97597. Just be warned: your documentation has to be impeccable, clearly describing the skilled work you performed that went far beyond a simple swap of gauze.
For more detailed answers to specific scenarios, you can always check out our comprehensive wound care billing FAQs.
Here’s another classic bundling trap. If you perform a debridement and then apply an Unna boot (CPT 29580) to the same wound in the same visit, payers will almost certainly only pay for the debridement. The Unna boot is seen as an integral part of that wound care service.
The only way you can bill for both is if the Unna boot is applied to a completely separate and unrelated wound, or if it's the only procedure you perform during that visit.
Primus Healthcare

The human body is a marvel of biological engineering, and among its many wonders, the skin stands out as the largest organ. Known scientifically as the integumentary system, the skin serves multiple pivotal roles, encompassing protection, thermoregulation, and sensation. This article delves into the intricate structure and essential functions of the skin, exploring its three main layers: the epidermis, dermis, and hypodermis or subcutis.
The skin is a complex organ composed of three primary layers, each with distinct functions and characteristics.
The epidermis is the outermost layer of the skin, acting as the first line of defense against environmental threats. It is a thin, waterproof layer that protects the body from pathogens, chemicals, and physical damage. The epidermis is primarily made up of keratinocytes, cells that produce keratin, a protein that strengthens the skin.
Within the epidermis, there are several sub-layers, including the stratum corneum, which is the outermost and consists of dead skin cells that are continuously shed and replaced. This process is essential for maintaining the skin’s integrity and function as a barrier. The epidermis also contains melanocytes, which produce melanin, the pigment responsible for skin color and protection against ultraviolet radiation.
Beneath the epidermis lies the dermis, a thicker layer that provides structural support and elasticity. The dermis is composed of connective tissue and contains a rich supply of blood vessels, nerves, hair follicles, and sweat glands. This layer is responsible for the skin’s strength and flexibility, as well as its ability to regulate temperature and sense the external environment.
The dermis plays a crucial role in thermoregulation, with its network of blood vessels adjusting blood flow to either retain or dissipate heat. Additionally, the sweat glands located in the dermis produce sweat that evaporates to cool the body, an essential process for maintaining a stable internal temperature.
The deepest layer of the skin is the hypodermis, also known as the subcutis. This layer is composed mainly of fat and connective tissue, providing insulation and cushioning for the body. The hypodermis helps to anchor the skin to underlying structures such as muscles and bones, while also serving as an energy reserve.
The fatty tissue in the hypodermis acts as a thermal insulator, minimizing heat loss and protecting the body from extreme temperatures. This layer also absorbs shock, protecting the internal organs from injury.
The skin is not merely a passive covering; it is an active organ with a wide array of functions essential for survival and well-being.
One of the skin’s primary roles is to act as a protective barrier against environmental hazards. The epidermis shields the internal organs from mechanical injuries, pathogens, and harmful chemicals. Its acidic pH and natural oils inhibit bacterial growth, contributing to the body’s immune defense.
The skin also prevents excessive water loss, a critical function for maintaining the body’s fluid balance. This barrier function is vital in preventing dehydration and ensuring that the body’s internal environment remains stable.
Thermoregulation is another critical function of the skin, enabling the body to maintain a consistent core temperature. The dermis’s blood vessels expand or contract in response to temperature changes, facilitating heat exchange with the environment. Sweat production and evaporation further enhance the body’s ability to cool down during high temperatures or physical exertion.
Conversely, when exposed to cold, the blood vessels constrict to conserve heat, and the fat layer in the hypodermis provides additional insulation. This dynamic response ensures that the body’s vital organs function optimally, regardless of external conditions.
The skin is equipped with an array of sensory receptors that detect changes in the environment, such as temperature, pressure, and pain. These receptors are crucial for sensation, enabling the body to respond to external stimuli and avoid harm. The sensory feedback provided by the skin is integral to the body’s interaction with its surroundings.
Additionally, the skin plays a role in communication, with facial expressions and skin color changes (such as blushing) conveying emotions and social signals.
Exposure to sunlight triggers the synthesis of vitamin D in the skin, a vital process for maintaining bone health and supporting the immune system. Vitamin D facilitates the absorption of calcium and phosphorus, essential minerals for bone formation and maintenance.
This function highlights the skin’s role in broader physiological processes, underscoring its importance beyond its immediate protective and sensory functions.
Maintaining healthy skin is crucial for ensuring its functions are carried out effectively. Proper skincare involves protecting the skin from excessive sun exposure, maintaining hydration, and adopting a balanced diet rich in vitamins and minerals that support skin health.
Regular cleansing, moisturizing, and the use of sunscreen can prevent damage from ultraviolet rays and environmental pollutants. A healthy lifestyle, including adequate sleep and stress management, also contributes to the skin’s overall health and appearance.
The skin is a remarkable organ that serves as the body’s first line of defense, a regulator of body temperature, and a medium for sensation and communication. Understanding the structure and functions of the integumentary system underscores the importance of skin health in overall well-being.
From the protective epidermis to the supportive dermis and insulating hypodermis, each layer of the skin plays a distinct and vital role. As the body’s largest organ, the skin’s multifaceted functions are indispensable, highlighting the need for ongoing care and attention to maintain its health and functionality.

Primus Healthcare
Effective pressure ulcer treatment guidelines are the bedrock of modern wound care. They give us a systematic, evidence-based roadmap to prevent, assess, and manage these incredibly complex wounds. By establishing best practices for everything from staging and debridement to nutrition and offloading, they standardize care. This ensures every patient receives high-quality, consistent treatment rooted in proven clinical outcomes.
Imagine trying to build a house without a blueprint. You might have the right materials—dressings, support surfaces, and skilled staff—but the process would be chaotic, inconsistent, and probably doomed to fail. Modern pressure ulcer treatment guidelines are that essential blueprint for wound care.
These protocols aren’t just arbitrary rules. They represent the culmination of decades of hands-on clinical experience and hard-nosed scientific research. They create a common language and a standardized playbook, making sure every patient benefits from the most effective strategies known to medicine. That consistency is what truly moves the needle on improving patient outcomes.
In the early days, our approach was often descriptive and reactive. We saw a wound, we described it, we reacted. Today, the focus has flipped to a proactive, evidence-based model that reflects a much deeper understanding of wound physiology and the roadblocks to healing.
These guidelines have been refined over decades, moving from simple descriptive staging to comprehensive, multidisciplinary protocols. Now, the emphasis is squarely on risk assessment, prevention, and standardized measurement. A pivotal moment came in 2016 when the National Pressure Ulcer Advisory Panel (NPUAP), founded in 1987, updated its terminology. "Pressure ulcer" officially became "pressure injury" to better capture the full scope of underlying tissue damage, not just what's visible on the surface.
This solid, evidence-based foundation is what gives the guidelines their power. To really appreciate the science behind these protocols, it helps to know how to effectively read scientific papers and pull out the key clinical data.
Ultimately, these guidelines establish a clear standard of care that protects both patients and clinicians. For patients, it means receiving care that is validated and effective, slashing the risk of devastating complications like infection and amputation.
For clinicians, it provides a defensible framework for decision-making, aligning their practice with nationally recognized best practices. Adhering to these guidelines is a core part of providing great collaborative care, no matter the setting. You can learn more about the goals of advanced home wound collaborative care in our related article. This systematic approach ensures that every step we take is purposeful and laser-focused on one thing: healing the wound.
Getting the staging right is the absolute foundation of any effective pressure ulcer treatment plan. Think of it as the GPS for wound healing—without knowing your exact starting point, you can’t map out the quickest, most direct route to recovery. This initial assessment isn't just about sticking a label on a wound; it’s about truly understanding its depth and severity so you can pick the right interventions from day one.
Treating a Stage 1 injury on intact skin is worlds apart from managing a Stage 4 that goes down to muscle or bone. When we nail the staging, we ensure the treatment plan is appropriate, stop the wound from getting worse, and set realistic goals for healing.
This visual shows how a commitment to evidence-based care is the bedrock for both assessment and prevention.
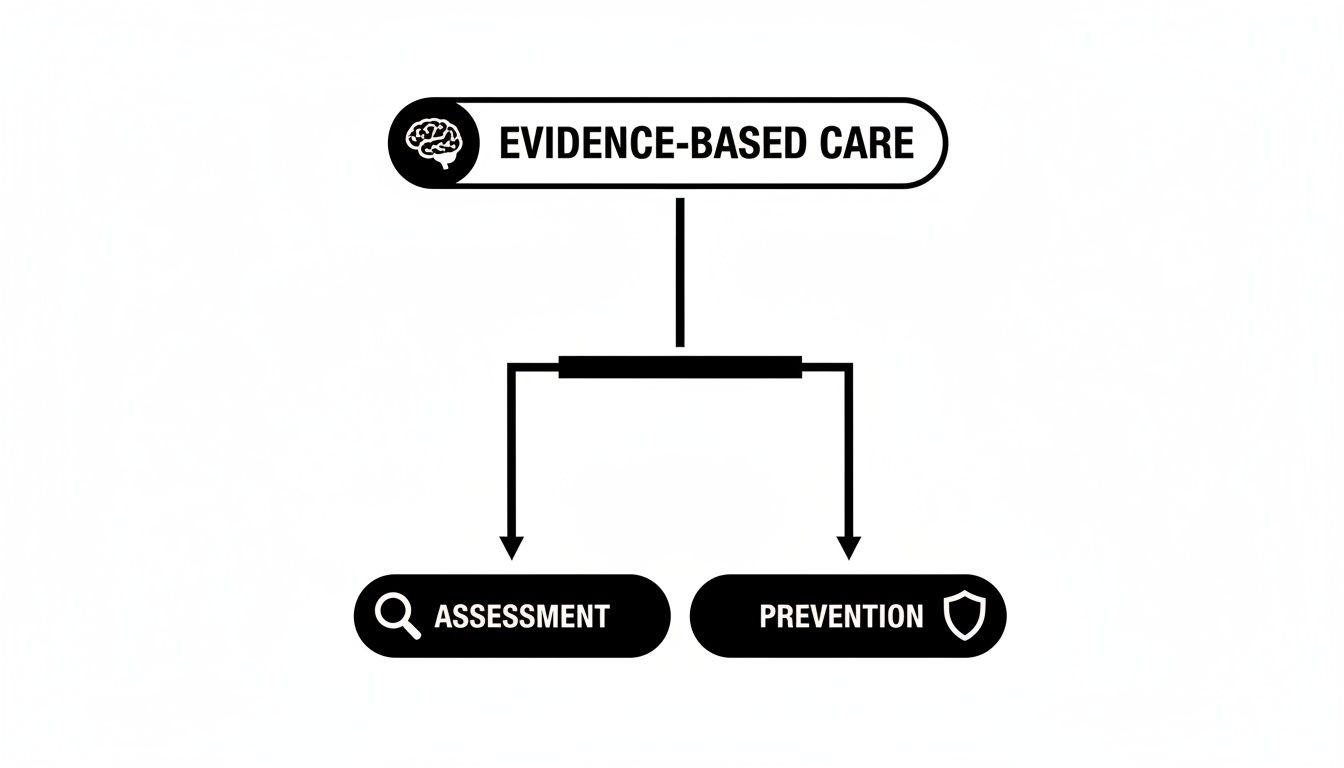
Simply put, a solid, evidence-based approach sharpens our ability to evaluate existing injuries and, just as importantly, to prevent new ones from ever forming.
To make sure everyone is speaking the same language, the National Pressure Injury Advisory Panel (NPIAP) created a standardized staging system. This system classifies injuries based on how much tissue damage we can see.
For a quick reference, this table breaks down the key characteristics of each stage, making it easier to identify them in a clinical setting.
| Stage | Key Characteristics | Clinical Appearance |
|---|---|---|
| Stage 1 | Non-blanchable erythema of intact skin. | Persistent redness that doesn't turn white when pressed. In darker skin, it may appear as a different color (purple/maroon) than surrounding skin. Area may be painful, firm, or have a different temperature. |
| Stage 2 | Partial-thickness skin loss with exposed dermis. | A shallow, open ulcer with a red-pink wound bed. It might also look like an intact or ruptured serum-filled blister. No slough is visible. |
| Stage 3 | Full-thickness skin loss. | Deeper than Stage 2, with visible adipose (fat) tissue. Slough may be present, but you can still see the depth of the wound. Muscle, tendon, and bone are not exposed. |
| Stage 4 | Full-thickness skin and tissue loss. | The most severe stage. Muscle, tendon, ligament, cartilage, or even bone is directly visible. Slough or eschar may be present. |
| Unstageable | Obscured full-thickness skin and tissue loss. | The wound bed is completely covered by slough (yellow, tan, gray) or eschar (tan, brown, black). The true depth—and therefore the stage—can't be determined until the covering is removed. |
| Deep Tissue Pressure Injury (DTPI) | Persistent non-blanchable deep red, maroon, or purple discoloration. | Appears as a deep bruise under intact skin or as a blood-filled blister. This injury happens from intense pressure deep at the bone-muscle interface. It can evolve rapidly. |
As you can see, the stages give us a clear, progressive picture of tissue damage. The ability to distinguish between a DTPI and a Stage 1, for example, is critical because their underlying pathology and potential for deterioration are vastly different.
Correct staging is the first step, not the last. To build a truly effective treatment strategy, we need to perform a complete assessment that paints the full clinical picture. This means looking closely at the wound itself and the skin around it.
A thorough assessment should always include these key components:
While a trained eye is our most fundamental tool, some problems hide beneath the surface. Advanced diagnostics can give us a look at what the naked eye can't see, like high bacterial loads that stall the healing process.
Fluorescence imaging, for instance, is a non-invasive technology that lights up bacteria in real time. This allows for incredibly targeted debridement and sampling, making sure we’re treating the problem area directly. You can see exactly how a point-of-care wound imaging device detects bacteria to guide treatment decisions.
When we combine our classic assessment skills with modern technology, we can make more informed decisions, which ultimately leads to better, faster healing for our patients.
Once you've staged and assessed a pressure ulcer, the real work begins: preparing the wound bed for healing. I always tell new clinicians to think of the wound bed like a garden plot. You can’t expect healthy tissue to grow if the soil is packed with weeds, rocks, and debris. This is where the TIME framework comes in as an indispensable tool, guiding our approach to modern pressure ulcer treatment.
The acronym TIME stands for Tissue, Infection/Inflammation, Moisture, and Edge. It's more than just a memory aid; it's a clinical checklist that forces us to tackle the four biggest local barriers that can stall—or completely stop—the healing process. By methodically working through each part, we create the perfect environment for the body's natural healing powers to take over.
This structured method shifts wound care from a reactive guessing game to a proactive, evidence-based strategy, ensuring we don't miss a single crucial step.
The "T" in TIME is all about Tissue management, which means removing non-viable or dead tissue. We call this process debridement. Dead tissue, whether it's yellowish slough or black, leathery eschar, is a major roadblock. It physically blocks healthy granulation tissue from forming and acts as a buffet for bacteria, dramatically increasing the risk of infection.
We have several debridement methods in our toolkit, and the right choice depends on the wound, the patient's overall condition, and the clinical setting.
Clearing out this dead tissue is the absolute, non-negotiable first step. Without it, you're not going to get far.
Next up, the "I" focuses on managing Infection and Inflammation. A key thing to remember is that all chronic wounds have bacteria on them, but that doesn't mean they're all infected. Our goal is to manage the bacterial load, or bioburden, so it doesn't overwhelm the patient’s immune system and kick off a destructive inflammatory response.
A core principle in pressure ulcer treatment is telling the difference between bacterial colonization (where bacteria are present but not causing harm) and critical colonization or outright infection (where their presence is delaying healing and causing a reaction).
In chronic wounds, the classic signs of infection like fever might be absent. Instead, we have to look for more subtle clues: a sudden increase in pain, a change in the color or smell of the exudate, or a wound that simply stops making progress. These are the red flags. If we suspect an infection, we'll turn to antimicrobial dressings or, in more serious cases, systemic antibiotics, ideally guided by diagnostic tests.
"M" stands for Moisture balance. Wounds need moisture to heal—it helps cells move around and get their work done. But it’s a delicate balance. Too much moisture, and the skin around the wound gets soggy and breaks down (a process called maceration). Too little, and the wound bed dries out, forming a hard scab that stops healing in its tracks.
Getting this balance right is truly an art. It’s all about picking the right dressing for the job. We need to decide if the wound needs a dressing that can donate moisture to a dry bed or one that can soak up excess fluid from a weeping wound. This is exactly why a one-size-fits-all approach to dressings is doomed to fail; the dressing choice has to match what the wound needs right now.
Finally, "E" represents the Edge of the wound, where we focus on epithelial advancement. For a wound to finally close, new skin cells have to migrate from the edges across the healthy, prepared wound bed. But if those edges are rolled under (epibole), dried out, or just plain unhealthy, that migration process grinds to a halt.
Managing the wound edge effectively often comes down to making sure the other three steps—debridement, infection control, and moisture balance—have been handled correctly. Sometimes, even with perfect preparation, the edges remain stubborn. In these cases, we might need to bring in advanced therapies to kickstart the healing cascade and finally get that wound to close.
Once the wound bed is clean and ready, the next step in pressure ulcer treatment is picking the right dressing. Don't think of dressings as just simple covers; they are active tools we use to create the perfect healing environment. The sheer number of options can feel overwhelming, but it all gets simpler when you ask one key question: What does this specific wound need right now?
Getting the dressing right is all about moisture balance. The goal is to hit that sweet spot—not too dry, which stops healthy cells from moving in, and not too wet, which can macerate and damage the surrounding skin.
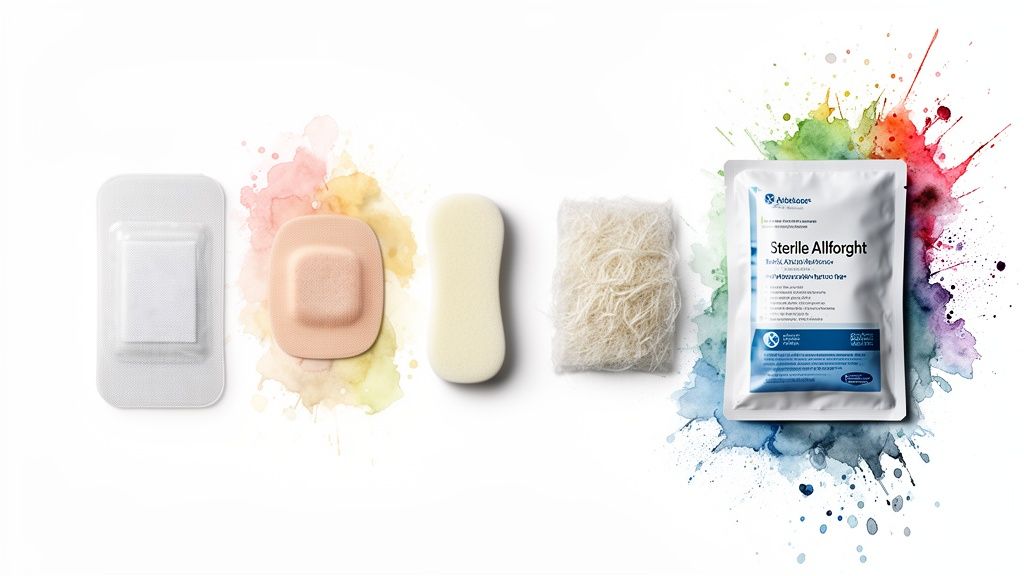
Different dressings have different superpowers. Some are built to soak up a ton of fluid, while others are designed to add moisture. Here’s a quick rundown of common types and what they’re best for:
The key here is to keep reassessing. A wound that needs a heavy-duty alginate today might be ready for a simple foam dressing next week as it heals and drainage lessens.
Sometimes, even with the best wound prep and the perfect dressing, a wound just hits a wall. It stalls. When that happens, it's time to bring in advanced therapies.
Advanced therapies aren't a last resort. They are a strategic move when a wound shows no signs of healing after 2-4 weeks of solid, evidence-based standard care.
This is our cue to shift gears. Instead of just managing the wound environment, we need to actively kickstart the body's own regenerative engine. Escalating care at the right time is a core principle of modern pressure ulcer guidelines, ensuring our patients with stubborn wounds get the help they need.
For these tough, non-healing wounds, advanced biologics like amniotic membrane allografts can be a game-changer. Think of a stalled wound like a construction site where the crew has run out of scaffolding. They have the materials (cells, growth factors) but no structure to build on.
Amniotic allografts provide that missing scaffold. These biologics deliver a rich matrix loaded with essential growth factors and proteins that do three crucial things:
This structured approach is a key part of current treatment guidelines, which are built on clinical studies and measurable outcomes. By providing this biological jumpstart, amniotic allografts can effectively reboot the healing process in wounds that have stopped responding to conventional care.
You can learn more about the specific advanced treatment options available from Specialty Wound Care in our detailed guide. These therapies are a critical tool in our arsenal, allowing us to manage even the most difficult pressure injuries successfully.
When you're treating a pressure ulcer, it’s easy to get tunnel-vision and focus only on the wound itself. But effective treatment is about looking at the whole patient, not just the hole in the patient. Two of the most critical—and sometimes neglected—pieces of the puzzle are offloading and nutrition.
Think of it like this: the most advanced dressing in the world is fighting a losing battle if the underlying causes of the injury aren't fixed. You can't heal a pressure ulcer if the patient is still lying on it. And you can't expect the body to build new tissue without giving it the right raw materials.
Let’s be clear: offloading—removing all pressure from the injured area—is the absolute foundation of treatment. It’s not a suggestion; it’s a requirement. Without consistent, effective pressure redistribution, even the most expensive therapies are set up to fail.
The goal is simple: spread the pressure over a larger surface area and constantly change the points of contact. This one-two punch allows blood to rush back into those starved tissues, delivering the oxygen and nutrients they desperately need to start repairing themselves.
We make this happen with two key tactics:
Wound healing is an incredibly demanding process for the body. A patient with a major pressure ulcer has a super-charged metabolism, almost like someone recovering from major surgery. If their nutritional needs aren't met, their body simply won't have the fuel to build new tissue, fight off infection, and close the wound.
Proper nutrition isn't just a good idea; it's a core component of international pressure ulcer treatment guidelines. The focus goes beyond just calories to the specific building blocks required for tissue repair.
Inadequate nutrition is a top risk factor for both developing pressure ulcers and the failure of existing wounds to heal. A nutritional assessment should be a standard part of every single initial wound evaluation.
A targeted nutritional strategy is essential to support the body's healing cascade. Several key nutrients are the stars of the show, and a deficiency in any one of them can bring healing to a screeching halt.
Here are the most critical components to zero in on:
By pairing a robust offloading schedule with a targeted nutrition plan, you create the perfect internal and external environment to give the body its best possible shot at healing.
Great clinical care is one thing, but getting paid for it is another. The critical link between the two? Your documentation. You have to start thinking of your clinical notes as more than just a medical record. They are the story that proves the medical necessity of your care and justifies every decision you make.
When it comes to wound care, flimsy or vague documentation is a fast track to claim denials. Payers need to understand the why behind your treatment plan, plain and simple. Your notes have to paint a clear picture of the wound's complexity and how your clinical reasoning aligns with established pressure ulcer treatment guidelines.
A solid wound note is so much more than just the wound’s stage. It's a living document that shows off your expertise and explains why you’re using certain resources. Each entry should build on the last, either showing progress or clearly explaining why you're shifting your strategy.
To make sure your notes hold up, they need to be packed with specific, measurable details. Throw out vague phrases like "wound looks better." That won't cut it. Instead, your documentation needs to be a precise log of the wound's entire journey.
Here’s what every single note must include:
Think of it this way: a well-documented note is your best defense in an audit. It should let a reviewer who has never even seen the patient completely understand the wound's status and why your treatment plan was necessary.
When a wound hits a wall and you need to bring in advanced therapies like amniotic allografts or diagnostic imaging, your documentation has to work even harder. Your notes need to tell a clear story of why standard care just wasn't enough.
This means you must document the failure of conservative treatments over a period of 2-4 weeks. This is what establishes the medical necessity for escalating to a higher level of care.
Navigating this can be a headache, but you don't have to do it alone. At Specialty Wound Care, we have dedicated billing specialists and documentation workflows built specifically for wound management. Our team makes sure your notes are compliant and strong, cutting down your administrative burden so you can get the right reimbursement for the expert care you provide.
Even with the best guidelines, clinical practice is where the real questions pop up. You're at the bedside, managing a complex case, and you need practical answers. This is where we bridge the gap between textbook knowledge and day-to-day patient care.
Let's walk through some of the most frequent questions we hear from clinicians, breaking down the evidence-based principles that should guide your decisions. Getting these details right is what separates a good care plan from a great one—ensuring every action is consistent, defensible, and gets your patient closer to healing.
The standard guideline is a formal reassessment at least once a week. This isn't just a quick look; it means you're documenting measurements, identifying tissue types, and noting the amount and type of exudate.
But think of that as the bare minimum. For a patient in acute care or someone whose wound is changing quickly—for better or worse—you’ll want to assess it far more often. Consistent, detailed documentation is your best tool for proving medical necessity, tracking progress, and confidently adjusting the treatment plan.
Knowing when to call for backup is a crucial clinical skill. You should strongly consider referring to a wound care specialist if a pressure ulcer shows no clear signs of healing after 2 to 4 weeks of solid, standard care.
Other situations demand an immediate referral:
Getting a specialist involved early doesn't just help the wound; it’s proven to prevent serious complications and get patients on a faster healing track.
This is a very common point of confusion, and the answer is a firm no. Pressure injuries do not heal in reverse. A wound closes by filling the damaged area with granulation tissue and, eventually, scar tissue. It doesn't magically regenerate the original muscle, fat, or bone that was lost.
So, when a Stage 4 ulcer is healing, you must document it as a "healing Stage 4 pressure injury"—not a Stage 3 or 2. This distinction is absolutely critical for maintaining an accurate medical record and ensuring everyone on the care team understands the wound's true history.
Good antibiotic stewardship is at the heart of modern wound care. We now know that topical antibiotics are generally not recommended for uninfected wounds. Why? They can promote bacterial resistance and even be toxic to the very cells trying to heal the wound.
Systemic (oral or IV) antibiotics are only for wounds with clear clinical signs of a spreading or systemic infection—think cellulitis, sepsis, or osteomyelitis. This decision should always be driven by a thorough clinical assessment, and whenever possible, by diagnostic tests that pinpoint the exact pathogen and its sensitivities. Using antibiotics "just in case" on a colonized wound is not best practice and can do more harm than good.
At Specialty Wound Care, we work alongside clinicians to navigate these tough treatment decisions every day. We provide the advanced diagnostics and therapies needed to tackle the most challenging cases. Find out how we can support your practice at SpecialtyWoundCare.com.
Primus Healthcare
Wound healing is a complex and dynamic process, essential for restoring the integrity of tissue following injury. A critical element in this process is the blood supply, which plays multiple roles in different stages of healing. From delivering essential substances such as oxygen, nutrients, and immune cells, to removing waste products, the blood supply is fundamental in fueling all phases of wound healing. This blog post explores the key roles of blood supply in the stages of wound healing: Hemostasis, Inflammation, Proliferation, and Remodeling, with a particular focus on angiogenesis, new vessel growth, perfusion to support tissue repair, collagen formation, and infection control.
Hemostasis is the first stage of wound healing, occurring immediately after injury. The primary goal during this phase is to stop bleeding and form a stable clot. The blood supply plays a vital role in this process by delivering clotting factors and platelets to the wound site. These elements work together to initiate the clotting cascade, leading to the formation of a fibrin clot that serves as a temporary matrix for incoming cells.
Beyond clot formation, the blood supply in hemostasis is crucial for delivering growth factors such as platelet-derived growth factor (PDGF) and transforming growth factor-beta (TGF-β). These growth factors are released from degranulating platelets and play a significant role in attracting immune cells to the wound site, setting the stage for the subsequent inflammatory phase.
The inflammatory phase is characterized by the recruitment of immune cells to the wound site. Blood supply is essential in this phase for transporting immune cells such as neutrophils and macrophages. These cells are tasked with clearing debris and pathogens, thereby preventing infection and facilitating a clean environment for tissue repair.
Neutrophils are among the first responders, arriving within hours of injury, where they perform phagocytosis of bacteria and cellular debris. Subsequently, macrophages take over, continuing the debridement process and secreting cytokines and growth factors that further propagate the healing process. The blood supply ensures a continuous flow of these immune cells, maintaining an effective inflammatory response until the threat of infection or contamination is mitigated.
The proliferation phase marks the period of new tissue formation and is heavily dependent on an adequate blood supply. This stage involves angiogenesis, the process of new blood vessel formation, which is crucial for delivering oxygen and nutrients required for tissue synthesis and repair.
During angiogenesis, endothelial cells are stimulated by factors such as vascular endothelial growth factor (VEGF) to proliferate and migrate, forming new capillaries. These new vessels improve perfusion to the wound area, ensuring that fibroblasts and other cells involved in tissue formation receive sufficient oxygen and nutrients. This enhanced perfusion supports critical processes in the proliferation phase, including collagen synthesis and extracellular matrix formation.
Collagen deposition is a hallmark of the proliferation phase, providing structural integrity to the healing wound. Fibroblasts, fueled by the nutrients delivered via the blood supply, lay down collagen in a manner that strengthens the newly formed tissue. The adequacy of the blood supply during this phase directly impacts the quality and speed of wound healing.
The remodeling phase is the final stage of wound healing, where the newly formed tissue is strengthened and matured. During this phase, the blood supply continues to play a crucial role in providing oxygen and nutrients necessary for the remodeling of collagen fibers and the overall maturation of the wound.
In this stage, type III collagen, initially laid down during the proliferation phase, is replaced with type I collagen, which is stronger and more resilient. This process is dependent on adequate perfusion to the wound area. Furthermore, the blood supply aids in the gradual reduction of cellularity within the wound, as excess cells are removed and the tissue structure becomes more organized.
Effective remodeling also involves the contraction of the wound, reducing its size and improving tensile strength. This contraction is facilitated by myofibroblasts, which are supported by the nutrients and oxygen delivered through the blood supply. As remodeling progresses, the density of blood vessels in the wound area decreases, reflecting the reduced metabolic demand as the tissue reaches a state of equilibrium.
Throughout all stages of wound healing, infection control is paramount. The blood supply is essential in delivering immune cells to the wound site, which play a critical role in preventing and controlling infections. Neutrophils and macrophages, transported via the bloodstream, are key players in identifying and eliminating pathogens, ensuring that the wound remains uncontaminated.
Furthermore, the oxygen delivered through the blood supply has direct antimicrobial effects, as many pathogens are unable to thrive in oxygen-rich environments. Thus, maintaining an adequate blood supply not only supports tissue repair but also serves as a protective mechanism against infection.
The blood supply is indispensable in wound healing, influencing each stage from hemostasis to remodeling. By delivering oxygen, nutrients, and immune cells while removing waste products, the blood supply fuels the entire healing process. Angiogenesis and new vessel growth enhance perfusion, supporting tissue repair, collagen formation, and infection control.
Understanding the pivotal role of blood supply in wound healing can inform clinical strategies to optimize healing outcomes, particularly in cases where circulation may be compromised. By ensuring an adequate blood supply, healthcare professionals can enhance the body’s innate ability to repair and regenerate tissue, ultimately improving patient outcomes.


