Uncategorized

After Wisdom Teeth Removal: A Clear Day-by-Day Healing Guide

Primus Healthcare | January 2nd, 2026


You've made it through the surgery, and now you're settling in at home. That first 24-hour window is, without a doubt, the most critical part of your recovery after wisdom teeth removal. What you do now directly impacts how the next week or so will play out.

Your body's main job is to form a stable blood clot in the empty tooth socket. Think of this clot as nature's own perfect bandage—it shields the underlying bone and nerves from everything. Protecting it is your number one priority.

Navigating The First 24 Hours

This isn't just a waiting game; it's an active healing phase where every little decision matters. Each year, about 5 million Americans have their wisdom teeth removed, and a typical recovery takes around two weeks. Swelling usually hits its peak on days two and three, and then the pain starts to ease up.

The key to staying on that timeline (or even shortening it) is to nail this first day. Let's walk through what you need to do, step by step. If you want a deeper dive, you can discover more insights about the post-extraction recovery period and what to expect.

Immediate Actions When You Arrive Home

The moment you get home, your recovery mission is officially on. You'll likely still be numb from the anesthesia, which is great—it gives you a head start to get comfortable before the discomfort creeps in.

The first thing to focus on is the gauze your surgeon placed. Bite down with firm, steady pressure. This isn't about soaking up blood; it's the pressure itself that stops the bleeding and helps that all-important clot form. Try not to talk too much or chew on the gauze, as any movement can disrupt things.

Key Takeaway: A little oozing mixed with saliva can look like a lot of blood, and that's totally normal. But if you find yourself soaking through bright red gauze pads every 30 minutes after a couple of hours, that's a sign to give your surgeon's office a call.

Once you’re settled, get an ice pack going. Wrap it in a towel (never apply ice directly to your skin) and place it on your cheek over the surgical area. The magic formula is 20 minutes on, 20 minutes off. This simple cycle is your best weapon against swelling. Starting immediately helps constrict the blood vessels and minimizes inflammation before it has a chance to really set in.

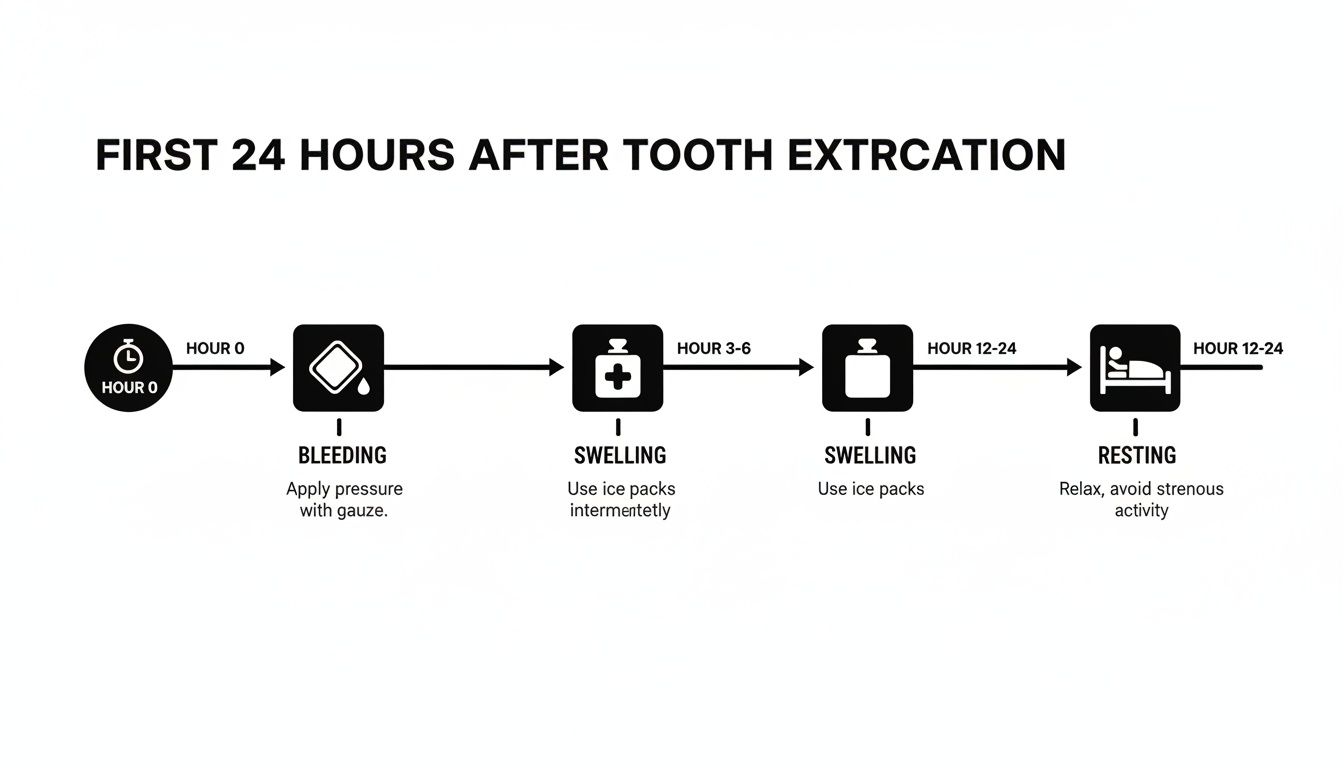
This timeline gives you a quick visual breakdown of your priorities for the day.

Timeline illustrating the recovery process after wisdom teeth removal with icons for 0-2, 2-12, and 12-24 hours.

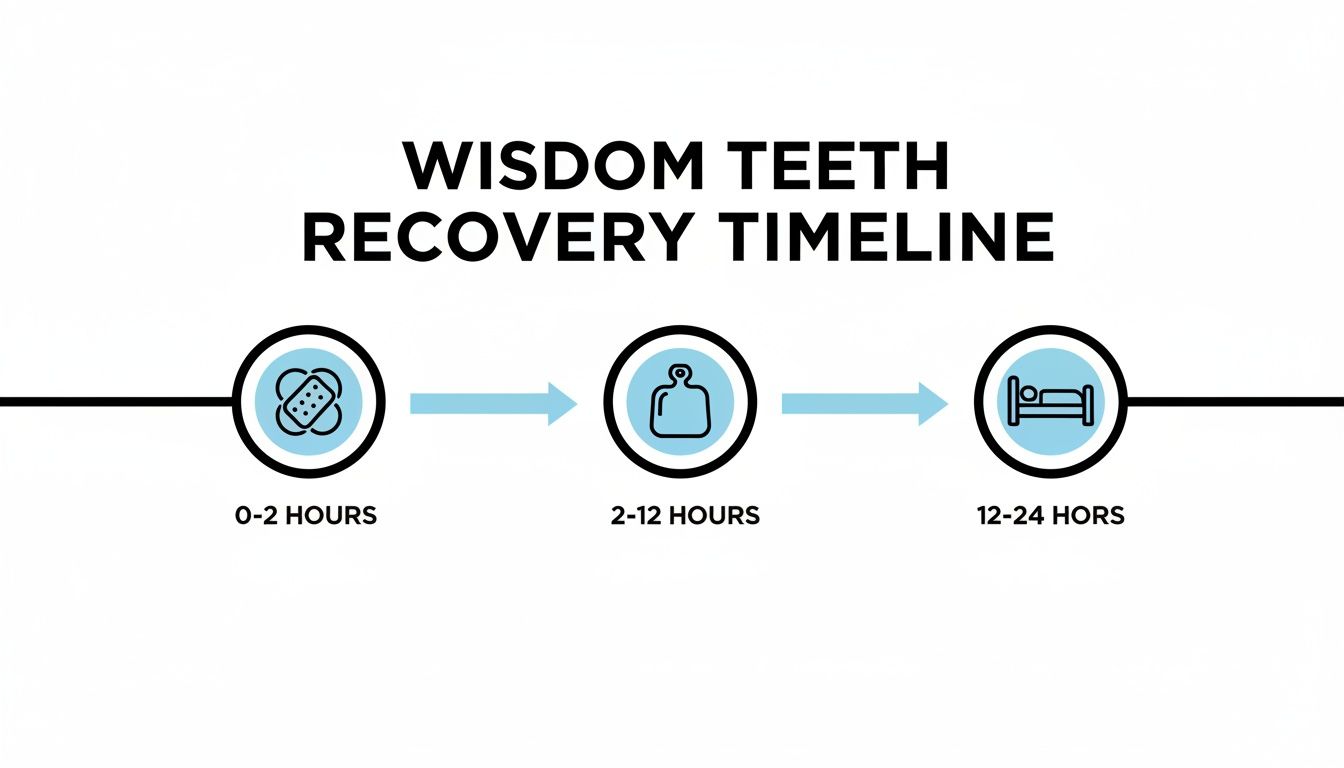
As you can see, the focus shifts from actively managing bleeding early on to controlling swelling and then prioritizing rest as the hours go by.

To help you keep track, here's a simple checklist of the do's and don'ts for this critical first day.

Immediate Post-Op Care Checklist (First 24 Hours)

This table summarizes the essential actions to take and things to avoid to protect the surgical site and manage your initial symptoms.

Action/Symptom What to Do What to Avoid
Bleeding Bite down firmly on gauze for 30-45 minutes at a time. Chewing on gauze, excessive talking, spitting.
Swelling Apply ice packs to the outside of your cheek (20 mins on, 20 mins off). Applying heat, lying flat for long periods.
Pain Take your first dose of pain medication before the anesthesia wears off. Stay ahead of the pain. Waiting until the pain is severe to take medication.
Hydration/Diet Drink plenty of cool liquids. Stick to soft, cool foods like yogurt, applesauce, or pudding. Using straws, drinking hot liquids, eating crunchy or hard foods.
Rest Lie down with your head elevated on 2-3 pillows. Rest and avoid any physical activity. Bending over, strenuous activity, lying completely flat.

Following these guidelines closely gives your body the best possible start for a smooth and speedy healing process.

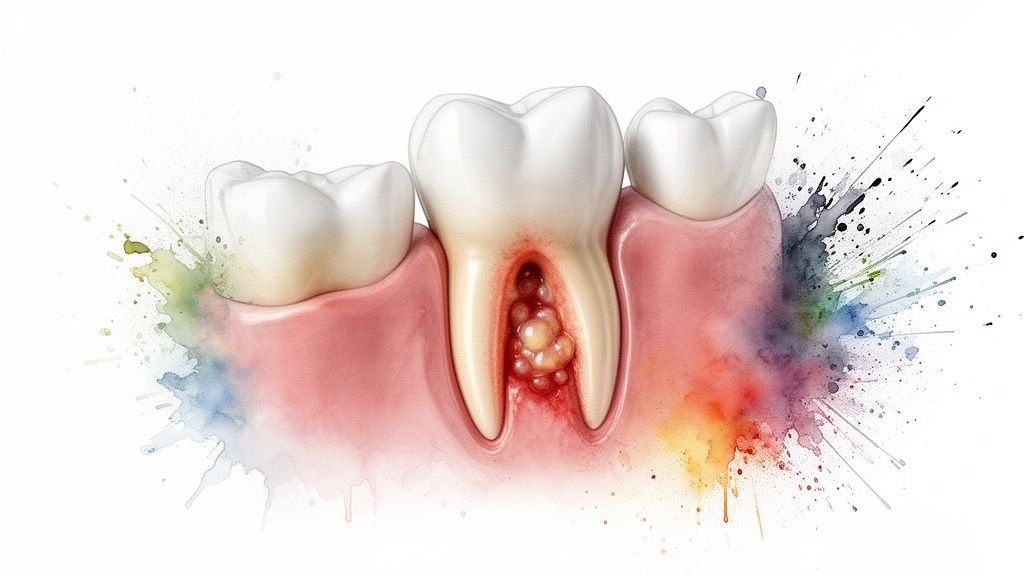
Protecting The Surgical Site Is Everything

Nearly everything you do on day one circles back to protecting that blood clot. If it gets dislodged, you can end up with a dry socket, which is a notoriously painful complication you definitely want to steer clear of.

Here are the non-negotiable rules for the first week:

  • No Spitting. The force from spitting can easily pull the clot right out of the socket. If you need to rinse, just let the liquid gently fall out of your mouth into the sink.
  • No Straws. The suction creates a vacuum in your mouth, and it's one of the top causes of a dislodged clot.
  • No Smoking. Beyond the chemicals interfering with healing, the physical act of inhaling can dislodge the clot.
  • No Hot Liquids. Heat can dissolve the clot and may increase bleeding. Stick with cool or lukewarm options for now.

When it's time to rest or sleep, your position matters. Prop your head up with a couple of extra pillows to keep it elevated above your heart. This simple trick helps reduce swelling and minimizes that throbbing feeling. Lying flat allows blood to pool in your head, which increases pressure and discomfort. You'll be surprised at what a difference this small adjustment makes when you wake up the next morning.

A Realistic Plan For Pain And Swelling

Person resting on a couch with an ice pack on their face and a tissue, near water and pills.

Let's be honest: you're going to have some discomfort and swelling after your wisdom teeth are removed. It’s an unavoidable part of the process. But while you can’t skip it, you can absolutely get a handle on it with a smart, proactive approach.

The real goal here isn't to chase the pain after it starts, but to stay ahead of it. If you wait until you're already in serious discomfort, you're forced to play catch-up, and that's a tough battle. A well-timed strategy from the very beginning will make a massive difference in your recovery.

Building Your Medication Schedule

Your surgeon will likely prescribe a pain reliever and suggest an over-the-counter anti-inflammatory like ibuprofen. These two medications are a powerful team because they work differently. The trick is to create a staggered schedule.

For instance, you might take your prescription medication, and then three hours later, take the recommended dose of ibuprofen. Three hours after that, it's time for your next prescription dose. By alternating them, you maintain a consistent level of pain relief, avoiding those awful peaks and valleys of discomfort.

Pro Tip: Set alarms on your phone for your medication schedule, especially for the first 48-72 hours. It's surprisingly easy to lose track of time when you're resting, and those alarms are your best friend for staying ahead of the pain curve.

This method often helps you manage pain so effectively that you end up needing less of the stronger prescription medication overall. Just be sure to follow the dosage instructions from your surgeon and pharmacist to the letter.

Mastering Temperature Therapy

Temperature therapy is probably the best non-medical tool you have for managing symptoms, but it’s a two-part game. Using the wrong temperature at the wrong time can actually set you back.

The First 72 Hours: Ice Is Your Ally

For the first two or three days, your main mission is to fight inflammation. Cold therapy is how you win.

  • How it Works: An ice pack constricts the blood vessels in your cheek. This reduces blood flow to the area, which minimizes swelling and helps numb the nerve endings for some welcome pain relief.
  • The Method: Grab a gel pack or even a bag of frozen peas wrapped in a thin towel. Apply it to the outside of your jaw for 20 minutes, then take it off for at least 20 minutes.
  • Why Breaks Are Crucial: Leaving ice on for too long can damage your skin tissue. That "off" period lets your skin return to a normal temperature before you apply the cold again.

Stick to this on-and-off cycle, and you'll stand a much better chance of avoiding those classic "chipmunk cheeks" that tend to show up on day two or three.

After 72 Hours: Switch to Warmth

Once you've passed the 72-hour mark, your goal changes. Now, you want to promote healing and ease up any muscle stiffness. It's time to bring in moist heat.

A warm compress, like a damp washcloth heated in the microwave (test it first!), helps increase blood circulation. This brings more oxygen and nutrients to the surgical sites to speed up the healing process. It also feels amazing on a stiff, sore jaw that’s been held open during surgery. For a deeper dive into managing jaw soreness, this guide to relief from jaw pain after wisdom teeth extraction offers more detailed strategies.

Finding a Comfortable Sleeping Position

How you sleep plays a huge role in swelling and comfort. Just like during the first 24 hours, keeping your head elevated is key for the first few nights.

When you lie flat, fluid can pool in your facial tissues, which increases pressure and that awful throbbing feeling at the extraction sites. Prop your head and upper body up on two or three pillows. This lets gravity work for you, helping to drain fluid away from your face. If you're a side sleeper, do your best to stay on your back for a few nights. If you can't, at least try to avoid putting direct pressure on the side where a tooth was removed.

What to Eat and How to Keep Your Mouth Clean

Figuring out what to eat and how to keep your mouth clean after wisdom teeth removal can feel like a huge challenge. Your mouth is sore, the surgical sites are incredibly delicate, and the last thing you want is to mess something up. The best way to approach this is in phases—start with the basics and slowly work your way back to your normal routine as you heal.

This isn't just about surviving on milkshakes for a week (though a little ice cream is definitely okay). It’s about giving your body the right fuel to heal while protecting those sensitive extraction sockets from getting irritated or infected. A smart plan here is just as critical as managing your pain and swelling.

Your Post-Surgery Eating Plan

For the first couple of days, your diet is going to be pretty limited, but it's essential for healing. The main goal is to eat foods that need zero chewing and won't disturb the fragile blood clots forming in the sockets. Think smooth, soft, and cool.

Right after surgery, you'll be sticking to liquids or puréed foods. This is all about staying hydrated and getting some easy calories in so your body has the energy it needs to start repairing itself.

Good Choices for the First 1-2 Days:

  • Cool Soups: Smooth, blended soups like tomato or butternut squash are perfect. Just make sure they aren't hot.
  • Smoothies: These are a great way to pack in nutrients. Add some protein powder, yogurt, or soft fruits like bananas. Just remember—absolutely no straws. Sipping can dislodge the blood clot, so drink right from the cup.
  • Yogurt and Pudding: These are recovery staples for a reason. They're soft, cool, and require no effort to eat.
  • Applesauce: A simple and gentle option to get some nutrients in.
  • Meal Replacement Shakes: These can be a lifesaver for making sure you’re getting balanced nutrition when you can't really "eat."

Once you hit day three or four, you’ll likely start feeling a bit better and can begin adding in foods that need just a little bit of chewing.

A Quick Note on Temperature: Hot foods and drinks can increase blood flow to the surgical sites, which might cause bleeding or knock a clot loose. Stick with cool or lukewarm options for at least the first 48 hours. It's a simple step that makes a big difference.

When you're ready, you can move on to more substantial foods. This is the point where you'll start to feel like you're eating a "real" meal again.

Soft Foods to Introduce Around Days 3-7:

  • Scrambled Eggs
  • Mashed Potatoes or Mashed Sweet Potatoes
  • Oatmeal or Cream of Wheat
  • Soft, Flaky Fish (like Cod or Tilapia)
  • Refried Beans
  • Cottage Cheese
  • Avocado

Foods and Habits to Absolutely Avoid

What you don't eat is just as crucial as what you do. The wrong foods can cause a lot of pain and lead to nasty complications like a dry socket or an infection.

For at least the first week, you need to avoid anything that could get stuck in the sockets or requires any real chewing effort. This means staying away from:

  • Crunchy Foods: Chips, popcorn, nuts, and crackers.
  • Hard Foods: Pretzels, hard candies, and tough cuts of meat.
  • Chewy Foods: Gummy candies, steak, and crusty bread.
  • Spicy or Acidic Foods: These will sting and severely irritate the healing tissue.
  • Foods with Small Seeds or Grains: Things like strawberries, raspberries, quinoa, and sesame seeds are notorious for getting lodged in sockets and causing infections.

Keeping Your Mouth Clean Without Causing Harm

Good oral hygiene is non-negotiable for preventing infection, but your normal brushing routine is way too aggressive for the first few days. For the first 24 hours after surgery, you shouldn't do any rinsing, spitting, or brushing right near the surgical sites.

After that initial 24-hour window, you can start a very gentle cleaning routine. The idea is to keep things clean without disturbing the healing that’s already underway.

The Gentle Saltwater Rinse

Starting the day after your surgery, a warm saltwater rinse will be your best friend. It’s the most effective way to keep the sockets clean. Just mix half a teaspoon of salt into an eight-ounce glass of warm water.

  1. Take a small sip into your mouth.
  2. Gently tilt your head from side to side, letting the water flow over the surgical areas.
  3. Do not swish or spit forcefully. This is critical.
  4. Simply let the water fall out of your mouth into the sink.

Do this after every meal and before heading to bed. It’ll help flush out any food particles without putting pressure on the clots.

Brushing and Flossing Carefully

You can, and should, start brushing your other teeth again the day after surgery. Use a very soft-bristled toothbrush and be extremely cautious as you get near the back of your mouth. For the first few days, avoid the extraction sites completely. You can also gently brush your tongue—it’ll help your mouth feel a whole lot fresher.

How To Spot And Prevent Complications

While almost everyone heals just fine after wisdom teeth removal, knowing what isn't normal can bring a ton of peace of mind. The goal here is to understand the difference between typical recovery aches and the early signs of a real problem.

This isn't about scaring you. It's about empowering you to act fast if something feels wrong, stopping a small issue from turning into a big one.

Your main job is to prevent two key issues: dry socket and infection. Both are pretty rare, but they can seriously slow down your healing and cause a lot of unnecessary pain. The good news? The same simple aftercare that helps you heal—like avoiding straws and keeping the area clean—is your best defense against them.

A watercolor illustration of a post-surgery meal tray with soup, a smoothie, eggs, and a toothbrush.

Recognizing The Signs Of A Dry Socket

"Dry socket" is the complication everyone seems to have heard of. Officially called alveolar osteitis, it happens when the blood clot that forms in the empty tooth socket gets knocked out or dissolves too early. This leaves the bone and sensitive nerves exposed to air, food, and everything else in your mouth.

You'll know the pain from a dry socket—it’s nothing like the dull ache of normal healing.

  • Timing: The pain usually kicks in around three to five days after your surgery, often right when you were starting to feel better.
  • Pain: The biggest giveaway is a severe, throbbing pain that doesn't just stay at the surgery site. It often radiates up toward your ear, temple, or eye on that side of your face.
  • Taste and Smell: You might also have a nasty taste in your mouth or bad breath that even saltwater rinses can't touch.
  • Appearance: A quick peek with a flashlight might reveal whitish bone at the bottom of the socket instead of the dark, reddish clot you should see.

If this sounds like what you're experiencing, don't just try to power through it. Call your oral surgeon right away. Treatment is usually simple—they'll clean the socket and place a medicated dressing over it—but it's the only way to get real relief.

How To Identify A Possible Infection

Infections are another potential curveball, though they're less common than dry sockets if you’re following your aftercare instructions. Your mouth is full of bacteria, and a surgical wound can be an easy target.

The signs of an infection can look a lot like normal healing at first, with one critical difference: they get worse, not better, after the third day.

Key Takeaway: Swelling and pain should be at their worst around day three, then start getting noticeably better each day. If your pain, swelling, or general feeling of being sick suddenly spikes on day four or five, that’s a red flag. Time to call your surgeon.

Other warning signs of an infection include:

  • Yellow or white pus draining from the extraction site.
  • A persistent fever or chills.
  • Swelling that makes it hard to open your mouth or swallow.

To help you tell the difference, here’s a quick comparison of what you can generally expect versus what should make you pick up the phone.

Normal Healing vs. Potential Complication

Symptom Normal Healing (Days 3-7) Potential Complication (Warning Sign)
Pain Gradually decreases. Managed with prescribed or OTC pain relievers. Becomes severe, throbbing, or radiates to the ear/eye after day 3.
Swelling Peaks around day 3, then steadily goes down. Worsens or reappears after day 4; feels hard or hot to the touch.
Drainage Minimal, clear, or slightly blood-tinged oozing in the first 24 hours. Yellow or white pus coming from the socket; foul taste or odor.
Fever A low-grade fever (under 101°F / 38.3°C) is possible in the first 24-48 hours. A new or persistent fever develops after day 3.

This table is just a guide, and your surgeon's advice is always the final word. When in doubt, call them.

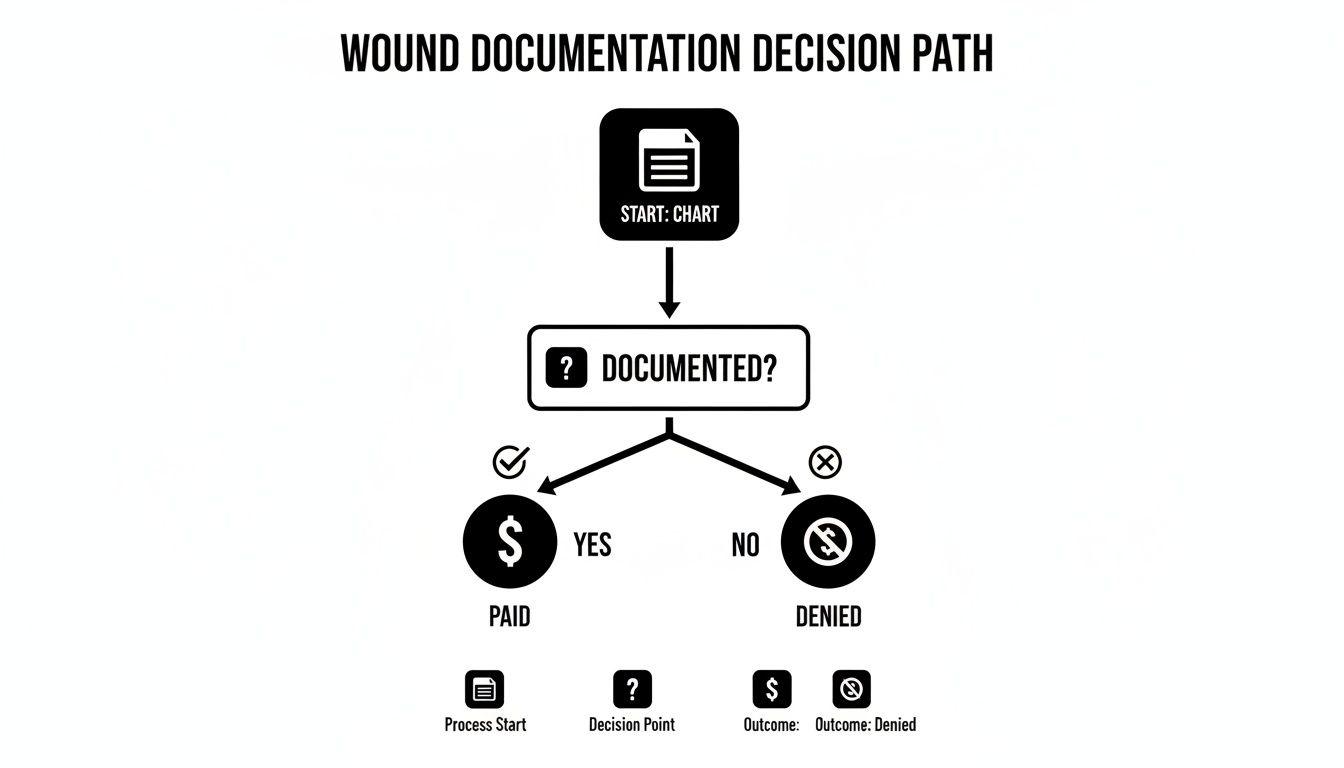
An oral surgery site is a complex wound, and sometimes an infected socket can behave like a chronic wound, needing rapid diagnostics to pick the right antibiotics. In these cases, technology is a huge help. You can learn more about how a point-of-care wound imaging device detects the presence and location of elevated bacterial loads, allowing clinicians to make faster, more accurate treatment decisions. This gets you the right care quickly and stops an infection in its tracks.

Never hesitate to contact your provider if you think you have an infection. A course of antibiotics usually clears things up fast, but catching it early is the key.

Knowing When To Call For Help

A worried woman holds a mirror, touching her painful jaw with red, blue, green splashes and a phone nearby.

Let’s be honest, recovering from wisdom teeth removal can feel like a guessing game. Is this much pain normal? Shouldn't the bleeding have stopped by now? Knowing the difference between a typical healing process and a genuine problem is the key to a smooth, worry-free recovery.

Most of the time, things heal up just fine. But your body has ways of telling you when something’s wrong. The most important thing you can do is listen to it and never hesitate to get professional advice.

Red Flags That Require Immediate Attention

Some symptoms are not up for debate—they should never be ignored. If you experience any of the following, it’s time to pick up the phone and call your oral surgeon's office right away, even if it's after hours. Waiting can quickly turn a manageable issue into a serious complication.

  • Uncontrolled Bleeding: Some oozing for the first day is expected. Heavy, bright red bleeding that doesn't slow down after applying firm gauze pressure for over an hour is not.
  • Severe Pain Unresponsive to Medication: Your pain should be getting better after day three, not worse. If the pain suddenly intensifies or your prescribed medication isn't touching it, that’s a major red flag for a complication like a dry socket.
  • Signs of an Allergic Reaction: Watch for a skin rash, hives, or any difficulty breathing after taking medication. These symptoms point to an allergic reaction and demand immediate medical attention.

For a broader perspective on what constitutes an urgent issue, this ultimate guide to dental emergencies is a helpful resource.

When Normal Healing Stalls

Sometimes, the healing process just stalls out. You might not have the urgent red flags we just talked about, but the socket just isn't closing properly. Maybe it stays tender for weeks, or you notice other signs that it's just not getting better. This is when the surgical site becomes a chronic wound.

This is where the situation crosses a line from standard dental aftercare into the realm of specialized wound medicine. A routine oral surgery site should heal predictably. When it doesn't, it starts to behave like any other complex wound on the body and needs a more advanced strategy to get it back on track.

An oral wound that fails to heal properly is more than just a dental issue—it’s a chronic wound that needs specialized care. If you've been dealing with a non-healing surgical site for weeks, it's time to consider a different approach.

The Role Of A Wound Care Specialist

If you’re stuck with a surgical site that has turned into a chronic problem, a wound care specialist can bring treatments to the table that go far beyond what a typical dental office provides. They look at the wound on a cellular level to figure out exactly why it’s stalled.

Advanced treatments can make all the difference in these stubborn cases. For instance, fluorescence imaging can be used to see bacterial colonies that are invisible to the naked eye, allowing for much more precise treatment. In other situations, amniotic allografts can provide a biological scaffold for your body’s own cells to build new, healthy tissue, essentially giving the healing process a fresh start. These therapies are designed specifically for complex wounds that haven't responded to standard care.

If your recovery has hit a wall and you're worried about a wound that just won't heal, seeking specialized help is the most proactive step you can take. You can explore your options and book a consult with a wound care expert to get a detailed assessment and a personalized treatment plan designed to finally get you over the finish line.

Common Questions About Wisdom Teeth Recovery

Even when you follow your post-op instructions to the letter, questions are bound to pop up. Knowing what to expect—and what’s not normal—can make all the difference in feeling confident during your recovery.

We’ve put together the most common questions we hear from patients. Think of this as your go-to guide for those middle-of-the-night worries, helping you tell the difference between a normal healing ache and a genuine red flag.

How Long Does The Pain Actually Last?

This is the big one, isn't it? For most people, the most significant pain hangs around for three to five days. It typically peaks right alongside the swelling, usually around the 48 to 72-hour mark after your surgery.

After that peak, you should notice a real shift. The sharp, intense pain starts fading into a more manageable, dull soreness. If you start feeling better and then suddenly get hit with a severe, throbbing pain a few days later, that's a major warning sign for dry socket. Don't just hope it goes away—call your surgeon.

When Can I Start Working Out Again?

I know it’s tough to press pause on your fitness routine, but it's absolutely essential for a smooth recovery. You need to avoid all strenuous activity for at least one full week. No exceptions.

Why? Anything that gets your heart rate and blood pressure up can trigger more bleeding, swelling, and throbbing pain at the surgical sites. Worse, it can dislodge the blood clots that are so critical for healing, setting you back significantly.

  • Days 1-4: Your only job is to rest. That means no lifting, bending over, or any real exertion.
  • Days 5-7: You can start introducing some very light activity, like a slow walk around the block. Pay close attention to your body. If you feel any throbbing in your jaw, stop immediately.
  • After Day 7: Assuming your recovery is on track and complication-free, your surgeon will likely give you the green light to slowly ease back into your normal routine.

Expert Tip: Don't be a hero and rush back to the gym. Even if you're feeling pretty good, those sockets are still incredibly delicate. Trying to do too much too soon is one of the fastest ways to cause a setback.

What Are The Telltale Signs Of A Dry Socket?

Dry socket is the most common complication people worry about, and for good reason—it is intensely painful. The classic sign is a sudden blast of severe, throbbing pain that appears three to five days after surgery, often after you've already started to feel better.

This pain is different. It doesn't just stay in the socket; it often radiates up toward your ear, temple, or even your eye on that side of your face. You might also notice a foul taste in your mouth or bad breath that doesn't go away with gentle saltwater rinses. If you look in the mirror, the socket might look visibly empty, missing the dark blood clot that should be there.

If you suspect a dry socket, don't wait. Call your oral surgeon’s office right away to get it treated.

Is A Stiff And Sore Jaw Normal?

Yes, a stiff, sore, and hard-to-open jaw is completely normal. It’s a condition called trismus, and it’s caused by swelling in the jaw muscles after they were held open during the procedure.

The stiffness usually feels worst around day three and then slowly gets better over the next week. Once you’re past the 72-hour mark, you can start applying a warm, moist compress to the outside of your jaw. This will feel great and help those tight muscles relax.

Gently trying to open and close your mouth can also help restore your range of motion, but never force it to the point of pain. For more answers to common questions, check out our FAQs about wound care.


At Specialty Wound Care, we know that a clear, supported healing journey is essential. If you are struggling with a surgical wound that just isn't getting better, our advanced diagnostics and treatments are here to help. Find out how we can support your recovery by visiting https://specialtywoundcare.com.

Early Identification and Management of Chronic Wounds: A Clinical Guide

Specialty Wound Care | January 1st, 2026


Early Identification and Management of Chronic Wounds: A Clinical Guide

Chronic wounds demand attention before complications arise. Delayed wound management often leads to prolonged healing and greater patient risks. This clinical guide highlights key steps for early identification and effective treatment, featuring tools like MolecuLight DX and the triple-layer allograft to improve patient outcomes. Keep reading to strengthen your approach to advanced wound care and make a real difference in your patients’ recovery. For further insights, feel free to refer to this resource on wound care guidelines.

Importance of Early Identification

Understanding the significance of identifying chronic wounds early can save lives and prevent complications. Spotting these wounds in their initial stages allows for timely intervention.

Recognizing Chronic Wounds

Identifying chronic wounds requires keen observation. These wounds often linger beyond the usual healing time, typically over four weeks. They resist standard treatments and may show no signs of progress. Knowing the type of wound you are dealing with is crucial. Common chronic wounds include diabetic foot ulcers, pressure ulcers, and venous leg ulcers. Each demands a tailored treatment approach.

Signs and Symptoms to Watch

Look for persistent redness, swelling, and foul odor. These are red flags indicating infection or stalled healing. Pain levels that don’t decrease can also be a concern. Document any changes or lack of improvement. This data helps in determining the next steps in management. For a detailed guide on treatment, refer to the Pocket Guide on Wound Treatment.

Role of Early Detection in Healing

Early detection plays a pivotal role in speeding up recovery. Intervening early minimizes the risk of complications such as infections. Quick action can significantly reduce the overall healing time and improve outcomes. Most people think waiting for natural healing is enough, but timely action is essential.

Advanced Management Techniques

Once chronic wounds are identified, advanced techniques can aid in effective management. Leveraging modern tools and methods ensures better results for patients.

Utilizing MolecuLight DX

MolecuLight DX is a game-changer in wound management. This tool helps visualize bacterial presence in wounds, guiding precise interventions. With its real-time imaging, it allows for targeted debridement and treatment. Imagine having a clear roadmap to tackle infection effectively.

Benefits of Triple-Layer Allograft

The triple-layer allograft offers unmatched healing support. It serves as a scaffold promoting tissue repair while being compliant with FDA standards. This allograft accelerates healing by fostering a conducive environment for wound closure. Incorporating it into your practice could transform patient outcomes.

Integrating Specialty Wound Care Solutions

Specialty Wound Care solutions provide a comprehensive approach. These solutions incorporate cutting-edge technologies and personalized care strategies. By partnering with providers, they ensure the highest standard of wound care. Discover more about integrating solutions by exploring this comprehensive guide.

Enhancing Patient Outcomes

Implementing advanced techniques and early detection methods is only part of the equation. Consistent and holistic practices are vital in enhancing overall patient recovery.

Comprehensive Wound Care Practices

Comprehensive care involves more than treatments; it includes patient education and follow-up. Keeping patients informed about their care plan promotes better adherence. Regular monitoring and documenting progress provide insights into treatment efficacy. For further reading, consult the American Family Physician’s article on managing chronic wounds.

Collaborating for Better Results

Collaboration is key in wound care. Working with multidisciplinary teams enriches the treatment process. It opens up avenues for sharing knowledge and resources. Building a network with other professionals creates a support system that enhances patient care.

Continuous Education and Training

Stay updated with the latest in wound care by pursuing ongoing education. Regular training ensures that you are equipped with the latest techniques and information. This commitment to learning fosters better patient outcomes and professional growth. Unlock the potential of your practice by dedicating time to learning and application.

In conclusion, early identification and advanced management of chronic wounds are crucial in improving patient outcomes. By integrating modern tools and maintaining comprehensive care practices, healthcare professionals can make significant strides in patient recovery. Remember, the longer you wait, the harder it becomes to treat these wounds effectively. Stay proactive in your approach to wound care.

Visit now

Uncategorized

Your Guide to Understanding and Treating an Abscess on Gum

Primus Healthcare | January 1st, 2026


An abscess on the gum is more than just a painful lump; it's a serious red flag. Think of it as your body's emergency containment system trying to wall off a rapidly growing bacterial infection. This painful, pus-filled pocket is a battle your body can't win on its own, and it demands immediate professional attention to stop the infection from spreading.

Understanding a Gum Abscess and Why It Demands Urgent Care

A cross-section of a tooth showing a dental abscess or infection within its root, with watercolor splashes.

Picture a small but aggressive bacterial colony finding a weak spot deep in your gum tissue or at the root of a tooth. Your immune system immediately goes on the defense, sending white blood cells to fight off the invaders. This intense conflict creates a pocket filled with pus—a mix of dead bacteria, tissue, and immune cells—which we see and feel as a painful, swollen lump. That's a gum abscess.

Ignoring this warning sign is a dangerous gamble. If left untreated, the bacteria will multiply and spread. This can lead to tooth loss, damage to the jawbone, or even a systemic infection that travels through your bloodstream, affecting your entire body.

That’s why an abscess on the gum is a true dental emergency. Knowing the difference between a minor issue and a crisis is key, making understanding when to seek emergency dental care essential for your health and safety.

The Two Primary Types of Gum Abscesses

Not all abscesses are created equal. Where the infection starts—its origin story—determines the entire course of action. Pinpointing the source is the first critical step toward getting the right treatment.

Let's break down the two main types you might encounter.

Periodontal Abscess vs Periapical Abscess

The table below offers a quick comparison of the two main types of dental abscesses to better understand the potential source of the infection.

Feature Periodontal Abscess (Gum Origin) Periapical Abscess (Tooth Origin)
Source Infection starts in the gum pocket next to a tooth. Infection begins inside the tooth's pulp (nerve).
Primary Cause Advanced gum disease (periodontitis) traps bacteria. Severe tooth decay, cracks, or trauma lets bacteria in.
Location Swelling appears on the side of the gum, often near the gumline. Swelling is typically at the tip of the tooth root, visible on the gum.
Associated Pain Often a dull, continuous ache; may be sensitive to biting. Usually a sharp, throbbing, severe pain that can be intense.
Tooth Vitality The associated tooth is often still alive and healthy. The associated tooth is usually non-vital (dead) or dying.

Understanding this distinction is far more than just academic—it's the roadmap for treatment. A periodontal abscess often calls for deep cleaning and drainage, while a periapical abscess usually requires a root canal or tooth extraction to get to the source.

These infections are surprisingly common. Dental abscesses are behind a significant number of urgent care visits, making up about 8% of all emergency dental appointments worldwide. In the U.S. alone, severe dental infections result in around 200,000 emergency room visits annually. That’s a quarter of all oral health-related ER trips, a statistic that hammers home just how critical it is to recognize an abscess on the gum and seek professional help without delay.

Recognizing the Symptoms and Uncovering the Root Causes

A gum abscess doesn't just show up unannounced. It's the painful final act of a story that starts with a simple bacterial invasion. Figuring out how this happens—and what warning signs to watch for—is your first line of defense.

Think of your gum tissue as a fortress wall. When something creates a breach in that wall, it’s an open invitation for bacteria to storm in, set up camp, and multiply. Several common dental problems can tear down these defenses, essentially rolling out the red carpet for an infection.

Tracing the Infection Back to Its Source

The road to a full-blown gum abscess often begins with what seem like minor issues that slowly spiral out of control. Pinpointing the original culprit is absolutely critical. Why? Because just draining the abscess isn't a permanent fix; you have to solve the underlying problem, or it will just keep coming back.

Here are the usual suspects:

  • Untreated Gum Disease: This is the big one. When plaque and tartar build up, they force the gums away from the teeth, creating deep pockets. These pockets are the perfect dark, damp hideouts for bacteria to get trapped and thrive.
  • Deep Tooth Decay: A cavity that bores its way into the tooth's soft inner pulp—where the nerve lives—gives bacteria a direct route to the core. From there, the infection travels down the root and explodes into an abscess in the gum tissue right at the tip.
  • Dental Trauma: A cracked, chipped, or broken tooth is like a broken window in your home's security. It creates a clear pathway for bacteria to invade the sensitive inner layers, sparking an infection that can quickly lead to an abscess.
  • A Foreign Object Gets Stuck: Sometimes, it’s as simple as a tiny piece of a popcorn kernel getting wedged deep into the gum tissue. If it stays there, it irritates the area and triggers an infection, which can eventually form an abscess.

These conditions create the ideal breeding ground for bacteria to flourish, ending in a painful gum abscess. The scale of these underlying problems is staggering. Periodontal diseases are a massive global health burden, with an estimated 1.07 billion prevalent cases worldwide in 2021. In fact, over 42% of adults over 30 have some form of gum disease, which just goes to show how common these precursor conditions really are. You can find more details on the global impact of periodontal diseases on PMC.

Identifying the Telltale Warning Signs

While a visible, pimple-like bump on your gum is the most obvious giveaway, an abscess sends out plenty of other distress signals. Catching these early can get you to seek help before the infection digs in deeper. The pain, in particular, can be intense and hard to ignore.

An abscess often announces itself with a severe, persistent, throbbing pain. It can radiate from the tooth into your jaw, up to your ear, or down into your neck. This isn't just a minor ache that you can push through; it’s a constant, demanding pain telling you something is seriously wrong.

Keep a close eye out for these key symptoms:

  • Intense, Persistent Pain: A throbbing ache that makes it hard to chew, focus, or even think straight.
  • Extreme Sensitivity: A sharp, severe pain when anything hot or cold touches the tooth.
  • Visible Swelling: You might see noticeable swelling in your gums, cheek, or the side of your face.
  • Foul Taste or Bad Breath: If the abscess bursts, you might get a sudden rush of salty, foul-tasting fluid in your mouth. Persistent bad breath is another common sign.
  • Systemic Symptoms: A fever, feeling generally unwell (malaise), and having tender, swollen lymph nodes under your jaw or in your neck are signs the infection is spreading.

These symptoms are your body’s fire alarm. They’re warning you that a localized infection is getting worse. While professional treatment is non-negotiable, you can find some relief from the severe discomfort. There are several helpful at-home soothing tips for dental abscess pain that can offer temporary comfort while you wait for your appointment. Just remember, these are stopgap measures, not a cure. They can't replace a visit to your dentist.

How Dentists Pinpoint the Cause of a Gum Abscess

When you show up at the dentist with a throbbing, swollen gum, it’s understandable to feel a bit on edge. But knowing how your dentist will get to the bottom of the problem can make the whole experience less stressful. Getting a precise diagnosis for an abscess on the gum is the critical first step, making sure the treatment hits the true source of the infection, not just the visible symptoms. Think of it as a methodical investigation to figure out exactly what’s going on under the surface.

It all starts with a conversation about what you're feeling and your overall health history. Then, your dentist will perform a gentle but thorough clinical exam. They're basically a detective looking for clues—inspecting your gums, teeth, and nearby tissue for any redness, swelling, or a draining fistula, which is a tiny tunnel the abscess forms to let out pus.

They'll also likely tap lightly on your teeth. This simple technique, called a percussion test, helps zero in on whether a specific tooth is the culprit. It's a quick way to help distinguish between an abscess starting in the gum (periodontal) and one originating from a tooth root (periapical).

Seeing Beneath the Surface with Dental Imaging

A visual check gives the dentist a lot of good information, but the real story of an abscess is often hidden deep inside a tooth or in the jawbone. To see what the naked eye can’t, your dentist will take dental X-rays. This is a non-negotiable step for getting the diagnosis right.

An X-ray serves as a blueprint of your mouth, showing exactly where the infection began and how far it has spread.

  • Finding the Source: For a periapical abscess, the X-ray might reveal a dark spot right at the tip of a tooth’s root, a clear sign of infection that started in the tooth's nerve.
  • Checking for Bone Loss: If it’s a periodontal abscess, the image can show bone loss around the tooth, a classic sign of advanced gum disease.
  • Planning the Treatment: The details from the X-ray help your dentist decide on the best course of action, whether it's a root canal, a deep cleaning, or, in more serious situations, removing the tooth.

Without this step, any treatment would just be a temporary fix. It's like patching a leaky pipe but never shutting off the water—the problem is guaranteed to come back.

Advanced Diagnostics for Tricky Infections

For most gum abscesses, a good clinical exam and a clear X-ray are all that's needed to create a solid treatment plan. But what about infections that keep coming back? Or when a patient has a weakened immune system? Sometimes, an infection just doesn’t get better with the first round of treatment. In these cases, we need to dig deeper. The goal shifts from simply identifying the problem to understanding the specific germs causing all the trouble.

This is where rapid pathogen testing makes a huge difference. Instead of waiting days for traditional lab cultures to grow, this technology can quickly identify the exact bacteria fueling the infection. More importantly, it can tell us which antibiotics will actually work against them.

By identifying the specific pathogen, clinicians can move beyond broad-spectrum antibiotics and select a targeted medication. This precision approach not only improves treatment outcomes but also helps combat the growing problem of antibiotic resistance.

This level of detail is a major leap forward in oral healthcare. When your team knows precisely what they're up against, they can build a personalized and highly effective treatment plan from day one. You can learn more about this by exploring the benefits of advanced pathogen detection in wound care. This modern approach ensures a faster, more predictable recovery from a serious abscess on the gum.

Your Step-By-Step Gum Abscess Treatment Plan

Getting a gum abscess diagnosis can be alarming, but thankfully, the treatment path is well-defined. Tackling an abscess on the gum isn't a one-and-done fix. It’s a multi-stage process designed to give you immediate relief, knock out the infection, and fix the underlying issue so it doesn’t come roaring back.

Each step is critical. We start by handling the immediate pain, then shift to controlling the bacteria, and finally, resolve the root cause for good. This methodical approach is the key to a full recovery.

Stage 1: Immediate Relief Through Incision and Drainage

First things first: we need to relieve the intense pressure and pain from that trapped infection. We do this with a straightforward but incredibly effective procedure called incision and drainage (I&D). Your dentist makes a tiny, precise incision over the abscess, which allows all the built-up pus to drain out.

You'll feel an almost instant wave of relief as that pressure vanishes. It’s a crucial first step for managing pain and kicking off the healing process. Just remember, this only treats the symptom—the painful pocket of pus—not what caused it in the first place.

After draining, the area is cleaned thoroughly with a saline solution to wash away any lingering bacteria, calming the inflammation and setting the stage for what comes next.

Stage 2: Controlling the Infection with Antibiotics

With the pressure gone, the next job is to get the bacterial infection under control and prevent it from spreading. While drainage removes the bulk of the bacteria at the site, microscopic bugs can still be hiding in the surrounding tissues or even get into your bloodstream.

This is where antibiotics step in. Your dentist will likely prescribe a course of medication to fight the infection systematically from the inside out.

Think of antibiotics as essential backup. They help manage the infection throughout your body, but they can't fix the dental problem that let the abscess form.

It's absolutely vital to finish the entire course of antibiotics, even if you start feeling a lot better after just a day or two. Stopping early lets the toughest bacteria survive, setting you up for a recurring and more resistant infection down the road.

Stage 3: Addressing the Root Cause for a Lasting Cure

This is the most important part of the whole plan. Without fixing the original problem, the abscess is almost guaranteed to return. The specific treatment you’ll need depends entirely on whether it’s a periodontal (gum-based) or periapical (tooth-based) abscess.

Using your exam and X-rays, your dentist will pinpoint the best course of action.

  • For a Periodontal Abscess: If the infection started in the gum pocket from advanced gum disease, the definitive treatment is a deep cleaning called scaling and root planing. This procedure gets rid of tartar and plaque below the gumline and smooths the tooth roots, helping the gums reattach and closing off the pockets where bacteria love to hide.
  • For a Periapical Abscess: If the abscess came from an infection inside the tooth's nerve, a root canal treatment is the usual solution. This process removes the infected pulp, disinfects the inside of the tooth, and seals it up. In severe cases where the tooth is too damaged to save, an extraction might be necessary to remove the source of infection completely.

This flowchart shows the diagnostic path a dentist follows, from the initial look to the final tests that confirm the right treatment.

Decision tree flowchart guiding gum abscess diagnosis, including examination, visible swelling, tests, and drainage.

Each step in this visual guide builds on the last, ensuring the final treatment plan is precisely targeted to where the abscess started.

Stage 4: Post-Procedure Wound Management and Follow-Up

Once the main treatment is done, the ball is in your court. Proper wound care at home is essential for a smooth, quick recovery. Your dentist will give you specific instructions—make sure you follow them to the letter.

These instructions usually cover a few key areas:

  • Maintaining Oral Hygiene: You'll need to keep the area clean, which often means gentle brushing and using a special antimicrobial rinse.
  • Managing Discomfort: Over-the-counter pain relievers can help with any soreness after the procedure.
  • Dietary Adjustments: Sticking to soft foods for a few days helps prevent irritating the healing tissue.

Finally, showing up for your follow-up appointments is non-negotiable. These visits let your dentist check on your healing, make sure the infection is totally gone, and confirm the underlying problem is solved for good, protecting you from another abscess on the gum.

Advanced Wound Care for a Faster Recovery

Healing from an abscess on the gum isn’t always a straight line, especially once the infection is drained. For some people, particularly those managing underlying health issues like diabetes or a weakened immune system, the site can turn into a complex wound that just won’t heal.

In these cases, standard home care simply isn't enough. This is where advanced wound care protocols come in. They aren’t just extra steps; they are targeted, proactive treatments designed to give your body the support it needs to truly regenerate damaged tissue.

When Healing Stalls and Standard Care Isn't Cutting It

For a healthy person, the small wound left after draining an abscess usually heals without much fuss. But when that healing process stalls—showing signs of stubborn inflammation, slow closure, or even reinfection—it’s a clear signal that the body needs more help. This is a common hurdle for patients whose systems are already working hard to manage other health challenges.

Think of it this way: standard care clears the debris from a construction site. Advanced care brings in the master builders and premium materials to reconstruct the building faster, stronger, and more resilient than before. These advanced methods are designed to break through the biological roadblocks that can turn a simple wound into a chronic problem.

One of the most effective tools in our kit is the use of biological scaffolds. For example, amniotic membrane allografts can be placed over the wound, acting as a natural framework. This scaffold is rich with the essential growth factors and proteins your body needs to build new, healthy gum tissue, giving a powerful jump-start to a stalled healing process.

Using Technology to Guide Treatment

A major challenge in managing a post-abscess wound is making sure it's truly clean. Even after drainage and a round of antibiotics, microscopic colonies of bacteria can stick around, creating what we call a high bacterial bioburden. This invisible threat is one of the main reasons some wounds just refuse to close.

To get ahead of this, modern wound care uses sophisticated imaging technology. Fluorescence imaging, for instance, allows a clinician to see the exact location and concentration of harmful bacteria on the wound’s surface in real-time. This isn’t guesswork; it’s a precise map showing exactly where to clean and debride the tissue. You can learn more about point-of-care wound imaging devices and how they guide treatment.

This table helps illustrate when it's time to transition from basic home care to a more specialized approach.

Standard Home Care vs Specialized Wound Management

A guide to understanding post-procedure care and when advanced wound management may be necessary for optimal healing.

Care Task Standard Home Care Instructions Triggers for Specialized Wound Care
Cleaning Gentle rinsing with warm salt water or a prescribed antimicrobial mouthwash. Persistent pus drainage, a foul odor, or redness that spreads after initial treatment.
Monitoring Watching for reduced swelling, less pain, and the gradual closing of the incision site. Healing that has stalled for 7-14 days, or if symptoms are getting worse instead of better.
Follow-Up A routine check-up to confirm the infection is gone and healing is on track. Patients with diabetes, autoimmune disorders, or a known history of non-healing wounds.

The ultimate goal of advanced wound care is to create the perfect environment for your body to heal itself. By removing barriers like high bacterial loads and providing regenerative support, we can significantly reduce recovery times and minimize the risk of the abscess returning.

By bringing in these advanced tools and strategies, we shift the focus from passively managing a wound to actively regenerating healthy tissue. This proactive approach helps patients recover more completely from an abscess on the gum, preventing long-term complications and restoring their oral health.

When a Gum Abscess Becomes a Medical Emergency

Most gum abscesses are urgent dental problems, but some cross the line into a full-blown medical emergency. This happens when the infection breaks free from its starting point in your mouth and begins to overwhelm your body’s defenses.

Recognizing the tipping point from a localized dental issue to a systemic threat is critical. An infection on the move can lead to sepsis, a life-threatening chain reaction where your body’s own immune response starts to damage its tissues and organs. Knowing what to look for isn’t just helpful—it can be a lifesaver.

Unmistakable Red Flag Symptoms

If you have a suspected gum abscess and notice any of the following signs, don't waste time calling the dentist. Get to an emergency room immediately for medical care.

  • Difficulty Breathing or Swallowing: This is the most alarming red flag. If swelling spreads to your throat or neck, it can start to close off your airway. Any trouble breathing or even swallowing your own saliva is a true medical emergency that needs immediate intervention.

  • High Fever and Facial Swelling: A fever is your body's normal response to an infection, but a high, stubborn fever (over 101°F or 38.3°C) paired with major swelling in your cheek, jaw, or down into your neck is a sign the infection is spreading aggressively.

  • Rapid Heart Rate and Confusion: Feeling dizzy, disoriented, or mentally foggy? Is your heart racing? These are classic signs that the infection may have entered your bloodstream, putting you at risk for sepsis. This requires urgent hospital care.

These symptoms mean the bacteria are no longer contained. They've breached the local defenses in your mouth and are starting to impact your entire system.

Preventing Future Gum Abscesses

The old saying holds true: an ounce of prevention is worth a pound of cure. The best way to sidestep a dental emergency is with consistent, proactive oral care. This is your number one defense against the problems that lead to abscesses in the first place.

Prevention is all about consistency. When you disrupt the bacterial colonies that cause decay and gum disease, you’re essentially knocking down the foundation an abscess needs to form.

Here are the most effective steps you can take to guard your oral health:

  1. Impeccable Oral Hygiene: It’s non-negotiable. Brush twice a day with fluoride toothpaste and floss at least once daily. This clears out the plaque and food debris that get stuck between teeth and under the gumline, where trouble starts.
  2. Regular Dental Visits: Don't skip your six-month check-ups and cleanings. Your dentist is trained to catch the earliest signs of decay or gum disease long before they have a chance to blow up into a painful infection.
  3. Mindful Diet: Sugar is fuel for the bacteria that cause cavities. Limiting sugary foods and drinks starves them out. A balanced diet doesn't just help your teeth; it supports your overall health, too.

Remember, untreated tooth decay is a wide-open door for infection. Oral diseases are incredibly common, affecting nearly 3.7 billion people worldwide, with untreated dental cavities being the single most common health condition. By tackling dental issues head-on, you dramatically reduce your risk of ever developing a painful—and potentially dangerous—abscess. You can discover more insights about global oral health on MedlinePlus.

Common Questions About Gum Abscesses

When you’re dealing with a gum abscess, it’s natural to have a few questions. Let's walk through some of the most common concerns to give you clarity and confidence on what to do next.

Can a Gum Abscess Heal on Its Own?

Absolutely not. A gum abscess will never resolve by itself. The pain might fade for a little while if it happens to burst and drain, but that’s misleading. The real source of the infection is still active deep inside the tissue.

Without professional treatment to clear out the pus and fix the root cause—whether it’s gum disease or a dying tooth—the infection will linger. It’s almost guaranteed to come back, and worse, it can spread into your jawbone or even your bloodstream, creating a much more serious health risk.

How Can I Manage the Pain Before My Dental Visit?

While you're waiting for your appointment, there are a couple of things you can do to manage the discomfort. Gently rinsing your mouth with warm salt water a few times a day is a great first step. It helps soothe the inflammation and can even draw out some of the infection.

Over-the-counter pain medications like ibuprofen can also be a big help, as they work to reduce both the pain and the swelling.

Remember, these are just temporary fixes to help you get by. They are no substitute for the professional care you need to eliminate the infection for good.

Is a Root Canal or Tooth Extraction Always Necessary?

Not always. The right treatment is all about pinpointing where the infection started. Your dentist’s diagnosis is the key to figuring out the best plan of action.

  • Periapical Abscess: If the infection began inside the tooth’s nerve, then yes, a root canal or an extraction is usually necessary to get rid of the source.
  • Periodontal Abscess: If the infection is from gum disease and started in the pocket between your tooth and gum, it can often be treated with a thorough deep cleaning procedure.

For more answers to common questions about dental and wound care, you can find a wealth of information by reviewing our comprehensive list of frequently asked questions.


At Specialty Wound Care, we are dedicated to resolving complex wounds with advanced diagnostics and treatments. If you are struggling with a non-healing oral wound or any persistent infection, we provide the specialized care needed for a full recovery. Learn more at https://specialtywoundcare.com.

Uncategorized

After Tooth Extraction: Your Essential Recovery Guide

Primus Healthcare | December 31st, 2025


Proper care after tooth extraction is essential, and those first 24 hours are without a doubt the most important for a smooth recovery. Your main job is to protect the blood clot that forms in the socket. Think of it as a natural bandage that covers the underlying bone and nerves.

Your First 24 Hours After Tooth Extraction

The hours right after your procedure really set the tone for the entire healing process. You're laying the foundation for a good recovery, and your body's first move is to create a protective blood clot in the empty socket.

Everything your dentist tells you to do is designed to keep this delicate clot safe. If it gets knocked out, you could end up with a dry socket—a genuinely painful complication you want to avoid.

For a complete rundown of what to do (and what not to do), these detailed instructions for after tooth extraction are a great resource. They break down the immediate aftercare steps clearly.

To make it even simpler, here's a quick reference table for that critical first day.

Immediate Aftercare Timeline: The First 24 Hours

Timeframe What to Do What to Avoid
First Hour Bite firmly and consistently on the gauze pad provided. Talking, chewing, or rinsing.
Hours 2-4 Continue biting on gauze if bleeding persists. Apply ice packs (20 min on, 20 min off). Spitting, smoking, drinking through a straw.
Hours 4-12 Prioritize rest with your head elevated. Stick to soft, cool foods. Hot liquids, alcohol, strenuous activity.
Hours 12-24 Continue resting and elevating your head. Take pain medication as prescribed. Vigorous rinsing, poking the site, hard/crunchy foods.

Following this simple timeline helps ensure that crucial blood clot stays right where it needs to be.

Protecting The Essential Blood Clot

That blood clot is the MVP of your recovery. It shields the sensitive nerve endings in the socket and creates the framework for new tissue to grow. Without it, healing takes a lot longer and hurts a lot more.

Your goal is to create an environment where the clot can form and stay put. This means avoiding anything that creates suction or pressure in your mouth.

Here's what to steer clear of for the first 24 hours:

  • No Straws: The sucking motion is notorious for pulling the clot right out of the socket.
  • No Forceful Spitting: This creates a sudden pressure change that can easily dislodge the clot. Just let saliva or liquids gently fall from your mouth.
  • No Smoking or Vaping: Besides the suction, the chemicals in smoke can slow down healing and raise your risk of infection.
  • No Vigorous Rinsing: Hold off on mouthwash or aggressive rinsing. You can start gentle saltwater rinses after the first day.

Managing Bleeding And Swelling

It's completely normal to see a little bit of oozing or light bleeding for the first few hours. Your dentist will send you home biting on a sterile gauze pad to help apply pressure and get that clot started.

Pro Tip: If the bleeding hasn't stopped once you're home, grab a fresh piece of gauze. Fold it into a small, thick square, place it directly over the extraction site, and bite down with firm, consistent pressure for 30-45 minutes. The key here is uninterrupted pressure.

To get a handle on swelling, grab an ice pack. Apply it to the outside of your cheek for 20 minutes on, then 20 minutes off. This simple cycle is incredibly effective. It helps constrict blood vessels, which minimizes inflammation and even provides a bit of a numbing effect.

This visual breaks down the key priorities for that critical first day.

Flowchart illustrating the first 24 hours of post-tooth extraction care, including managing bleeding, swelling, and resting.

As the chart shows, your immediate focus should be controlling bleeding with gauze, then using ice packs intermittently for swelling, all while making rest your top priority.

Prioritizing Rest And Elevation

Rest is non-negotiable. Plan on taking it easy for the rest of the day after your extraction. Avoid any heavy lifting, bending over, or strenuous workouts—anything that could spike your blood pressure and cause the site to start bleeding again.

When you lie down, prop your head up with an extra pillow to keep it elevated above your heart. This simple trick does wonders for reducing swelling and that throbbing feeling.

Managing Pain and Swelling Effectively

Let’s be honest: pain and swelling are a normal part of the deal after a tooth extraction. Your body is just doing its job. But that doesn’t mean you have to be miserable. The real secret is to get ahead of the discomfort and stay there, rather than trying to play catch-up when you're already in pain.

A woman rests on a sofa with a tissue near her mouth, a glass of water nearby, depicting recovery.

Think of it like this: managing pain is a schedule, not a reaction. If your dentist gave you a prescription, stick to the schedule they recommended, even if you’re feeling pretty good at the moment. This proactive approach keeps the pain from ever getting a chance to build into something overwhelming.

Taming Inflammation with Cold Therapy

For the first 48 hours, an ice pack is your most valuable tool. Applying cold to the outside of your cheek, right over the extraction site, is a surprisingly powerful way to reduce swelling and gently numb the area.

The cold works by constricting the blood vessels. This simple action limits the amount of fluid that rushes to the site, which is what causes that classic post-procedure puffiness. It's a natural way to find some relief from that initial throbbing feeling.

Here’s the best way to do it:

  • The 20/20 Rule: Keep the cold pack on for 20 minutes, then take it off for at least 20 minutes. This cycle is crucial. It gives your skin a chance to recover and prevents any potential tissue damage from too much cold.
  • Wrap It Up: Never put ice directly on your skin. Always wrap your cold pack (or a bag of frozen peas, which works great) in a thin dish towel to create a safe barrier.
  • Consistency is Key: Repeat this on-and-off cycle as often as you can during the first two days. The more consistent you are, the better your results will be.

Swelling often peaks around the second or third day post-extraction. Don't be alarmed if you feel a bit more swollen the day after your procedure—that's a completely normal part of the healing process.

By sticking with cold therapy, you can seriously lessen the peak of that swelling and keep your discomfort in check.

Using Medication Wisely

Whether you’re taking an over-the-counter anti-inflammatory like ibuprofen or something prescribed by your dentist, timing is everything. It is so much easier to keep pain at a low, dull hum than it is to wrestle it back down after it’s become severe.

Think of your pain level like a small campfire. A small fire is easy to manage. But if you ignore it and let it become a bonfire, it’s a whole different battle. Taking your medication on schedule keeps that fire small and manageable.

A Practical Medication Schedule Example

Time Action Notes
8:00 AM Take prescribed dose with a bit of soft food (like yogurt or applesauce). Eating a little something first can help prevent an upset stomach.
12:00 PM Take the next scheduled dose as your dentist directed. I always suggest setting an alarm on your phone so you don't miss it.
4:00 PM Continue with your scheduled dose, even if you feel okay. Remember, the goal is to stay ahead of the pain.
8:00 PM Take your final dose for the day before getting ready for bed. This can make a huge difference in getting a more restful night's sleep.

Switching to Warm Compresses

Once you’ve passed the 48-hour mark, it’s time to change tactics. The initial need to control swelling with cold is over. Now, the goal shifts to promoting healing and easing any jaw stiffness. This is where a warm compress comes in.

Applying a warm, moist towel to the same area helps increase blood circulation. Better circulation brings more oxygen and nutrients to the site, which speeds up your body’s natural repair work. It's also fantastic for relaxing a sore, stiff jaw that doesn't want to open easily.

Just like with the ice, apply the warm compress for about 20 minutes at a time. Start doing this on day three and repeat it several times throughout the day. This simple switch from cold to warm works in perfect harmony with your body’s healing timeline.

Your Healing Diet and Activity Guide

How you eat and move in the days following a tooth extraction has a massive impact on your healing. Making the right choices gives your body the fuel it needs to repair itself, while a misstep can easily derail your recovery. This is your practical, no-nonsense guide to getting nutrition and activity right.

Think of your body as a dedicated construction crew working to patch up the extraction site. Nutrient-rich foods are the high-quality building materials, and strenuous activity is like a sudden earthquake rattling the whole project. Your job is to supply the good stuff and keep things calm.

Fueling Your Body for a Smooth Recovery

The old advice to "just eat soft foods" is a decent starting point, but we can do better. Your goal is to find foods that are easy to eat, won't irritate the fresh wound, and are packed with the vitamins and minerals that promote healing. Yes, your diet will be a little limited for the first few days, but it definitely doesn't have to be bland.

Here are some excellent choices that go way beyond a simple bowl of ice cream:

  • Nutrient-Packed Smoothies: Blend soft fruits like bananas and berries with a scoop of Greek yogurt or protein powder to create a complete, easy-to-consume meal. Just remember—and this is critical—absolutely no straws. Using a straw creates suction that can dislodge the protective blood clot. Use a spoon instead.
  • Lukewarm Soups: Creamy tomato, butternut squash, or any blended vegetable soup is perfect. You want to avoid anything too hot, as heat can increase bleeding. Also, skip soups with chunky bits that could get lodged in the empty socket.
  • Gentle Proteins: Scrambled eggs, cottage cheese, Greek yogurt, and even tender, flaky fish are fantastic sources of protein, which is absolutely essential for tissue repair.
  • Mashed Veggies: Mashed potatoes and sweet potatoes are classics for good reason. You can also mash up avocado, carrots, or peas to get a wider range of vitamins.

And don't forget hydration. Water is your best friend. Staying well-hydrated helps your system flush out toxins and keeps your tissues healthy and ready to heal.

Crucial Reminder: Steer clear of alcohol, carbonated beverages, and caffeine for at least the first 48-72 hours. Alcohol can interfere with your medication and slow down healing, while the fizz from soda can easily disrupt the blood clot.

Understanding Your Activity Restrictions

Rest isn't just a suggestion; it's a non-negotiable part of your recovery. For the first 24-48 hours, your main job is to take it easy. That means no gym sessions, no lifting heavy groceries, and no tackling strenuous chores around the house.

Why is this so important? Any activity that gets your heart pumping also raises your blood pressure. That surge in pressure can be all it takes to make the fragile extraction site start bleeding again. Even something as simple as bending over to tie your shoes or picking up a heavy package can create enough pressure in your head to cause a problem.

A Realistic Timeline for Getting Back to Normal

This table is a general guide. If you had a more complicated surgical extraction, your dentist will give you a more specific schedule. The most important thing is to listen to your body. If you feel any throbbing or new discomfort when you start moving around, that’s your body's signal to stop and rest.

Activity Level When to Resume Rationale
Light Activity Days 2-3 You can typically get back to things like walking or desk work.
Moderate Exercise Days 3-5 Ease back into activities like jogging or yoga, paying close attention to how you feel.
Strenuous Activity Days 7-10 Hold off for at least a week before returning to heavy lifting or intense cardio.

How to Spot Complications Like Dry Socket

For the most part, recovering from a tooth extraction is a pretty smooth process. But knowing the difference between what’s normal and what’s a red flag can give you incredible peace of mind. Let’s walk through the warning signs so you can feel confident and in control of your healing.

Three soft, easy-to-eat foods: a bowl of soup, plain yogurt, and a healthy smoothie.

A little discomfort is part of the deal, but some symptoms are your body’s way of saying, “Hey, call the dentist.” Being able to tell them apart is the secret to a stress-free recovery.

Demystifying Dry Socket

The complication everyone’s heard of is dry socket, or what we call alveolar osteitis. It’s exactly what it sounds like: the protective blood clot that forms in the socket gets knocked out or dissolves before it’s supposed to. This leaves the bone and nerve endings underneath exposed to everything—air, food, liquids. It’s not a good time.

This isn’t just a minor setback; it’s a deep, significant pain that your usual pain meds won’t touch. Dry socket is probably the most dreaded complication, affecting 2-5% of all extractions, but that number jumps to a startling 20-30% for lower wisdom teeth.

A tell-tale sign of dry socket is pain that gets much worse around day three or four, right when you thought you were turning a corner. The pain is often a deep, throbbing ache that can radiate up toward your ear or eye on that side of your face.

For a deeper dive into prevention, these top recovery tips for avoiding dry socket offer some great, practical advice. The main symptoms to keep an eye out for are:

  • Severe, throbbing pain that doesn't get better with the medication you were given.
  • A visibly empty-looking socket. Instead of a dark clot, you might see the whitish color of bone.
  • A persistent foul taste or bad breath that you can't get rid of.
  • Pain radiating from the socket into your jaw, ear, or temple.

If you think you have a dry socket, don't just try to power through it. Your dentist can gently clean the area and place a special medicated dressing that brings almost immediate relief and helps the site heal correctly.

Recognizing the Signs of an Infection

An infection is less common than dry socket but more serious, and it definitely needs a professional’s attention right away. It's normal to have a bit of swelling and maybe even a low-grade fever for the first day or two. An infection, however, shows up with symptoms that get progressively worse, not better.

While normal swelling usually peaks around day two or three and then starts to go down, swelling from an infection just keeps getting bigger. You might also notice that persistent bad taste again, even after rinsing.

Key Infection Warning Signs

  1. Increasing Swelling: The swelling around the site gets worse after the third day.
  2. Persistent Fever: A fever that hangs on or even develops a few days after your procedure.
  3. Pus or Discharge: Any yellow or white fluid coming from the extraction site is a clear warning.
  4. Worsening Pain: If your pain was improving and then suddenly gets severe again, that's a red flag.

If any of these signs appear, it’s crucial to call your dentist immediately. An untreated infection has the potential to spread and cause much bigger problems. Today, clinicians can use advanced tools to pinpoint bacterial issues; our article on how a https://specialtywoundcare.com/point-of-care-wound-imaging-device-detects-the-presence-and-location-of-elevated-bacterial/ explains how this technology works.

When to Make the Call

When in doubt, always err on the side of caution. Your dental team would much rather you call with a question than have you wait while a problem gets worse. Never feel like you're bothering them if something just doesn't feel right.

Get in touch with your dentist or oral surgeon if you experience any of the following:

  • Bleeding you can't control, like soaking through a new gauze pad in less than an hour.
  • Pain that becomes severe and isn't managed by your medication.
  • Swelling that is still getting worse after 72 hours.
  • Any signs you might be having an allergic reaction to your medication, like a rash, hives, or trouble breathing.

Trust your gut. You know your body better than anyone, and being proactive is the best way to make sure your recovery is a complete success.

When a Simple Extraction Becomes a Complex Wound

For most people, the site of a tooth extraction heals without much fanfare. But what happens when that predictable healing process goes off the rails? Sometimes, what should be a straightforward recovery stalls out, turning the extraction site into a chronic, non-healing wound. This is especially true for individuals with certain underlying health conditions.

Black and white portrait of a woman experiencing severe tooth or jaw pain.

This isn't just about lingering discomfort. It’s a clear signal that the body’s natural repair systems are struggling. Think of it like a diabetic foot ulcer that resists healing due to poor circulation—an oral wound can face the very same obstacles. In these cases, standard aftercare instructions just aren't going to cut it.

Why Some Wounds Refuse to Heal

When your body can't mount an effective healing response, the reasons are often systemic. Several factors can throw a wrench into the intricate process of tissue regeneration, turning a simple extraction into a complex medical problem.

Underlying health issues are frequently the culprit. They create an environment where the body's repair mechanisms are fundamentally compromised.

  • Diabetes: Uncontrolled blood sugar is a major roadblock. It impairs circulation and weakens the immune system, making it much harder for the body to fight off bacteria and rebuild tissue.
  • Circulatory Issues: Without robust blood flow, the wound site is starved of the oxygen and nutrients it desperately needs to heal properly.
  • Autoimmune Disorders: Conditions that cause the immune system to misfire can disrupt the normal inflammatory and repair phases of healing.
  • Anticoagulant Therapy: While medically necessary for many, blood thinners can complicate the very first step of healing: forming a stable blood clot.

The connection between what happens in your mouth and your overall health is profound. In fact, U.S. studies have revealed that individuals with six or more teeth removed face a 91% higher prevalence of self-reported chronic diseases. The consequences of tooth loss truly extend far beyond the jawline.

Beyond Standard Dental Aftercare

When an extraction site simply won't heal, it demands a completely different approach. This is no longer a routine dental follow-up; it's a specialized wound management problem. Advanced interventions are needed to provide the support your body requires to finally close the wound.

These treatments are designed to tackle the specific biological roadblocks that are preventing recovery. You won't typically find them in a standard dental office, but they are essential for managing complex wounds, whether they're in the mouth or anywhere else on the body.

To a wound specialist, a non-healing tooth socket is viewed through the same lens as any other chronic wound. The core principles are identical: control the bacteria, manage inflammation, and give new, healthy tissue a framework to grow on.

This is exactly where modern regenerative medicine provides powerful solutions.

Introducing Advanced Wound Interventions

One of the most effective tools we have for these challenging situations is an amniotic membrane allograft. The easiest way to think of it is as a biological bandage or a natural scaffold. When placed over the wound, it provides a rich matrix of growth factors that signal your own cells to start the rebuilding process. It protects the site while actively encouraging the regeneration of healthy gum and bone tissue.

Of course, pinpointing the exact cause of the problem is key. We can use advanced diagnostic tools like fluorescence imaging to see, in real-time, precisely where harmful bacteria are concentrated in the wound. This isn't a guess; it's a precise map of the infection. This allows for incredibly targeted cleaning (debridement), removing the bacterial barriers that were stopping the healing in its tracks.

By combining these innovative technologies, wound care specialists can overcome challenges that standard care simply can't address. For anyone facing a difficult recovery, exploring these advanced wound treatment options can be the key to achieving complete and lasting healing.

Common Questions About Tooth Extraction Recovery

Once you're home after an extraction, a lot of questions can pop up. Even when your dentist explains everything, it’s easy to second-guess yourself and wonder if what you're feeling is normal. This is your go-to guide for those moments, with straightforward answers to the most common concerns.

My goal here is to give you the confidence to get through your recovery without unnecessary worry. Knowing what to expect—and what’s a red flag—is the best tool you have for a smooth, uneventful healing process.

How Long Does the Pain Last After a Tooth Extraction?

This is usually the number one question on everyone’s mind. For a simple extraction, the worst of the discomfort is typically within the first 48 to 72 hours. After that initial peak, you should feel a steady improvement each day.

For most people, over-the-counter pain relievers like ibuprofen are all that's needed to take the edge off. But if you had a more complex surgical extraction, like impacted wisdom teeth, you might be looking at soreness that lasts closer to a week.

Here’s the most important thing to watch: the direction the pain is going. If you were feeling better and then, around day three or four, the pain suddenly gets worse, that's a signal to pay attention. Severe, throbbing pain that isn't touched by your medication is a classic sign of a dry socket, and you need to call your dentist.

When Can I Brush My Teeth Normally Again?

Keeping your mouth clean is absolutely critical, but you have to be delicate. You can and should brush your other teeth the very night of your surgery, just be incredibly careful to stay away from the extraction site. And when you’re done, do not spit.

It feels a bit unnatural, but instead of spitting, just lean over the sink, open your mouth, and let everything gently fall out. This simple trick is one of the best ways to protect that fragile blood clot that’s so essential for healing.

After the first 24 hours are up, you can start doing gentle saltwater rinses.

  • The Right Mix: Just dissolve half a teaspoon of salt in a glass of warm water.
  • The Gentle Technique: Swish it around your mouth very gently, especially after you eat. This will help clear out any food particles without disrupting the site.
  • What to Avoid: Stay away from any mouthwash containing alcohol for at least the first week. Alcohol can be really harsh on healing tissues and might actually slow down your recovery.

What Should a Healing Tooth Extraction Site Look Like?

It’s natural to peek at the extraction site and worry about what you’re seeing, but most of the changes are a normal part of the healing playbook. Right after the procedure, the socket will be filled with a dark red blood clot—think of this as the foundation for all the new tissue to come.

Over the next week or so, you'll see your body start to replace that clot with something called granulation tissue. This new tissue often has a whitish or yellowish-gray appearance. I can't tell you how many calls we get from patients worried about this, but it’s actually a fantastic sign of healthy healing. It is not pus or an infection.

From there, the gums will slowly start to creep over the socket, a process that can take a few weeks to complete. The main thing you're watching for is an empty-looking socket, or if you can see something that looks like bare, white bone. If you see that, especially if it’s combined with significant pain, it could be a dry socket. Time to call the dentist.

Is It Normal for My Stitches to Fall Out?

Yes, if your dentist used dissolvable stitches, it's completely normal for them to fall out on their own. They are designed to do just that, usually breaking down within one to two weeks as your gums heal.

Don’t panic if a stitch comes out a few days ahead of schedule. As long as the bleeding has stopped and your pain is under control, it’s rarely an issue. The stitches do their most important job in those first few critical days.

Of course, if you have non-dissolvable stitches, your dentist will have you come back in to have them removed. If you’re ever unsure what kind you have or if something just doesn't feel right, a quick phone call to your dentist’s office can clear things up right away. For a deeper dive into these topics, check out our detailed guide on recovery FAQs.


At Specialty Wound Care, we know that sometimes healing doesn't go according to plan, especially when complicated by other health issues. If your tooth extraction site is failing to heal properly, our team is equipped with the advanced tools and proven protocols to help. Find out how we can support your healing journey at https://specialtywoundcare.com.

Revolutionizing Wound Care: The Latest Innovations in Wound Imaging and Their Clinical Benefits

Specialty Wound Care | December 30th, 2025


Revolutionizing Wound Care: The Latest Innovations in Wound Imaging and Their Clinical Benefits

Forget everything you know about wound assessment technology. Traditional methods often miss critical details that delay healing and complicate treatment. With advanced wound imaging tools like the MolecuLight DX, you gain clearer insights that improve accuracy and patient outcomes. Let’s explore how these wound care innovations bring real clinical benefits to your practice and your patients. Learn more about these advancements here.

Breakthroughs in Wound Imaging

In the world of wound care, technology is reshaping how professionals approach treatment. The latest advancements in imaging tools offer new ways to assess and treat wounds, making a significant impact on patient care.

Advanced Wound Imaging Technologies

When it comes to wound evaluation, seeing deeper than the surface matters. Advanced imaging technologies provide just that. These tools offer precise visuals that unveil hidden details, allowing you to make informed decisions. For example, MolecuLight DX captures images that highlight bacteria presence, which is crucial in tailoring treatment plans.

These innovations are not just about better images. They also mean faster assessments. By using cutting-edge devices, healthcare professionals can reduce the time needed to evaluate wounds. This efficiency leads to quicker interventions, ultimately improving patient recovery times. Hence, integrating such technology into practice could be a game-changer for your patients.

Clinical Benefits of Imaging Innovations

So, what does this mean for your clinical outcomes? With advanced imaging, you gain a clearer understanding of wound conditions. This insight allows you to customize treatment plans effectively. Studies indicate that using imaging tools can increase healing rates by up to 40%. Imagine the difference that makes in patient satisfaction and confidence in your care.

Moreover, these technologies support better documentation. Accurate records are essential for tracking progress and ensuring continuity of care. By utilizing detailed imaging, you enhance communication among healthcare teams, ensuring everyone is on the same page. This collaborative approach not only boosts morale but also streamlines the treatment process.

MolecuLight DX: A Game-Changer

The MolecuLight DX has emerged as a pivotal tool in wound care. Its introduction is transforming how professionals assess and treat wounds, offering tangible benefits in clinical settings.

Enhancing Wound Assessment Accuracy

The accuracy of the MolecuLight DX is unmatched. Utilizing fluorescence imaging, it reveals bacteria that are invisible to the naked eye. This feature is not just a gimmick; it directly impacts treatment outcomes. By precisely identifying infection sites, you can target interventions that reduce complications and promote faster healing.

Another advantage is its simplicity. Easy-to-use interfaces mean you spend less time learning how to operate the device and more time focusing on patient care. You don’t need to be a tech expert to harness its capabilities, making it an accessible tool for all healthcare providers striving to improve wound management.

Improving Treatment Outcomes

When you have a clear picture of what you are dealing with, outcomes improve. By using MolecuLight DX, you can track wound progress with precision. This tool aids in monitoring how wounds respond to treatment, ensuring interventions are effective and timely.

The impact is profound. In clinical studies, incorporating such imaging technology has shown to reduce healing times significantly. Faster recovery not only benefits the patient but also reduces the strain on healthcare resources. Less time in care means more availability for others needing attention, making your practice more efficient and responsive.

Transforming Wound Care Practices

With these advancements, wound care practices are experiencing a transformation. Incorporating imaging technology into your clinical routine can redefine patient interactions and treatment effectiveness.

Integrating Imaging in Clinical Settings

So, how do you bring this technology into your practice? Begin by considering the workflow. Integration should be seamless, ensuring no disruption to your current processes. Training is also essential. Equip your team with the knowledge to use these tools effectively, maximizing their potential.

Moreover, partnerships can enhance your capabilities. Collaborate with experts in imaging solutions to ensure you’re getting the best from your investment. This cooperation fosters a learning environment where your team can continually improve and adapt to new innovations in wound care.

Specialty Wound Care’s Expertise in Action

Specialty Wound Care stands at the forefront of these innovations. By focusing on cutting-edge technologies, they offer unmatched expertise in wound management. Their approach combines the latest tools with professional know-how, ensuring that patients receive optimal care.

The longer you wait to adopt these technologies, the more you risk falling behind. Specialty Wound Care’s commitment to staying ahead means they provide solutions that not only meet current needs but also anticipate future challenges. By partnering with them, you ensure your practice delivers the best possible outcomes for your patients.

For more insights into how imaging technology is revolutionizing wound care, visit this link.

Visit now

Best Advanced Wound Care Methods

Primus Healthcare | December 30th, 2025


Featured Image

The process of wound healing is a complex and dynamic one, involving multiple physiological stages. Traditionally, wound care has relied on basic methods such as cleaning, dressing, and managing infection. However, with the advent of advanced approaches and technologies, medical professionals are now equipped with more sophisticated tools to enhance healing outcomes. This article explores some of the most effective advanced wound care methods available today.

Understanding the Wound Healing Process

Before delving into advanced treatment options, it is crucial to understand the stages of the wound healing process. Wound healing typically proceeds through four overlapping phases:

  • Hemostasis: This initial phase occurs immediately after injury, where the goal is to stop bleeding through vasoconstriction and clot formation.
  • Inflammation: Characterized by redness, heat, and swelling, this phase involves the removal of debris and pathogens by immune cells.
  • Proliferation: During this phase, new tissue forms as cells divide and migrate. Angiogenesis, collagen deposition, and epithelialization occur.
  • Remodeling: The final phase involves the maturation of collagen fibers and the strengthening of the new tissue.

Disruptions in any of these phases can lead to chronic wounds. Therefore, employing advanced methods can be crucial in managing and expediting the wound healing process effectively.

Traditional vs. Advanced Wound Care Approaches

Common treatments for wounds have traditionally included physical cleaning, antiseptic application, and basic dressings. While these methods are effective for minor injuries, more complex wounds may require advanced solutions to optimize healing. Advanced wound care methods target specific phases of the healing process and are especially beneficial for chronic or non-healing wounds.

Advanced Wound Care Methods

1. Hyperbaric Oxygen Therapy (HBOT)

Hyperbaric Oxygen Therapy involves breathing pure oxygen in a pressurized chamber. This approach increases oxygen delivery to the wound site, promoting enhanced cell function and quicker healing. HBOT is particularly effective in treating diabetic foot ulcers, radiation injuries, and other chronic wounds.

2. Negative Pressure Wound Therapy (NPWT)

Negative Pressure Wound Therapy, also known as vacuum-assisted wound closure, uses a sealed dressing and a vacuum pump to reduce air pressure around the wound. This method increases blood flow, decreases edema, and promotes tissue granulation. It is commonly used for large, complex, or surgical wounds.

3. Bioengineered Skin Substitutes

Bioengineered skin substitutes provide a scaffold for new tissue growth and can be made from natural or synthetic materials. These substitutes mimic the skin’s structure and offer a temporary cover that fosters the wound healing environment. They are particularly useful in treating burns and chronic ulcers.

4. Growth Factors and Cytokine Therapy

Growth factors and cytokines play a pivotal role in the wound healing process by regulating cell proliferation and differentiation. Advanced therapies involving the application of recombinant growth factors can significantly enhance healing, particularly in non-healing wounds.

5. Gas Plasma Technology

Gas plasma technology is an emerging field in wound care, utilizing ionized gas to sterilize the wound environment and stimulate healing. This method exhibits strong antimicrobial properties without damaging healthy tissue, making it a promising option for complex wounds.

6. Nanomedicine

Nanomedicine leverages nanoparticles to deliver drugs or other therapeutic agents directly to the wound site. This targeted approach minimizes side effects and enhances the efficacy of treatments, such as antimicrobials or growth factors, thereby accelerating the healing process.

Benefits of Advanced Wound Care

Advanced wound care methods offer numerous benefits over traditional approaches. These include:

  • Improved Healing Times: Advanced methods often accelerate the wound healing process, reducing recovery time and improving patient outcomes.
  • Reduced Complications: By addressing the underlying causes of chronic wounds, advanced treatments can reduce the risk of complications such as infections.
  • Enhanced Patient Comfort: Many advanced wound care methods offer less invasive options with fewer dressing changes, leading to improved comfort and compliance.
  • Cost-Effectiveness: Although some advanced treatments may initially seem expensive, they can ultimately reduce overall healthcare costs by preventing chronic wound complications and the need for extensive long-term care.

Challenges and Considerations

While advanced wound care methods offer significant benefits, they also present certain challenges. The cost and accessibility of high-tech treatments can be prohibitive for some patients. Additionally, healthcare providers must be adequately trained to implement these advanced therapies effectively. It is essential for medical professionals to evaluate each patient’s unique needs and consider the most appropriate treatment options.

Future Directions in Advanced Wound Care

The field of advanced wound care is rapidly evolving, with ongoing research focused on developing new technologies and improving existing methods. Future directions may include:

  • Personalized Medicine: Tailoring wound care treatments based on individual genetic profiles and specific wound characteristics to optimize healing outcomes.
  • Bioprinting: Utilizing 3D printing technology to create customized, patient-specific tissue scaffolds that promote wound healing.
  • Smart Dressings: Development of dressings that monitor wound conditions and deliver therapeutic agents in response to environmental changes.

These innovations hold the potential to revolutionize wound care, offering more efficient and effective healing solutions.

Conclusion

Advanced wound care methods represent a significant leap forward in the management of complex wounds. By leveraging cutting-edge technologies such as gas plasma, nanomedicine, and bioengineered skin substitutes, healthcare providers can enhance the wound healing process and improve patient outcomes. As the field continues to evolve, it is crucial for medical professionals to stay informed about the latest advancements and integrate these strategies into their clinical practice. The ultimate goal is to provide patients with the most effective and comprehensive wound care, thereby improving their quality of life.

Uncategorized

A Guide to Wound Care Billing and Coding

Primus Healthcare | December 30th, 2025


Let’s be honest, successful wound care billing isn't just about codes. It all starts with a bulletproof foundation of clinical documentation. This is where you connect your clinical expertise directly to your practice's financial health.

Think of your patient chart as the ultimate storyteller. It has to paint a vivid, detailed picture for the payer, leaving zero doubt about the medical necessity of the care you provided. Without this detailed narrative, even the most accurately selected codes can get kicked back.

Payers operate on a simple principle: if it wasn't documented, it wasn't done. This is why seeing documentation as just another administrative chore is a critical, and often costly, mistake. Instead, it should be your first and best line of defense against claim rejections and audits.

Build a Bulletproof Foundation with Documentation

To create documentation that can withstand scrutiny, every single note has to contain specific, objective details that justify your treatment choices. Vague descriptions like "wound improving" just won't cut it. Your notes must be a precise log of the wound's status and your interventions.

The Anatomy of a Defensible Wound Care Note

Here are the essential elements your notes must include every time:

  • Precise Measurements: Document the length, width, and depth in centimeters at every visit. This is how you show progression or regression over time.
  • Tissue Type and Percentage: Get specific about the amount of granulation, slough, or eschar. For example, "Wound bed is 70% granulation tissue, 30% yellow slough."
  • Drainage Details: Describe the amount (scant, moderate, copious), color, and any odor from the exudate.
  • Periwound Skin Condition: Note the status of the surrounding skin. Are you seeing maceration, erythema, or induration? Write it down.
  • Signs of Infection: Clearly record any clinical signs of infection, such as increased pain, warmth, or purulent drainage.
  • Patient’s Response to Treatment: Detail how the patient is tolerating the current plan and any adjustments you made based on their response.

Viewing your documentation as a chore is a critical financial error. Instead, see it as your best defense against audits and denials, directly connecting your clinical skill to your practice's financial health.

A Real-World Scenario: Diabetic Foot Ulcer

Imagine a patient with a chronic diabetic foot ulcer. A weak note might just say, "Patient seen for DFU. Debrided wound. Dressing applied." This tells the payer next to nothing and provides no real justification for the service.

Now, here's what a strong, defensible note looks like. It tells the whole story:

"Patient presents for follow-up of a 3.5 cm x 2.8 cm x 0.4 cm plantar ulcer on the right foot. Wound bed contains 60% adherent yellow slough and 40% pale granulation tissue with moderate serosanguinous drainage. Periwound shows 1 cm erythema. Sharp excisional debridement was performed to remove all non-viable tissue down to the subcutaneous layer. Post-debridement measurements are 3.6 cm x 3.0 cm x 0.5 cm with a 100% granular base."

See the difference? This level of detail proves the medical necessity for the debridement (CPT 11042) and justifies the E/M service. If you're looking to elevate your team's skills, exploring structured training can provide invaluable workflows and templates. You can learn more in our guide on wound care training and documentation: https://specialtywoundcare.com/training-documentation/

And remember, ensuring all patient records are handled securely is non-negotiable. For a deep dive into making sure your documentation and transmission methods meet regulatory standards, this guide on HIPAA compliant faxing in healthcare is an invaluable resource.

The financial impact of getting this wrong is huge. In 2025, coding and documentation errors are a major source of lost revenue, with CMS reporting that these mistakes lead to 7–10% of all claim rejections annually. That statistic alone highlights the high stakes in a field where services range from simple dressing changes to complex debridements and advanced allografts.

Select the Right CPT and HCPCS Codes

Once your documentation is ironclad, the next step is to translate that clinical story into the right CPT and HCPCS codes. This is a common stumbling block for many practices. Even a minor coding mistake can lead to denied claims, lost revenue, and unwanted attention from auditors.

Think of it this way: CPT and HCPCS codes are the language payers understand. Choosing the correct one isn't just a suggestion; it's essential for getting paid accurately for the work you do. This means digging into the subtle but critical differences between similar code sets to find the one that perfectly matches the service you documented.

Distinguishing Between Debridement Codes

Debridement coding is probably one of the trickiest areas in wound care. Payers scrutinize these codes, so you absolutely have to know the difference between the two main categories. It all comes down to the method used and how deep you go.

To help clear things up, here’s a quick comparison of the debridement code families.

Debridement Code Selection Guide: Selective vs. Non-Selective

Code Type CPT Codes Method Used Basis for Coding Key Documentation Requirement
Selective 97597 / 97598 Sharp instruments, high-pressure water jets to remove specific, non-viable tissue. No anesthesia required. Surface area of the wound(s) in square centimeters. Detailed description of the non-viable tissue removed (e.g., slough, fibrin).
Excisional / Non-Selective 11042 – 11047 Surgical excision with instruments like scalpels or curettes to remove tissue down to a viable base. Deepest layer of tissue removed (e.g., subcutaneous, muscle, bone) and surface area. Clear identification of the deepest tissue layer cut away and removed.

The most important thing to remember is that you can’t bill for both types of debridement on the same wound during the same visit. Your notes have to paint a clear picture that justifies the code you picked.

Key Takeaway: Always code debridement based on the deepest layer of tissue removed, not the deepest layer visible in the wound bed. If a wound extends to the bone but you only debride subcutaneous tissue, you must use the code for subcutaneous tissue (11042).

Coding for Negative Pressure Wound Therapy

Negative Pressure Wound Therapy (NPWT) is a go-to treatment in wound care, and its coding is very specific. The main CPT codes you'll use are 97605-97608. Picking the right one boils down to two things: the wound size and whether the device is considered durable medical equipment (DME).

  • CPT 97605: Use this for a total wound surface area of 50 square centimeters or less.
  • CPT 97606: This is for a total wound surface area greater than 50 square centimeters.
  • CPT 97607 & 97608: These codes are for home care settings where the therapy device is disposable and not classified as DME.

Accurate wound measurements are non-negotiable here—they are your proof for the code you've chosen. Also, keep in mind that applying a multi-layer compression system, which often goes hand-in-hand with NPWT, is a separate service. You might be able to bill for it with its own code if it’s medically necessary.

This simple decision tree drives home the financial impact of getting your documentation right.

Flowchart outlining the wound documentation decision path, leading to 'Paid' if documented, or 'Denied' if not.

As you can see, a documented service gets paid. A service without documentation gets denied. It’s a straightforward but powerful reality in our field.

Billing for Skin Substitutes and E/M Services

Advanced treatments, like applying skin substitutes or cellular and/or tissue-based products (CTPs), introduce another layer of coding complexity. These are usually billed with HCPCS codes that change depending on the exact product used (think high-cost vs. low-cost grafts). You have to document the product name, the size, how much was applied, and how much was wasted.

On top of that, many wound care visits also include an Evaluation and Management (E/M) service. You can bill an E/M code on the same day as a procedure like debridement, but only if the E/M is a significant, separately identifiable service. This means you need to append modifier -25 and have documentation that clearly separates the thinking and decision-making (the E/M) from the hands-on procedure. For example, if a patient is scheduled for debridement but also presents with a new, unrelated issue that you have to assess and manage, that E/M work is likely billable.

For clinicians looking to integrate more of these therapies, exploring the advanced treatment options by Primus Specialty Wound Care can offer valuable insight. Getting these codes right ensures your practice is compensated fairly for the complexity and value of the care you provide.

Tell the Full Story with ICD-10-CM Diagnosis Codes

Let's get one thing straight: an accurate diagnosis code does way more than just identify a wound. It tells the payer the entire patient story, justifying every single service you provide and proving why your care is medically necessary.

Think of it this way. Your CPT codes explain what you did, but the ICD-10-CM codes explain why you did it. Mastering the ICD-10-CM code set for wound care isn't just about checking a box for compliance—it's about painting a crystal-clear clinical picture that gets you paid.

Using a generic ulcer code is like telling a mechanic "there's a problem with the car." It’s useless. But a highly specific code is like saying, "there's a slow leak in the front-left tire from a nail puncture." Now the mechanic knows exactly what’s needed. Vague coding forces payers to guess, and that guesswork almost always leads to denials.

For chronic, non-healing ulcers, coding to the highest level of specificity is absolutely non-negotiable. You have to capture every last detail about that wound and the patient's overall health.

Hand with pen examining medical coding document showing ICD-10 codes and a wound illustration.

Go Beyond the Basic Wound Diagnosis

To really build that clinical narrative, your diagnosis coding has to be multi-layered. Just coding for "pressure ulcer" won't cut it. Payers need to know the location, the severity, and all the underlying factors that are making the wound so stubborn.

Here are the critical details that need to be reflected in your ICD-10-CM code selection every time:

  • Anatomical Location and Laterality: Is the ulcer on the right heel or the left ankle? Specificity is everything. Use the codes that pinpoint the exact site.
  • Pressure Ulcer Staging: For pressure injuries, you must include the stage. A Stage 4 ulcer demands a completely different level of care than a Stage 1, and your coding has to show that.
  • Underlying Conditions: You have to link the wound to its root cause. If a patient has a diabetic foot ulcer, you must use a code that connects the diabetes to the foot complication, like E11.621 (Type 2 diabetes mellitus with foot ulcer).
  • Associated Comorbidities: Does the patient also have peripheral arterial disease (PAD) or venous insufficiency? These conditions directly sabotage healing and justify more intensive treatments. You need to code them as secondary diagnoses.

Precise ICD-10 coding is your most powerful tool for demonstrating medical necessity. It connects the wound to the patient's systemic health, building an undeniable case for the care you provide and improving quality metrics in a value-based care world.

A Home Health Case Study

Let's walk through a common scenario to see how this all comes together. A home health nurse is treating an 82-year-old bed-bound patient with a pressure ulcer.

A lazy or inexperienced coder might just use L89.159 (Pressure ulcer of sacral region, unspecified stage). This code is a red flag. It’s incomplete and practically begs for a denial or a request for more information because it lacks any real detail.

A robust, defensible coding approach tells the complete story:

  • Primary Diagnosis: L89.154 (Pressure ulcer of sacral region, Stage 4). Right away, this establishes the severity and location of the main problem.
  • Secondary Diagnosis: I70.211 (Atherosclerosis of native arteries of extremities with intermittent claudication, right leg). This explains that poor circulation (PAD) is a major complicating factor, justifying more advanced interventions.
  • Additional Diagnoses: I10 (Essential hypertension) and E78.5 (Hyperlipidemia). These comorbidities create a much fuller picture of the patient's overall health, which absolutely influences the plan of care.

This combination of codes provides a comprehensive clinical snapshot. It tells the payer this isn't just some simple wound; it's a severe, Stage 4 pressure injury on a patient with compromised circulation and other chronic illnesses. This is the level of detail payers need to see to approve claims for services like frequent debridement or advanced wound dressings without a fight. Getting this right is crucial for your financial viability.

Unlock Reimbursement with the Right Modifiers

Think of modifiers as the essential fine print on your wound care claims. While CPT and ICD-10 codes tell payers what you did and why you did it, modifiers add that crucial bit of context. Get them right, and you have a paid claim. Get them wrong, and you're looking at an immediate denial.

These simple two-digit codes are your way of clarifying special circumstances, preventing incorrect bundling, and ultimately, defending your reimbursement. Honestly, ignoring modifiers in wound care is like sending a text without any punctuation—the core message might be there, but the real meaning gets lost. For a payer, that missing context often signals an unbillable service, leading to rejections that just drain your time and resources.

Modifier 25 for Same-Day Services

Let’s start with a common one that trips people up: Modifier 25. You'll need to append this to an Evaluation and Management (E/M) code when you perform a significant, separately identifiable E/M service on the same day as another procedure.

Here’s a real-world scenario. A patient comes in for a scheduled debridement of a venous leg ulcer. During that visit, they mention a new, painful lesion that’s popped up on their other foot. To address it, you have to perform a separate exam, dig into their history, and go through the medical decision-making process for this brand-new problem.

  • The Procedure: The scheduled debridement (e.g., CPT 97597).
  • The E/M Service: The assessment of the new lesion, which is completely distinct from the routine pre-service work for the debridement.

In this case, you’d bill the appropriate E/M code (like 99213) with Modifier 25 attached. This signals to the payer that your E/M work went above and beyond the standard care baked into the debridement procedure. Without it, they'll almost certainly bundle the E/M service into the procedure payment, leaving you uncompensated for that extra work.

Using Modifier 59 to Unbundle Procedures

Another workhorse in wound care is Modifier 59, which identifies a "Distinct Procedural Service." This is your go-to when you need to tell a payer that two procedures done on the same day aren't related and should each be paid separately. It’s often considered the modifier of last resort when a more specific one doesn't fit the bill.

A classic example is treating multiple, distinct wounds. Imagine you perform an excisional debridement (CPT 11042) on a sacral pressure ulcer and a selective debridement (CPT 97597) on a diabetic foot ulcer—all during the same visit.

Since CPT codes 11042 and 97597 aren't typically billed together for the same wound, you absolutely must use Modifier 59 on CPT 97597. This clearly indicates it was performed on a different anatomical site, stopping the payer's automated system from flagging it as a duplicate service.

The Critical Role of the KX Modifier

When you’re dealing with services that have frequency limits, the KX modifier is your key to proving medical necessity. Payers like Medicare often cap how many debridements a patient can receive in a certain timeframe. The KX modifier is your official attestation that the documentation in the patient’s chart fully supports the need to exceed those limits.

Think of a patient with a rapidly deteriorating wound that requires debridement more often than the local coverage determination (LCD) usually allows. By adding the KX modifier to the debridement code, you are certifying two things:

  1. The service meets the specific coverage criteria outlined in the payer's policy.
  2. You have comprehensive documentation on file ready to prove it if they ask.

Be warned: using this modifier without rock-solid documentation is a huge compliance risk. Your notes must paint an unmistakable picture of why the additional service was not just helpful, but absolutely essential to the patient's care plan.

To help you keep these straight, here's a quick-reference guide to some of the most essential modifiers you'll encounter in wound care. It's a handy cheat sheet to ensure you're applying them correctly and telling the full story on your claims.

Essential Wound Care Modifiers and Their Applications

Modifier Description When to Use in Wound Care (Example)
25 Significant, Separately Identifiable E/M Service by the Same Physician on the Same Day of the Procedure or Other Service A patient is scheduled for a debridement. During the visit, they present a new, unrelated complaint (e.g., a suspicious skin lesion) that requires a separate workup. You would append Modifier 25 to the E/M code.
59 Distinct Procedural Service You perform a debridement on a right foot ulcer (CPT 97597) and apply a skin substitute to a left leg ulcer (CPT 15275) in the same session. You would use Modifier 59 on the second procedure code to show it was a separate site.
KX Requirements Specified in the Medical Policy Have Been Met A patient with a severe, rapidly necrotizing wound requires debridements more frequently than the payer's policy typically allows. Appending the KX modifier attests that documentation supports the medical necessity for the increased frequency.
76 Repeat Procedure or Service by Same Physician or Other Qualified Health Care Professional The same physician has to repeat an unplanned debridement on the same wound later in the same day due to sudden, severe necrosis. Modifier 76 indicates it is not a duplicate charge.
LT/RT Left Side / Right Side Used to specify which side of the body a procedure was performed on, which is critical for clarity when treating bilateral wounds. For example, billing for debridement of a wound on the right heel (using RT).

Mastering these modifiers isn't just about administrative box-ticking; it's a fundamental skill for running a financially healthy wound care practice. Correctly applying them ensures you are properly compensated for the vital, and often complex, work you do.

Navigate Payer Policies and Overcome Denials

You can nail the CPT, HCPCS, and ICD-10 codes every single time, but that’s only half the battle. Let’s be real—perfect coding doesn’t guarantee payment if your claims don’t line up with the tangled web of rules set by each payer.

This is where you have to get proactive.

Think of every payer, from a Medicare Administrative Contractor (MAC) to a commercial insurer, as having its own unique rulebook. These are often called Local Coverage Determinations (LCDs) for Medicare or just clinical policies for private payers. They spell out exactly what they consider medically necessary, how often a service can be done, and what proof they need. Ignoring them is just asking for a denial.

A hand holds a 'DENIED' document next to a desk phone and laptop, surrounded by colorful watercolor splashes.

Unpacking Common Denial Reasons

Those denial letters can feel cryptic, but after a while, you start to see the patterns. Most rejections in wound care boil down to a handful of common culprits. Getting familiar with them is the first step toward stopping them before they start.

  • Lack of Medical Necessity: This is the big one. The payer simply wasn't convinced the service was reasonable and necessary based on the documentation you sent.
  • Missing Prior Authorization: Many advanced treatments, like skin substitutes or hyperbaric oxygen therapy, require a green light before you proceed. Skipping this step leads to an automatic denial that’s almost impossible to reverse.
  • Exceeding Frequency Limits: Payers often put a cap on how many times a service, like debridement, can be performed in a certain timeframe. Bill for more without a solid justification (like the KX modifier), and you’ll trigger a rejection.
  • Incorrect Bundling: This happens when you bill for something the payer considers part of a larger, primary procedure. A classic example is trying to bill separately for applying an Unna boot on the same day as a debridement.

A denied claim isn't just a one-time financial loss; it's a data point. Use it to identify weaknesses in your documentation or billing workflow so you can fix the root cause and prevent similar denials in the future.

This landscape is constantly shifting. The introduction of over 420 CPT code updates in 2025, including 270 new codes, is reshaping wound care billing. These changes, effective alongside 252 new ICD-10-CM codes, demand rigorous training to capture wound specifics—essential for codes like E11.621 for diabetic foot ulcers. You can learn more about these upcoming coding and compliance changes to stay ahead.

Crafting a Compelling Appeal Letter

When a denial inevitably lands on your desk, a well-written appeal is your best shot at getting paid. A weak appeal that just says "we disagree" is a waste of time. A strong one builds a logical, evidence-based case that makes it easy for the reviewer to say yes.

Let's say a claim for excisional debridement (CPT 11043) was denied for "lack of medical necessity." Here’s how to build an appeal that works:

  1. Get Straight to the Point: Start with a clear introduction. State the patient's name, the claim number, and the specific service being appealed. No fluff.
  2. Paint the Clinical Picture: Briefly summarize the patient's condition and the wound's history. Explain why other conservative treatments didn't work. This sets the stage and provides crucial context.
  3. Use Their Own Rules Against Them: This is a powerful move. Directly quote the section of the payer's own medical policy or LCD that supports the service you provided. For example, "Per your LCD L33614, excisional debridement is considered medically necessary for wounds with non-viable tissue."
  4. Connect the Dots: This is where you win or lose the appeal. Systematically pull direct quotes from your clinical notes that match the policy requirements you just cited. For instance, "The progress note from [Date] documents '75% adherent yellow slough with necrotic edges,' which meets the criteria for non-viable tissue requiring removal."
  5. Show, Don't Just Tell: Don't just send the letter. Attach copies of the relevant progress notes with the key phrases highlighted. Include clear wound photos showing the non-viable tissue and any other supporting lab results.
  6. Close Professionally: End with a polite request for them to re-evaluate the claim for payment based on the evidence you’ve laid out.

To really get ahead of denials, many practices are finding that automated claims processing can be a huge help. It’s a proactive approach that gives your practice the tools to prevent denials from happening in the first place, not just react to them after the fact.

Common Questions on Wound Care Billing

Even when you feel you’ve mastered the fundamentals, certain situations in wound care billing can make the most seasoned pros second-guess themselves. Let's walk through some of the tricky questions we see pop up in daily practice and give you direct answers you can use on your very next claim.

These are the exact scenarios where practices often lose revenue or accidentally take compliance risks. Getting them right is non-negotiable for a healthy revenue cycle.

Can We Bill for an E/M Service During a Post-Operative Period?

This one comes up all the time. The short answer is yes, but you have to be very careful and use Modifier 24. This modifier flags an "Unrelated Evaluation and Management Service by the Same Physician or Other Qualified Health Care Professional During a Postoperative Period."

Think of it this way: a patient is in their 90-day global period after surgery on their right leg. They come in for a scheduled follow-up but also point out a new problem—an infected cyst on their back. The E/M service you perform for that cyst is completely separate and billable with Modifier 24. Why? Because it has absolutely nothing to do with the original surgery.

Key Takeaway: You can't use Modifier 24 for anything related to the surgery itself. That includes managing complications like a surgical site infection. All of that work is already bundled into the global surgery payment.

How Do We Code Debridement for Multiple Wounds?

Coding multiple wounds hinges entirely on the depth of debridement. The rules here are straightforward, but you have to follow them to the letter to avoid bundling errors and denials.

  • Same Depth: If you debride multiple wounds to the same tissue depth (say, all are subcutaneous), you need to add up the surface area of all the wounds. Then, you report that total using a single CPT code series (like 11042 for the first 20 sq cm and +11045 for each additional area).

  • Different Depths: This is where it gets more granular. If the wounds are debrided to different depths—one down to muscle and another to bone—you must code each one separately. Each wound gets its own primary CPT code based on its specific depth and size.

Mixing these two scenarios is one of the most common mistakes we see, and it almost always results in a denial.

Is It Possible to Bill for a Dressing Change?

In most cases, no. A routine dressing change is considered part of the E/M visit or post-op care. Payers just assume the work and supplies for a standard change are baked into the payment for the main service.

There is an exception, though. If the dressing change is unusually complex and involves procedural work—like meticulously removing embedded, non-viable tissue—it might qualify as a form of debridement. In that case, you could potentially use a code like 97597. Just be warned: your documentation has to be impeccable, clearly describing the skilled work you performed that went far beyond a simple swap of gauze.

For more detailed answers to specific scenarios, you can always check out our comprehensive wound care billing FAQs.

Can an Unna Boot Application Be Billed with Debridement?

Here’s another classic bundling trap. If you perform a debridement and then apply an Unna boot (CPT 29580) to the same wound in the same visit, payers will almost certainly only pay for the debridement. The Unna boot is seen as an integral part of that wound care service.

The only way you can bill for both is if the Unna boot is applied to a completely separate and unrelated wound, or if it's the only procedure you perform during that visit.

Innovative Engagement Strategies

Specialty Wound Care | December 29th, 2025


Advanced Wound Care Technology: How It Improves Patient Outcomes

Most wound care efforts miss a crucial step: connecting with patients in a way that truly motivates them. Without strong patient engagement, even the best wound care technology falls short. This post breaks down how collaborative strategies paired with smart marketing can turn wound care advancements into real improvements in healing rates. For more insights, visit this article.

Cutting-Edge Wound Care Technology

Ready to dive into how new technology is reshaping wound care? Let’s explore the latest breakthroughs making waves in treatment.

Latest Advancements in Treatment

New developments in wound care technology are transforming how wounds are treated today. From MolecuLight DX devices to triple-layer allografts, these tools offer precise assessments and tailored interventions. MolecuLight DX, for instance, helps identify bacterial loads, ensuring targeted cleaning and treatment. This level of precision means faster healing and fewer complications.

Triple-layer allografts are another game-changer. Designed for optimal support, they provide a scaffold for new tissue growth, reducing recovery time. With these tools, healthcare providers can offer more effective care tailored to each patient’s needs. Such precision translates to fewer infections and quicker recoveries, helping you get back to your life sooner.

These advancements are not just about technology but also about enhancing care quality. By integrating these tools into practice, healthcare professionals can offer more personalized and efficient treatment options, leading to improved patient outcomes.

Impact on Improving Wound Outcomes

How does this technology impact healing? Simply put, it boosts success rates. With advanced tools, wounds that are tough to treat now have better solutions. In fact, studies show that using such technology can reduce healing times significantly.

For example, when the right technology is used, infections drop by as much as 50%. This is not just a number; it’s a testament to the power of integrating cutting-edge tools in medical care. The improved healing process also means fewer hospital visits and less time off your feet, which is a relief for many.

The longer you wait to adopt these innovations, the more challenging it becomes to manage complex cases. These advancements are setting new standards, pushing towards an era where faster, more effective healing is the norm. Check out this article for more information on recent research in wound care.

Enhancing Patient Engagement

Technology is just one part of the puzzle. Engaging patients and collaborating effectively is equally important. Let’s look at how working together can improve outcomes.

Collaborative Strategies with Patients

The key to successful wound care lies in your engagement. By actively involving you in the treatment process, healthcare providers can tailor strategies that work best for your specific situation. This collaboration means you’re more likely to follow through with treatment plans.

Here’s the key insight: when you and your healthcare provider work together, healing often happens faster. This partnership could involve regular check-ins or using apps that track progress. It’s about making sure you’re informed and motivated every step of the way.

Most people think wound care is just about medical treatment, but it’s also about understanding and support. By teaming up with providers, you’re not just a patient; you’re a partner in your healing journey.

Role of Innovative Marketing in Healthcare

Marketing in healthcare? Absolutely. Innovative marketing strategies play a crucial role in patient education and engagement. By using clear communication and relatable content, healthcare providers can better inform you about your options.

Campaigns that focus on real stories and outcomes help demystify the process. When you see how others have benefited, it builds trust and motivation. This approach encourages you to engage more deeply with your care.

The healthcare landscape is changing, and so is the way information is shared. You deserve to know all your options, and effective marketing ensures that you’re informed and ready to take charge of your healing journey. For more on how marketing impacts healthcare, read this article.

Benefits of Advanced Wound Care Solutions

Now, let’s explore the direct benefits these advanced solutions bring to the table. It’s more than just healing; it’s about comprehensive care.

Effective Techniques for Hard-to-Heal Wounds

Dealing with stubborn wounds can be frustrating, but advanced techniques offer hope. By employing methods like specialized testing and tailored dressings, healing is expedited. Pathogen identification is quicker, allowing for precise interventions.

Consider this: traditional methods might take weeks to identify issues, but with these advanced solutions, you can see results in days. This speed is crucial for preventing complications and ensuring a smooth recovery.

These methods offer a lifeline for those struggling with chronic wounds. With the right approach, healing is not just possible; it’s probable. This distinction is crucial in moving from managing wounds to effectively treating them.

Partnering with Specialty Wound Care Providers

Wondering how to get started with these advanced solutions? Partnering with specialty wound care providers is key. These experts bring a wealth of knowledge and state-of-the-art technology to the table, ensuring you receive top-notch care.

By collaborating with these providers, you gain access to the latest treatments and strategies, customized to fit your needs. This partnership means you’re not alone on your healing journey. Instead, you have a team dedicated to helping you achieve the best possible outcomes.

At the end of the day, it’s about finding the right support. By aligning with specialty providers, you ensure your care is comprehensive and cutting-edge, paving the way for a healthier future. Explore more about future innovations here.

In conclusion, the combination of advanced technology and patient engagement is transforming wound care. By staying informed and partnering with the right providers, you can achieve remarkable healing results.

Visit now

Empowering Wound Care: Harnessing Technology for Enhanced Healing Outcomes

Specialty Wound Care | December 29th, 2025


Empowering Wound Care: Harnessing Technology for Enhanced Healing Outcomes

Wound care technology has changed how you approach stubborn wounds, yet many providers still rely on outdated methods. Specialty Wound Care offers tools like the MolecuLight DX and triple-layer allografts that give you clearer insights and better healing results. In this post, you’ll learn how these wound management solutions can improve your patient outcomes and modernize your practice. For more insights on technology in wound care, visit this article.

Technological Advancements in Wound Care

With the rapid pace of medical advancements, wound care is entering a new era of precision and effectiveness. Let’s explore some groundbreaking tools reshaping the field.

MolecuLight DX for Precise Analysis

Imagine seeing what’s lurking beneath the surface of a wound. MolecuLight DX offers that vision. This technology gives you a clear view of bacterial presence, which ordinary eyes miss. By using fluorescence imaging, you can detect and quantify bacteria easily. This tool not only helps in identifying problem areas but also in tracking healing progress over time. Many practitioners find that this technology enhances decision-making, guiding more effective treatments. With MolecuLight DX, you reduce guesswork and increase precision. This means better care and quicker healing for your patients, which is a win for everyone.

Triple-Layer Allograft Benefits

When wounds are stubborn, you need a robust solution. Triple-layer allografts provide a unique scaffold that supports healing. These allografts mimic natural skin layers, offering excellent protection and promoting tissue regeneration. Complying with FDA standards, they are safe and effective. Using these allografts can shorten recovery times, providing patients with the relief they need sooner. As a healthcare provider, you gain a reliable tool that integrates seamlessly into your treatment plans. This allows you to offer cutting-edge care that keeps you ahead in the field of wound management.

Advanced Pathogen Testing Methods

Identifying the right pathogen is crucial for effective treatment. Traditional methods can be slow. But with advanced testing, you identify pathogens much faster. This allows for timely interventions, curbing the spread of infections. Quick identification means starting the right treatment sooner, which can be life-saving in some cases. Not only does this improve patient outcomes, but it also enhances your practice’s efficiency. By leveraging these testing methods, you ensure that your patients receive the best care possible, positioning your practice as a leader in advanced wound management.

Enhancing Patient Outcomes with Technology

By embracing technology, you improve patient outcomes significantly. Let’s dive into how these advancements directly benefit your practice and patients.

Improved Healing through Innovation

Innovative solutions provide measurable improvements in recovery rates. For example, using MolecuLight DX has resulted in faster healing in 60% of cases, according to recent studies. These tools allow you to tailor treatments to individual needs, increasing effectiveness. Patients benefit from reduced recovery times, and you gain satisfaction in providing superior care. By staying updated with technological advancements, you keep your practice at the forefront of medical care. This not only enhances patient trust but also solidifies your reputation as an innovator in wound care.

Tailored Wound Management Solutions

Every wound is unique, and so should be its treatment. Tailoring solutions to the specific needs of each patient leads to better outcomes. Using advanced tools like the triple-layer allograft provides the flexibility you need. These tools enable you to address various wound types effectively. By customizing care, you enhance patient satisfaction and outcomes. This approach not only improves healing but also strengthens patient-provider relationships. It’s about providing care that meets individual needs, which makes all the difference.

Access to Cutting-Edge Training Resources

Keeping up with new technology is vital. Specialty Wound Care provides access to training resources that ensure you stay ahead. These resources help you integrate new tools smoothly into your practice. With proper training, you utilize technology to its full potential, benefiting both you and your patients. By being knowledgeable, you increase your practice’s credibility and patient trust. Embracing these resources enhances your skills and keeps you at the cutting edge of wound care technology.

Visit now

Our Largest Organ – The Skin

Primus Healthcare | December 29th, 2025


Featured Image

The human body is a marvel of biological engineering, and among its many wonders, the skin stands out as the largest organ. Known scientifically as the integumentary system, the skin serves multiple pivotal roles, encompassing protection, thermoregulation, and sensation. This article delves into the intricate structure and essential functions of the skin, exploring its three main layers: the epidermis, dermis, and hypodermis or subcutis.

Understanding the Layers of the Skin

The skin is a complex organ composed of three primary layers, each with distinct functions and characteristics.

The Epidermis: The Outer Shield

The epidermis is the outermost layer of the skin, acting as the first line of defense against environmental threats. It is a thin, waterproof layer that protects the body from pathogens, chemicals, and physical damage. The epidermis is primarily made up of keratinocytes, cells that produce keratin, a protein that strengthens the skin.

Within the epidermis, there are several sub-layers, including the stratum corneum, which is the outermost and consists of dead skin cells that are continuously shed and replaced. This process is essential for maintaining the skin’s integrity and function as a barrier. The epidermis also contains melanocytes, which produce melanin, the pigment responsible for skin color and protection against ultraviolet radiation.

The Dermis: The Supportive Middle Layer

Beneath the epidermis lies the dermis, a thicker layer that provides structural support and elasticity. The dermis is composed of connective tissue and contains a rich supply of blood vessels, nerves, hair follicles, and sweat glands. This layer is responsible for the skin’s strength and flexibility, as well as its ability to regulate temperature and sense the external environment.

The dermis plays a crucial role in thermoregulation, with its network of blood vessels adjusting blood flow to either retain or dissipate heat. Additionally, the sweat glands located in the dermis produce sweat that evaporates to cool the body, an essential process for maintaining a stable internal temperature.

The Hypodermis: The Insulating Layer

The deepest layer of the skin is the hypodermis, also known as the subcutis. This layer is composed mainly of fat and connective tissue, providing insulation and cushioning for the body. The hypodermis helps to anchor the skin to underlying structures such as muscles and bones, while also serving as an energy reserve.

The fatty tissue in the hypodermis acts as a thermal insulator, minimizing heat loss and protecting the body from extreme temperatures. This layer also absorbs shock, protecting the internal organs from injury.

The Skin’s Multifaceted Functions

The skin is not merely a passive covering; it is an active organ with a wide array of functions essential for survival and well-being.

Protection and Barrier Function

One of the skin’s primary roles is to act as a protective barrier against environmental hazards. The epidermis shields the internal organs from mechanical injuries, pathogens, and harmful chemicals. Its acidic pH and natural oils inhibit bacterial growth, contributing to the body’s immune defense.

The skin also prevents excessive water loss, a critical function for maintaining the body’s fluid balance. This barrier function is vital in preventing dehydration and ensuring that the body’s internal environment remains stable.

Thermoregulation

Thermoregulation is another critical function of the skin, enabling the body to maintain a consistent core temperature. The dermis’s blood vessels expand or contract in response to temperature changes, facilitating heat exchange with the environment. Sweat production and evaporation further enhance the body’s ability to cool down during high temperatures or physical exertion.

Conversely, when exposed to cold, the blood vessels constrict to conserve heat, and the fat layer in the hypodermis provides additional insulation. This dynamic response ensures that the body’s vital organs function optimally, regardless of external conditions.

Sensation and Communication

The skin is equipped with an array of sensory receptors that detect changes in the environment, such as temperature, pressure, and pain. These receptors are crucial for sensation, enabling the body to respond to external stimuli and avoid harm. The sensory feedback provided by the skin is integral to the body’s interaction with its surroundings.

Additionally, the skin plays a role in communication, with facial expressions and skin color changes (such as blushing) conveying emotions and social signals.

Production of Vitamin D

Exposure to sunlight triggers the synthesis of vitamin D in the skin, a vital process for maintaining bone health and supporting the immune system. Vitamin D facilitates the absorption of calcium and phosphorus, essential minerals for bone formation and maintenance.

This function highlights the skin’s role in broader physiological processes, underscoring its importance beyond its immediate protective and sensory functions.

Skin Health and Maintenance

Maintaining healthy skin is crucial for ensuring its functions are carried out effectively. Proper skincare involves protecting the skin from excessive sun exposure, maintaining hydration, and adopting a balanced diet rich in vitamins and minerals that support skin health.

Regular cleansing, moisturizing, and the use of sunscreen can prevent damage from ultraviolet rays and environmental pollutants. A healthy lifestyle, including adequate sleep and stress management, also contributes to the skin’s overall health and appearance.

Conclusion

The skin is a remarkable organ that serves as the body’s first line of defense, a regulator of body temperature, and a medium for sensation and communication. Understanding the structure and functions of the integumentary system underscores the importance of skin health in overall well-being.

From the protective epidermis to the supportive dermis and insulating hypodermis, each layer of the skin plays a distinct and vital role. As the body’s largest organ, the skin’s multifaceted functions are indispensable, highlighting the need for ongoing care and attention to maintain its health and functionality.

Facebook
Instagram
LinkedIn
SOCIALICON
Youtube
X (Twitter)
Bluesky